Veeam Support Knowledge Base https://www.veeam.com/services/open/kb/rss-feed 2024-03-18T14:21:29Z Veeam Software <![CDATA[Release Information for Veeam Backup for AWS 7 Patch 1]]> https://www.veeam.com/kb4559 2024-03-18T00:00:00Z 2024-03-18T00:00:00Z

Release Information for Veeam Backup for AWS 7 Patch 1

KB ID: 4559
Product: Veeam Backup for AWS | 7.0
Published: 2024-03-18
Last Modified: 2024-03-18

Requirements

Please confirm that you are running version Veeam Backup for AWS 7 (build 7.0.0.615) or later before upgrading. You can find the currently installed build number (Server Version) in the About section under Configuration | Support Information | Updates. After installing Veeam Backup for AWS 7 patch 1, your build number will be 7.1.0.8.

What's New

Security 

  • Overall stability and product security have been improved.

Scalability

  • The UI usability and performance have been improved for large-scale deployments.
  • Improved the export log functionality to support large-scale deployments.
  • Added a custom configuration option to change the location for the temporary log bundle when exporting logs.
    To change the path, please contact Veeam Support for assistance.

REST API

  • EC2 volumes can now be excluded using tags.

Resolved Issues

General

  • The support logs are not removed automatically when the export operation fails with "No space left on device."

Backup

  • EC2 archiving will fail for all resources in a policy if at least one of the protected resources is not found in the infrastructure

REST API

  • The following RestAPI call does not return any results when EC2 instances are included in the policy by tags:
    GET /api/v1/virtualMachines/policies?VirtualMachineId=<VirtualMachineId>
    

Deployment Information

To install updates, follow the steps described in the Veeam Backup for AWS User Guide.

After installing the patch, your build version will be 7.1.0.8.

To submit feedback regarding this article, please click this link: Send Article Feedback
To report a typo on this page, highlight the typo with your mouse and press CTRL + Enter.
]]>
<![CDATA[Release Information for Veeam Backup for Microsoft Azure 6 Patch 1]]> https://www.veeam.com/kb4556 2024-03-18T00:00:00Z 2024-03-18T00:00:00Z

Release Information for Veeam Backup for Microsoft Azure 6 Patch 1

KB ID: 4556
Product: Veeam Backup for Microsoft Azure | 6.0
Published: 2024-03-18
Last Modified: 2024-03-18

Requirements

Please confirm that you are running version Veeam Backup for Microsoft Azure 6 (build 6.0.0.234) or later before upgrading. You can find the currently installed build number (Server version) in the About section under Configuration | Support Information | Updates. After installing Veeam Backup for Microsoft Azure v6 patch 1, your build number will be 6.0.1.267.

What's New

Security 

  • Overall stability and product security have been improved. 
  • In private deployment, disk access resources assigned to VM disks can now be used for backup operations of these disks if the 'Veeam backup appliance ID' tag is assigned to the disk accesses.

Resolved Issues

General

  • When creating an SMTP account using the Web UI, the username requires the domain name to be specified in the following format:
    username@domain
    
  • Email notification settings do not support configuring multiple email recipients.

Private Network Deployment

  • Under certain conditions, disk access resources cannot be reused.
  • Network settings of the backed-up disk are not applied to the created snapshots.

Backup

  • Policies continue to back up resources protected by a specific tag even when that tag is unassigned or changed for these resources.
  • Azure SQL Managed Instance backup fails if the Business Critical service tier is used.
  • Under certain conditions, the backup of large disks may fail due to an overflow error.
  • Manual snapshot is unavailable for Azure VMs and Azure Files located in tenants other than where the appliance is deployed.

Restore

  • An account assigned the 'Restore operator' role cannot perform Azure VM-level, disk-level, or file-level restore.
  • Cross-tenant restore of Azure Files is unavailable.

Workers

  • Worker deployment fails if outbound traffic over port 80 is blocked, even when security updates are disabled for workers.
  • Under certain conditions, when performing incremental backup to an immutable repository, the process may stall with no progress shown.

Deployment Information

To install updates, follow the steps described in the Veeam Backup for Microsoft Azure User Guide

After installing the patch, the build number will be 6.0.1.267.

To submit feedback regarding this article, please click this link: Send Article Feedback
To report a typo on this page, highlight the typo with your mouse and press CTRL + Enter.
]]>
<![CDATA[Release Information for Veeam Backup for Google Cloud 5 Patch 1]]> https://www.veeam.com/kb4560 2024-03-18T00:00:00Z 2024-03-18T00:00:00Z

Release Information for Veeam Backup for Google Cloud 5 Patch 1

KB ID: 4560
Product: Veeam Backup for Google Cloud | 5.0
Published: 2024-03-18
Last Modified: 2024-03-18

Requirements

Please confirm that you are running version Veeam Backup for Google Cloud 5 (build 5.0.0.1297) or later before upgrading. You can find the currently installed build number (Server version) in the About section under Configuration | Support Information | Updates. After installing Veeam Backup for Google Cloud 5 Patch 1, your build number will be 5.0.1.1343.

What's New

Security 

  • Overall stability and product security have been improved.

Resolved Issues

General

  • Under certain conditions, the modern authentication method does not work when connecting to the mail server in the Microsoft 365 cloud.

Backup

  • The backup policy for the Cloud SQL instance fails due to missing mandatory flags on the selected staging server.
  • Under certain conditions, the VM snapshot restore point can be saved in the incomplete state.

Reporting

  • The "Start Time" property in the email report for backup policy sessions is displayed in the incorrect format.

Deployment Information

To install updates, follow the steps described in the Veeam Backup for Google Cloud User Guide.

After installing the patch, your build version will be 5.0.1.1343.
To submit feedback regarding this article, please click this link: Send Article Feedback
To report a typo on this page, highlight the typo with your mouse and press CTRL + Enter.
]]>
<![CDATA[Build Numbers and Versions of Veeam Backup for AWS]]> https://www.veeam.com/kb4361 2024-03-18T00:00:00Z 2024-03-18T00:00:00Z

Build Numbers and Versions of Veeam Backup for AWS

KB ID: 4361
Product: Veeam Backup for AWS | 1.0 | 2.0 | 3.0 | 4.0 | 5.0 | 5a | 6.0 | 6a | 7.0
Published: 2022-09-22
Last Modified: 2024-03-18

This KB article lists all versions of Veeam Backup for AWS and their respective build numbers.

For more information on deploying the latest version of Veeam Backup for AWS, visit: 

Starting with the release of Veeam Backup & Replication 12.1, the What's New information for integrated products, like Veeam Backup for AWS, is included in the Veeam Backup & Replication What's New PDF.
Version  Build Number Release Date Release Notes
Veeam Backup for AWS 7 Releases
Veeam Backup for AWS 7 Patch 1 7.1.0.8 2024-03-18 KB4559
Veeam Backup for AWS 7 7.0.0.615 2023-12-05 PDF
Veeam Backup for AWS 6a Releases
Veeam Backup for AWS 6a 6.1.2.3 2023-07-03 KB4471
6.1.0.25 2023-05-30 PDF
Veeam Backup for AWS 6 Releases
Veeam Backup for AWS 6 6.0.2.3 2023-07-03 KB4471
6.0.0.335 2023-03-09 PDF
Veeam Backup for AWS 5 Releases
Veeam Backup for AWS 5a 5.1.1.8 2022-12-09 KB4383
Veeam Backup for AWS 5a 5.1.0.39 2022-11-16 KB4305
Veeam Backup for AWS 5 5.0.0.452 2022-06-16

PDF

KB4305

Veeam Backup for AWS 4 Releases
Veeam Backup for AWS 4a 4.1.0.46 2021-12-23 KB4211
Veeam Backup for AWS 4 4.0.0.741 2021-10-05 PDF
Veeam Backup for AWS 3 Releases
Veeam Backup for AWS 3 P1 3.1.0.57 2021-08-10 KB4094
Veeam Backup for AWS 3 p1 3.1.0.19 2021-02-08
Veeam Backup for AWS 3 3.0.0.319 2020-12-08

PDF

KB4060

Veeam Backup for AWS 2 Releases
Veeam Backup for AWS 2 P1 2.0.1.622 2020-09-18 KB4015
Veeam Backup for AWS 2 2.0.0.600 2020-06-18

PDF

KB3198

Veeam Backup for AWS 1 Releases
Veeam Backup for AWS 1 1.0.0.300 2019-12-02 PDF
Swipe to show more of the table
To submit feedback regarding this article, please click this link: Send Article Feedback
To report a typo on this page, highlight the typo with your mouse and press CTRL + Enter.
]]>
<![CDATA[Build Numbers and Versions of Veeam Backup for Microsoft Azure]]> https://www.veeam.com/kb4360 2024-03-18T00:00:00Z 2024-03-18T00:00:00Z

Build Numbers and Versions of Veeam Backup for Microsoft Azure

KB ID: 4360
Product: Veeam Backup for Microsoft Azure | 1.0 | 2.0 | 3.0 | 4.0 | 5.0 | 5a | 6.0
Published: 2022-09-22
Last Modified: 2024-03-18

This KB article lists all versions of Veeam Backup for Microsoft Azure and their respective build numbers.

For more information on deploying the latest version of Veeam Backup for Microsoft Azure, visit:

Starting with the release of Veeam Backup & Replication 12.1, the What's New information for integrated products, like Veeam Backup for Microsoft Azure, is included in the Veeam Backup & Replication What's New PDF.
Version  Build Number Release Date Release Notes
Veeam Backup for Microsoft Azure 6 Releases
Veeam Backup for Microsoft Azure 6 Patch 1 6.0.1.267 2024-03-18 KB4556
Veeam Backup for Microsoft Azure 6 6.0.0.234 2023-12-05 PDF

Veeam Backup for Microsoft Azure 5a Releases

Veeam Backup for Microsoft Azure 5a 5.1.0.75 2023-07-03 KB4471
5.1.0.63 2023-05-30 PDF
Veeam Backup for Microsoft Azure 5 Releases
Veeam Backup for Microsoft Azure 5 5.0.0.607 2023-07-03 KB4471
5.0.0.579 2023-03-21 PDF
Veeam Backup for Microsoft Azure 4 Releases
Veeam Backup for Microsoft Azure 4 4.0.0.714 2022-12-16 KB4383
4.0.0.679 2022-07-25

PDF

KB4306

Veeam Backup for Microsoft Azure 3 Releases
Veeam Backup for Microsoft Azure 3a 3.0.1.19 2022-02-01

PDF

KB4279

Veeam Backup for Microsoft Azure 3 3.0.0.666 2021-10-05

PDF

KB4164

Veeam Backup for Microsoft Azure 2 Releases
Veeam Backup for Microsoft Azure 2a 2.0.0.337 2021-06-01

PDF

KB4179

Veeam Backup for Microsoft Azure 2 2.0.0.303 2021-02-24 KB4113
Veeam Backup for Microsoft Azure 1 Releases
Veeam Backup for Microsoft Azure 1 1.0.0.253 2020-04-28 PDF
Swipe to show more of the table
To submit feedback regarding this article, please click this link: Send Article Feedback
To report a typo on this page, highlight the typo with your mouse and press CTRL + Enter.
]]>
<![CDATA[Build Numbers and Versions of Veeam Backup for Google Cloud]]> https://www.veeam.com/kb4359 2024-03-18T00:00:00Z 2024-03-18T00:00:00Z

Build Numbers and Versions of Veeam Backup for Google Cloud

KB ID: 4359
Product: Veeam Backup for Google Cloud
Published: 2022-09-22
Last Modified: 2024-03-18

This KB article lists all versions of Veeam Backup for Google Cloud and their respective build numbers.

For more information on deploying the latest version of Veeam Backup for Google Cloud, visit:

Starting with the release of Veeam Backup & Replication 12.1, the What's New information for integrated products, like Veeam Backup for Google Cloud, is included in the Veeam Backup & Replication What's New PDF.
Note: Prior to version 3.0, the product was known as Veeam Backup for Google Cloud Platform.
Version  Build Number Release Date Release Notes
Veeam Backup for Google Cloud 5 Releases
Veeam Backup for Google Cloud 5 Patch 1 5.0.1.1343 2024-03-18 KB4560
Veeam Backup for Google Cloud 5 5.0.0.1297 2023-12-05 PDF

Veeam Backup for Google Cloud 4 Releases

Veeam Backup for Google Cloud 4 4.0.0.1082 2023-09-20 KB4497
4.0.0.1080 2023-07-06 KB4471
4.0.0.1072 2023-02-14 PDF

Veeam Backup for Google Cloud 3 Releases

Veeam Backup for Google Cloud 3 3.0.0.868 2022-12-16 KB4383
3.0.0.859 2022-06-16 PDF
Veeam Backup for Google Cloud Platform 2 Releases
Veeam Backup for Google Cloud Platform 2 P1 2.0.0.535 2021-10-13 KB4220
Veeam Backup for Google Cloud Platform 2 2.0.0.530 2021-08-18 PDF
Veeam Backup for Google Cloud Platform 1 Releases
Veeam Backup for Google Cloud Platform 1 1.0.0.288 2021-02-03 PDF
Swipe to show more of the table
To submit feedback regarding this article, please click this link: Send Article Feedback
To report a typo on this page, highlight the typo with your mouse and press CTRL + Enter.
]]>
<![CDATA[Restored Linux Machine Fails to Boot]]> https://www.veeam.com/kb2669 2024-03-18T00:00:00Z 2024-03-18T00:00:00Z

Restored Linux Machine Fails to Boot

KB ID: 2669
Product: Veeam Backup & Replication
Veeam Agent for Linux
Published: 2018-06-12
Last Modified: 2024-03-18

Challenge

An issue with initiramfs may cause the restored Linux macine to fail to boot with the following symptoms:

  • For RHEL/CentOS/SUSE systems, during the boot process they will drop into the dracut emergency shell and display errors similar to:
    dracut-initqueue timeout - starting timeout scripts
    /dev/vgroot/root does not exist
    
  • For Debian systems, a different error message may be shown. By default, Debian doesn't use dracut to generate initramfs images, so the following error is shown:
    Kernel panic - not syncing: VFS: Unable to mount root fs on unknown-block()
    

The LVM system.devices file limits which device IDs can be accessed by LVM, causing a restored Linux machine to fail to boot because the disk IDs will have changed. When this occurs the restored Linux server will fail to boot with the error:

  • Timed out waiting for device /dev/mapper/<lvm-name>
    Dependency failed for /
    Dependency failed for Local File System
    

Cause

Faulty initramfs

This issue occurs because the initial ramdisk image does not contain the necessary block device kernel modules (drivers).

The initial ramdisk image (initramfs/initrd) is an image of an initial root filesystem used as a part of the Linux boot process.

The most common scenario for this is when restoring a virtual machine that was backed up using Veeam Agent for Linux to completely new hardware. For example, a virtual machine was backed up in VMware and is then restored to a Hyper-V environment.

Limited LVM Visibility

This issue occurs because the original Linux machine was configured to limit which devices are visible to LVM through the use of /etc/lvm/devices/system.devices in conjunction with use_devicesfile=1 being set within /etc/lvm/lvm.conf.

Per RHEL Documentation, "In Red Hat Enterprise Linux 9, the /etc/lvm/devices/system.devices file is enabled by default."

Solution

Scenario 1: Faulty initramfs

To resolve this issue, you must regenerate the initramfs image.

This consists of:

  • Locating partitions/volumes on the target system corresponding to the root filesystem, /boot, and /boot/efi partitions.
  • Mounting these to a target directory and bind-mounting system pseudo filesystems.
  • Chrooting into the mounted OS.
  • Rebuilding the initramfs from within the chrooted environment.
Advanced Troubleshooting
  • The following troubleshooting steps are provided as a courtesy and should be performed by a knowledgeable Linux Administrator.
  • You should only perform the steps in this article on a machine that has been restored using Veeam. If you make a mistake, re-restore the VM and try again.
  • Readers are strongly advised to read each section carefully. Some command examples are not meant to be directly copied and pasted into a bash prompt.

Part 1: Prerequisites

  • You must have a Linux LiveCD matching the distribution and release version of the restored Linux system that is compatible with target system hardware. It can be either a distribution-supplied live/rescue CD or Custom Veeam Recovery Media generated on the machine prior to restore.
  • You must be aware of the disk and volume layout of the target system and the devices corresponding to the root filesystem and boot partitions. If this information is not readily available, you may use File-level Restore (with Veeam Recovery MediaVeeam Agent for Linux, or Veeam Backup&Replication) to mount the backup contents and inspect the /etc/fstab file.
This article outlines the general sequence of events. Depending on the specific configuration (disk layout, Linux distribution, version, etc.), some steps may vary or be omitted altogether.

Part 2: Boot from LiveCD

  1. Boot from the distro's LiveCD or Custom Veeam Recovery Media.
  2. Switch to the bash shell (elevate to root user if necessary).
  3. Locate the volumes/partitions hosting the Linux VM's root and boot filesystems. You can use commands like lsblk (list hierarchy of block devices), lvdisplay (list logical volumes), etc.
Note: If the target system uses software RAID (such as md-raid), dm-multipath, or other software-based storage structures for root and boot filesystems, these have to be assembled/configured manually before proceeding further.
Note: If LVM is used for the root filesystem and the volume group with its logical volumes is not visible in lsblk output, run vgscan and vgchange -ay to scan and activate all available volume groups. After that, run lsblk/lvdisplay again and verify that the volume groups and their volumes are now visible.

Part 3: Mount Guest OS Filesystem and Chroot

  1. Create a directory where the system root will be mounted.

Example:

mkdir /targetroot
  1. Mount the device hosting the guest OS root filesystem inside the directory (/targetroot).

Example for sda3 partition:

mount /dev/sda3 /targetroot
Examples for root logical volume in centos volume group:
mount /dev/centos/root /targetroot
or
mount /dev/mapper/centos-root /targetroot
Note: At this point, you should be able to inspect /targetroot/etc/fstab file to estimate where the other partitions/volumes may be located.
  1. Mount the guest OS's boot partition inside /targetroot/boot.

Example for sda2 boot partition:

mount /dev/sda2 /targetroot/boot
  1. If UEFI is in use: The guest OS's EFI system partition (/boot/efi) needs to be mounted to /targetroot/boot/efi.

Assuming EFI system partition on sda1:

mount /dev/sda1 /targetroot/boot/efi

Note: If BTRFS using separate subvolumes is in use for any of the required partitions, you might have to use subvol= or subvolid= parameters in the mount command to specify a subvolume to mount.

Example:

mount -o subvol=/@/boot/grub2/x86_64-efi /dev/sda2 /targetroot/boot/grub2/x86_64-efi

This command mounts /@/boot/grub2/x86_64-efi BTRFS subvolume from /dev/sda2 device to /targetroot/boot/grub2/x86_64-efi

For more information on BTRFS mount options refer to the BTRFS manpage.

Note: Depending on the configuration, additional filesystems might have to be mounted manually for a successful initramfs rebuild (such as /var or /tmp).
  1. Bind mount the pseudo filesystems inside target root - /dev, /proc, /sys, and /run:
mount --bind /dev /targetroot/dev
mount --bind /proc /targetroot/proc
mount --bind /sys /targetroot/sys
mount --bind /run /targetroot/run
  1. Chroot into the mounted system:
chroot /targetroot /bin/bash
At this point, the target environment should be ready for initramfs rebuild.

Part 4: Rebuilding initramfs

Identifying and Correlating Kernel Versions to Initial Ramdisk Images

The initial ramdisk image (initramfs/initrd) is an image of an initial root filesystem used as a part of the Linux boot process. Initial ramdisk images are stored as files under /boot, named initramfs-<kernel version>.img or initrd-<kernel version>.

Example for Red Hat Enterprise Linux 8:

# ls -la /boot/initramfs-*
-rw-------. 1 root root 65698610 Aug 8 2019 /boot/initramfs-0-rescue-b15a66f034f840ecb6a1205c983df822.img
-rw-------. 1 root root 19683576 Sep 13 2020 /boot/initramfs-4.18.0-193.19.1.el8_2.x86_64kdump.img
-rw-------. 1 root root 27783687 Nov 8 2020 /boot/initramfs-4.18.0-193.28.1.el8_2.x86_64.img
-rw-------. 1 root root 22324786 Nov 8 2020 /boot/initramfs-4.18.0-193.28.1.el8_2.x86_64kdump.img
-rw-------. 1 root root 27989970 Dec 6 13:17 /boot/initramfs-4.18.0-240.10.1.el8_3.x86_64.img
-rw-------. 1 root root 22485564 Jan 17 2021 /boot/initramfs-4.18.0-240.10.1.el8_3.x86_64kdump.img
-rw-------. 1 root root 27943270 Jan 17 2021 /boot/initramfs-4.18.0-240.1.1.el8_3.x86_64.img
-rw-------. 1 root root 22485474 Jan 17 2021 /boot/initramfs-4.18.0-240.1.1.el8_3.x86_64kdump.img
Example for SUSE Linux Enterprise Server 15 SP1:
# ls -la /boot/initrd*
lrwxrwxrwx 1 root root 29 Aug 23 2019 /boot/initrd -> initrd-4.12.14-197.15-default
-rw------- 1 root root 11142180 Dec 27 16:37 /boot/initrd-4.12.14-197.15-default
-rw------- 1 root root 15397016 Dec 22 2020 /boot/initrd-4.12.14-197.15-default-kdump
-rw------- 1 root root 10994816 Dec 27 16:37 /boot/initrd-4.12.14-197.15-default.backup

Initial ramdisk image files correspond to GRUB/GRUB2 boot menu entries - when a specific entry is selected in the boot menu, a corresponding initramfs image is loaded. The association between GRUB menu entries and initial ramdisk image files can be determined via grub.cfg file (generally located under /boot/grub or /boot/grub2) - look for menuentry records which denote GRUB boot menu entries.

Example from SUSE Linux Enterprise Server 15 SP1:

### BEGIN /etc/grub.d/10_linux ###
menuentry 'SLES 15-SP1'  --class sles --class gnu-linux --class gnu --class os $menuentry_id_option 'gnulinux-simple-bf547c2f-3d66-4be6-98c3-8efe845a940d' {
<...>
        echo    'Loading Linux 4.12.14-197.15-default ...'
        linuxefi /boot/vmlinuz-4.12.14-197.15-default root=UUID=bf547c2f-3d66-4be6-98c3-8efe845a940d  ${extra_cmdline} splash=silent resume=/dev/disk/by-path/pci-0000:03:00.0-scsi-0:0:0:0-part3 mitigations=auto quiet crashkernel=175M,high
        echo    'Loading initial ramdisk ...'
       initrdefi /boot/initrd-4.12.14-197.15-default
}

Red Hat Enterprise Linux 8 uses BLS framework with boot menu entries stored under /boot/loader/entries:

# ls /boot/loader/entries/
b15a66f034f840ecb6a1205c983df822-0-rescue.conf                      b15a66f034f840ecb6a1205c983df822-4.18.0-240.10.1.el8_3.x86_64.conf
b15a66f034f840ecb6a1205c983df822-4.18.0-193.28.1.el8_2.x86_64.conf  b15a66f034f840ecb6a1205c983df822-4.18.0-240.1.1.el8_3.x86_64.conf
# cat /boot/loader/entries/b15a66f034f840ecb6a1205c983df822-4.18.0-240.10.1.el8_3.x86_64.conf
title Red Hat Enterprise Linux (4.18.0-240.10.1.el8_3.x86_64) 8.3 (Ootpa)
version 4.18.0-240.10.1.el8_3.x86_64
linux /vmlinuz-4.18.0-240.10.1.el8_3.x86_64
initrd /initramfs-4.18.0-240.10.1.el8_3.x86_64.img $tuned_initrd
<...>
Generally, the initial ramdisk image has to be rebuilt for the kernel version that is booted into by default - in most cases, that's the newest kernel (having the latest version).
Before proceeding, ensure you know the <kernel version> against which the initial ramdisk image must be rebuilt.
Note: Different distributions use different utilities to work with initial ramdisk images; make sure to consult your distribution documentation as well as appropriate utilities manpages in case of any doubts.

Note: Rebuilding the initial ramdisk will overwrite the existing image. You should consider making a copy of the existing initramfs/initrd image beforehand. Example:

cp /boot/initramfs-<kernel version>.img /boot/initramfs-<kernel version>.img.backup
Distro Specific Initramfs Rebuild Instructions

Now that you have identified the initramfs that needs to be rebuilt, expand the section below matching the distro for information about rebuilding it.

RHEL/CentOS/Oracle Linux
These distributions use dracut to manage initramfs images. The general syntax to rebuild initramfs image is:
dracut -f -v /boot/initramfs-<kernel version>.img <kernel version>

Here, <kernel version> has to be replaced with the kernel version for which the initramfs is being rebuilt.

Example:

# ls -la /boot/initramfs-*
-rw-------. 1 root root 65698610 Aug  8  2019 /boot/initramfs-0-rescue-b15a66f034f840ecb6a1205c983df822.img
-rw-------. 1 root root 19683576 Sep 13  2020 /boot/initramfs-4.18.0-193.19.1.el8_2.x86_64kdump.img
-rw-------. 1 root root 27783687 Nov  8  2020 /boot/initramfs-4.18.0-193.28.1.el8_2.x86_64.img
-rw-------. 1 root root 22324786 Nov  8  2020 /boot/initramfs-4.18.0-193.28.1.el8_2.x86_64kdump.img
-rw-------. 1 root root 27989970 Dec  6 13:17 /boot/initramfs-4.18.0-240.10.1.el8_3.x86_64.img
-rw-------. 1 root root 22485564 Jan 17  2021 /boot/initramfs-4.18.0-240.10.1.el8_3.x86_64kdump.img
-rw-------. 1 root root 27943270 Jan 17  2021 /boot/initramfs-4.18.0-240.1.1.el8_3.x86_64.img
-rw-------. 1 root root 22485474 Jan 17  2021 /boot/initramfs-4.18.0-240.1.1.el8_3.x86_64kdump.img


Here, /boot/initramfs-4.18.0-240.1.1.el8_3.x86_64.img image corresponds to 4.18.0-240.1.1.el8_3.x86_64 kernel.

To rebuild it with dracut, run:

dracut -f -v /boot/initramfs-4.18.0-240.1.1.el8_3.x86_64.img 4.18.0-240.1.1.el8_3.x86_64
Debian/Ubuntu
These distributions generally use update-initramfs command. Syntax:
update-initramfs –u –k <kernel version>

Where <kernel version> is replaced with the kernel version for which the initramfs is being rebuilt. 


More information:

UPDATE-INITRAMFS(8)

SUSE Linux Enterprise/openSUSE
These distributions use mkinitrd script to automatically rebuild initramfs images.
Run:
mkinitrd

Because mkinitrd-suse is just a wrapper for dracutdracut can be used for the same purpose as well. For more information, refer to RHEL/CentOS/Oracle Linux section above.

Alternate example using dracut:

dracut -f -v /boot/initrd-4.12.14-197.15-default 4.12.14-197.15-default

Part 5: Unmount and Reboot

With the initramfs having been rebuilt, exit the chroot environment:

exit
After that, unmount everything that was mounted during the Mounting stage.
Example:
umount /targetroot/dev
umount /targetroot/proc
umount /targetroot/sys
umount /targetroot/run
umount /targetroot/boot/efi
umount /targetroot/boot
umount /targetroot

Finally, the system can be rebooted.

During the next boot, select the image in the GRUB interface with the same version as the initramfs image that was rebuilt.

Scenario 2: Limited LVM Visibility

To resolve this issue, remove the /etc/lvm/devices/system.devices file. Removing that file will unrestrict which devices LVM can access, allowing the system to boot.

Note: After the machine is able to boot correctly, you may choose to reconfigure the system.devices file. For more information, review RHEL Documentation: Limiting LVM device visibility and usage.

The procedure for removing the system.devices file will depend on whether the root account is disabled or not. You can determine which steps to follow based on whether the system fails to boot and either dumps you into a maintenance prompt or, instead, displays the message "Cannot open access to console, the root account is locked."

Outcome 1: Boot Fails to Emergency Shell as Root

The system fails to boot, and because a root account was enabled, it dumps the user into an emergency shell.

Example:

  1. Enter the root user password to access the Emergency console.
  2. Remove the /etc/lvm/devices/system.devices file.
rm -f /etc/lvm/devices/system.devices
  1. Reboot.
reboot
root solved

Outcome 2: Boot Fails without Emergency Shell

The system fails to boot, but because the root account was disabled, it displays the message:

Cannot open access to console, the root account is locked.

Example:

  1. Boot from the Veeam Recovery Media or any preferred recovery ISO.
  2. Activate all volume groups with the command:
vgchange -ay
  1. Review the available block devices using:
lsblk
  1. Make a directory where the root filesystem will be mounted:
mkdir /mnt/lvm
  1. Mount the root filesystem to the folder.
    The root filesystem path may be different than the example shown here. Review the results from lsblk.
mount /dev/mapper/rl-root /mnt/lvm
  1. Remove the /etc/lvm/devices/system.devices file.
rm -f /etc/lvm/devices/system.devices
  1. Unmount the root filesystem.
umount /mnt/lvm
  1. Reboot the machine.
reboot
To submit feedback regarding this article, please click this link: Send Article Feedback
To report a typo on this page, highlight the typo with your mouse and press CTRL + Enter.
]]>
<![CDATA[Veeam Data Cloud Release Information and Build Numbers]]> https://www.veeam.com/kb4555 2024-03-15T00:00:00Z 2024-03-15T00:00:00Z

Veeam Data Cloud Release Information and Build Numbers

KB ID: 4555
Product: Veeam Data Cloud for Microsoft 365
Published: 2024-03-07
Last Modified: 2024-03-15

This KB article lists all versions of Veeam Data Cloud and their respective release information and build numbers.

For more information Veeam Data Cloud, visit:

Version Build Number Release Date
Veeam Data Cloud for Microsoft 365 1.5 Releases
Veeam Data Cloud for Microsoft 365 1.5.1 1.5.1 2024-03-14

What's New

  • Restores — Added Teams filtering options.
  • Backup logs — Add a "Running" option in the backup logs filter.

Resolved Issues

  • Backup Job is set to disabled after editing the backup job's name.
  • The status of backup jobs in a running state does not auto-refresh.
  • OneDrive doesn't allow customers to load more OneDrive items.
  • Issue with Download Options in SharePoint Folder.
  • An error occurs when selecting a Sharepoint site in Role Setting.
  • The pagination of backup users is not functioning for some fixed customers.
  • Performance-related improvements.
  • Other minor features and bug fixes.
Veeam Data Cloud for Microsoft 365 1.5.0 1.5.0 2024-02-28
What's New
  • UI — Change logo and branding
    • Updated the product name and logo to "Veeam Data Cloud for Microsoft 365".
    • Changed logos on sign-in screens, menu logos, and the favicon to reflect the new branding.
    • Updated the color scheme on the login page and dashboard graphs.
  • Role-Based Access Control (RBAC)  — Veeam Data Cloud for Microsoft 365 users can now assign admin user roles using groups in Active Directory. Two new tabs have been added to the Settings -> Users page to add and manage Veeam Data Cloud for Microsoft 365 users and assign roles by AD group.
  • Restore — Added the capability to compare Outlook data within a backup to production during the restore process.
  • Admin Portal — You can now disable email previews for your entire organization if you do not want to allow your users to access this feature. Contact your reseller or Veeam Data Cloud support to disable it.
  • SharePoint — Added the ability to view previous versions of documents when selecting a file or folder for restore in SharePoint.
  • Settings — Customer admins can now enable self-service for their organization, allowing all users from that company domain to restore their own OneDrive and Outlook content.

Resolved Issues

  • Fixed issues identified in penetration test results, including updating API endpoints and implementing more granular permissions.
  • Other minor features and bug fixes.
Swipe to show more of the table
To submit feedback regarding this article, please click this link: Send Article Feedback
To report a typo on this page, highlight the typo with your mouse and press CTRL + Enter.
]]>
<![CDATA["Established connection failed because connected host has failed to respond :10005"]]> https://www.veeam.com/kb4557 2024-03-13T00:00:00Z 2024-03-13T00:00:00Z

"Established connection failed because connected host has failed to respond <vbr_ip>:10005"

KB ID: 4557
Product: Veeam Backup & Replication | 11 | 12 | 12.1
Veeam Agent for Microsoft Windows | 5.0 | 6.0 | 6.1
Published: 2024-03-13
Last Modified: 2024-03-18

Challenge

A Windows Agent Backup or Windows Agent Policy type job within Veeam Backup & Replication fails with either of the following errors.

  • A Veeam Agent Backup operating in Managed by backup server fails with the error:

    Error: Managed session has failed: A connection attempt failed because the connected party did not properly respond after a period of time, or established connection failed because connected host has failed to respond <vbr_ip>:10005
    
  • A Veeam Agent Policy fails to deploy with the following error:

    Failed to send backup job configuration to <machine> Error: Failed to update backup job 
    Managed by agent job ID: <job_id_guid>. 
    Managed by agent job name: <job_name>.
    Invalid job configuration.
    Connection problems.
    Exception has been thrown by the target of an invocation.
    Failed to establish connection: no valid IP addresses were found.
    A connection attempt failed because the connected party did not properly respond after a period of time, or established connection failed because connected host has failed to respond <vbr_ip>:10005  
    
Similar Ports in Errors

This article is regarding Veeam Agent for Microsoft Windows deployments that are managed by Veeam Backup & Replication and use the port 10005. Other nearby ports are used for similar purposes:

  • 10001 — Port used by Standalone Veeam Agent for Microsoft Windows Deployments to communicate with Veeam Backup & Replication.
  • 10002 — Legacy port used by older versions of Veeam Agent for Linux to communicate with Veeam Backup & Replication.
  • 10003 — Port used for Veeam Cloud Connect communication from Backup Server to Backup Server.
  • 10004 — Unused
  • 10005 — Port used by Managed Deployments of Veeam Agent for Microsoft Windows to communicate with Veeam Backup & Replication.
  • 10006 — Port used by Veeam Agent for Linux and Veeam Agent for Mac to communicate with the Veeam Backup Server.
Third-Party Software Port Conflicts

While firewalls blocking port communication remains the most common cause of support cases, Veeam Support has seen a marked increase in the number of cases caused by the Cloud Agent of Qualys vulnerability scanner, as it shares many of the same default ports:

"During an unauthenticated scan using the Qualys scanner, the Cloud Agent will return its Correlation ID to [the] scanner over one of the Agent Scan Merge ports (10001, 10002, 10003, 10004, 10005)."

The ports used by the Agent Scan Merge can be customized: Agent Correlation Identifier.

Cause

These errors occur when the Windows machine where Veeam Agent for Microsoft Windows is installed cannot reach the Veeam Backup Service on the Veeam Backup Server over port 10005.

This may occur if:

  • The machine where Veeam Agent for Microsoft Windows is deployed cannot resolve the hostname or FQDN of the Veeam Backup Server.
  • The Veeam Backup Service could not assign itself port 10005 when it started because another application already used that port.
  • A firewall in the environment is blocking traffic between the machine where Veeam Agent for Microsoft Windows is installed and the Veeam Backup Server.
    • Firewall on the Veeam Backup Server
    • Firewall on the Windows machine itself.
    • Firewall in the network (if the traffic is crossing them).

Solution

A complete guide on how to test port connectivity can be found on KB4444.
Troubleshooting Checklist
  • Ensure that the Veeam Backup Service on the Veeam Backup Server is associated with port 10005.
Get-Process -Id (Get-NetTCPConnection -LocalPort 10005).OwningProcess
Port Ownership
If the process listed is not Veeam.Backup.Service, investigate why that process is using the port. If the third-party software can be reconfigured to use a different port, it is advised to reconfigure it rather than the Veeam software. It is possible to change the port Veeam Backup & Replication uses to receive traffic from the Veeam Agent for Microsoft Windows deployments. See the More Information section for information about changing the port used by Veeam Backup & Replication for receiving managed Veeam Agent for Microsoft Windows deployment traffic.
  • Ensure that the Windows machine being backed up can correctly resolve the the hostname and FQDN of the Veeam Backup Server.
nslookup <vbr_fqdn>
ping <vbr_fqdn>
nslookup and ping
Note: The success of ping is not necessary for the functionality of agent management. The ping is only intended to confirm that the machine's local DNS uses the data received from the DNS server, as shown in the nslookup results.
  • Ensure that the Windows machine being backed up can reach port 10005 on the Veeam Backup Server.
Test-NetConnection -ComputerName <vbr.server.ip> -Port 10005
TestNetConnection

More Information

Customize Port Used To Recieve Communication

If you are facing a situation where another product is using port 10005, and that third-party software cannot be adjusted to use a different port, Veeam Backup & Replication can be configured to listen on a different port for communication from managed Veeam Agent for Microsoft Windows deployments.

Considerations and Limitations

Changing the port that managed Veeam Agent for Microsoft Windows deployments use to communicate with Veeam Backup & Replication will cause them to lose contact with Veeam Backup & Replication until their configuration is updated to make them aware of the port change.

  • For machines not in a Computer with pre-install backup agents type Protection Group, when Veeam Backup & Replication connects out to the Veeam Agent for Microsoft Windows deployment (job start or protection group rescan), it will update that deployment with the new inbound communication port.
  • For machines in a Computer with pre-install backup agents type Protection Group, each machine must be manually reconfigured to communicate with Veeam Backup & Replication over the new port. This is because machines in that type of Protection Group cannot have a configuration pushed out to them; they receive their configuration instead by periodically contacting the Veeam Backup & Replication server to see if their job settings have changed. Therefore, changing the inbound communication port causes them to no longer be able to reach the Veeam Backup & Replication software. To update the machine in this type of protection group, either:
    • Update configuration using the Configurator — Generate a new pre-configured deployment package, copy the <protection_group_name>.xml configuration file to the Windows machine, then use the following command to update the configuration:
      "C:\Program Files\Veeam\Endpoint Backup\Veeam.Agent.Configurator.exe" -setVBRsettings /p:"<protection_group_name>.xml"
      
      or
    • Update the port by editing the registry — Edit the SerializedConnectionParamsstring value in the [HKLM\SOFTWARE\Veeam\Veeam EndPoint Backup] key on the Windows machine. The string value will contain a port number; update that to match the port selected on the Veeam Backup Server.
      <?xml version="1.0"?><ConnectionParams ConnectionPoint="VBR.domain.tld" Port="10005"><IpAddresses>10.0.0.115</IpAddresses></ConnectionParams>
      
 
Registry Value

Create the following registry value on the Veeam Backup Server.

Key Location: HKLM\SOFTWARE\Veeam\Veeam Backup and Replication\
Value Name: EndPointServerSslPort
Value Type: DWORD (32-Bit) Value
Value Data(Dec): 10005 (Default)

To submit feedback regarding this article, please click this link: Send Article Feedback
To report a typo on this page, highlight the typo with your mouse and press CTRL + Enter.
]]>
<![CDATA[Release History for Veeam Service Provider Console 8]]> https://www.veeam.com/kb4509 2024-03-13T00:00:00Z 2024-03-13T00:00:00Z

Release History for Veeam Service Provider Console 8

KB ID: 4509
Product: Veeam Service Provider Console | 8.0
Published: 2023-12-05
Last Modified: 2024-03-13

Veeam Service Provider Console 8 Builds

8.0.0.18054

Requirements

Before installing this Cumulative Patch, please confirm that you are running at least Veeam Service Provider Console 8 (build 8.0.0.16877).

You can check this by logging in to the backup portal and navigating to the Configuration > Support Information tab. After updating, the build number will be 8.0.0.18054.

For new deployments or upgrades from Veeam Service Provider Console 7, use the latest ISO on the Veeam Service Provider Console Download Page, which includes the latest Cumulative Patch on this page.
 

Release Information

What’s New

Security

  • Overall stability and product security has been improved.

Alarms

  • Four new alarms have been introduced for tracking public cloud backup policies. These alarms include monitoring of:
    • snapshots
    • replica snapshots
    • backups
    • archive jobs.

Scalability

  • The Veeam Backup & Replication data collection job performance has been improved in large-scale deployments.
  • The Veeam Backup for Microsoft 365 data collection job performance has been improved in large-scale deployments.
     
Resolved Issues

General

  • Under certain conditions, users cannot access pre-installed plugins.

Alarms

  • The configured tolerance period is ignored in RPO-based alarms.
  • Under certain conditions, the “Cloud VM without backup” alarm is not triggered.
  • “Cloud policy snapshot session state” and “Cloud policy replica snapshot session state” alarms are not triggered for backup appliances assigned to a reseller.

Company Management

  • If the MFA policy is enabled in the backup portal, a new company cannot be created from the Veeam Backup for Microsoft 365 plugin.

Management Agent

  • Under certain conditions, new management agents cannot connect to the Veeam Service Provider Console server.

VCSP Pulse Portal Integration

  • The data collection task has been optimized to improve scalability and performance.

Reports

  • Under certain conditions, scheduled backup reports are no longer generated.

REST API

  • The GetBackupRepositories method does not return any values.
  • HPE StoreOnce repository cannot be assigned to a company as a hosted resource.
  • Under certain conditions, the GetProtectedVirtualMachines method returns an incorrect value.

8.0.0.16877

Release Information

Download Information

Deployment ISO

For new installations and upgrades from previous versions, download the latest Veeam Service Provider Console 8 ISO file:

DOWNLOAD ISO

See the Current Version Download Page for ISO hashes.

Patch Install

If at least version Veeam Service Provider Console 8 (build 8.0.0.16877) is already installed, download the cumulative patch below and perform the following steps to update to the latest Cumulative Patch:

  1. Back up the Veeam Service Provider Console configuration database.
  2. Log off from all active Veeam Service Provider Console UI sessions.
  3. Using an Administrative Command Prompt or Administrative PowerShell console:
    • Execute VSPC.ApplicationServer.x64_8.0.0.x.msp on the Veeam Service Provider Console server.
    • Execute VSPC.WebUI.x64_8.0.0.x.msp  on the Veeam Service Provider Console Web UI server.
DOWNLOAD PATCH

Filename: VSPCv8Patch1_20240229.zip
MD5: 70772580294D90D1F7EB45C2C01A5868
SHA1: 74250B051751214B4081E68E3036BA370CE1493C

Reboot may be required

Please note that a reboot may be required after installing the update. 

Please plan accordingly.

ISO Release History

Patch Release History

Release Date Patch Filename Changelog
Veeam Service Provider Console 8.0.0.18054 Releases
2024-03-04 VSPCv8Patch1_20240229.zipMD5: 70772580294D90D1F7EB45C2C01A5868
SHA1: 74250B051751214B4081E68E3036BA370CE1493C

Initial Release

Swipe to show more of the table
To submit feedback regarding this article, please click this link: Send Article Feedback
To report a typo on this page, highlight the typo with your mouse and press CTRL + Enter.
]]>
<![CDATA[How to Add RHEL 8/9 Using NIST 800-171 or DISA STIG Security Profile to Veeam Backup & Replication]]> https://www.veeam.com/kb4250 2024-03-13T00:00:00Z 2024-03-13T00:00:00Z

How to Add RHEL 8/9 Using NIST 800-171 or DISA STIG Security Profile to Veeam Backup & Replication

KB ID: 4250
Product: Veeam Backup & Replication | 12 | 12.1
Published: 2021-12-10
Last Modified: 2024-03-13
The procedures documented in this article are based on testing with Veeam Backup & Replication 12.0.0.1420 P20230718 and 12.1.1.56 with Red Hat Enterprise Linux (RHEL) 8.9 and 9.3 using both the NIST 800-171 and DISA STIG security profiles.

Purpose

This article documents the additional procedures required when adding a RHEL server using either the NIST 800-171 or DISA STIG security profile to Veeam Backup & Replication.

The initial error one will experience when attempting this without following the procedures in the article is:

  • CSshShellStreamRebex
    
CSshShellStreamRebex

Solution

Resolution Summary

To add a Linux server using these security profiles, two things must be done to allow them to be added to Veeam Backup & Replication:

  1. tmux must not automatically be launched when the account Veeam Backup & Replication uses connects. This Veeam Backup & Replication limitation is documented in KB4466: Impact of tmux on Veeam Interactions With Linux OS.
  2. fapolicyd must be updated during the step when the "New Linux Server" wizard is attempting to install the Veeam services.

Part 1: Disable tmux automatic startup when logging in on the system.

Review KB4466:Impact of tmux on Veeam Interactions With Linux OS for more information.

The NIST 800-171 and DISA STIG security profile on Red Hat Enterprise Linux enables automatically running tmux when a user connects. For Veeam Backup & Replication to successfully deploy the Veeam services on the system, tmux must not automatically launch for the user it connects as.

An entry either directly within /etc/bashrc or a second script called by bashrc will control the automatic launching of a tmux session at user login. For example, in RHEL 8.9, the /etc/bashrc does not directly contain the 'exec tmux' entry; instead, tmux.sh is called using an entry in bashrc that calls for all scripts within /etc/profile.d/*.sh to be executed at login.

Once you identify how tmux is being executed at login, there are two options:

  • Option 1: Comment out the entire line containing 'exec tmux' to disable tmux at login system-wide.
    (This change can be reverted after the machine has been successfully added to Veeam Backup & Replication.
comment
  • Option 2: Modify the if statement to add a qualifier that if the user account matches the specified one, tmux should not be started when that user logs in.
    && [ "$(id -un)" != "veeam" ]
    
    (This change can be reverted after the machine has been successfully added to Veeam Backup & Replication.
su bypass

Part 2: Updating fapolicyd while adding the Linux server

To make this process as simple as possible, the legacy method of having the reader run specific fapolicy-cli commands at specific stages of services deployment has been replaced with a script that will automate the entire process. This script will watch for the specific service files to be uploaded, and then add them to the faploicy trusted list automatically.

Prepare Script on the Linux Server
  1. SSH to the Linux server you will be adding to Veeam Backup & Replication.
  2. Create the folder path /opt/veeam/ using the following command:
    The /opt/veeam/ path is used because the DISA STIG security profile sets /home/ to be mounted with the option 'noexec'.
sudo mkdir -p /opt/veeam/
  1. Create /opt/veeam/vbr_fapolicyd_updater.sh with the following content:
#!/bin/bash

FILES=(
"/opt/veeam/deployment/veeamdeploymentsvc"
"/opt/veeam/transport/veeamtransport"
"/opt/veeam/transport/veeamimmureposvc"
"/opt/veeam/transport/veeamagent"
)

COMMANDS=(
"fapolicyd-cli --file add /opt/veeam/deployment/veeamdeploymentsvc --trust-file veeamdeploymentsvc"
"fapolicyd-cli --file add /opt/veeam/transport/veeamtransport --trust-file veeamtransport"
"fapolicyd-cli --file add /opt/veeam/transport/veeamimmureposvc --trust-file veeamimmureposvc"
"fapolicyd-cli --file add /opt/veeam/transport/veeamagent --trust-file veeamagent"
)

for ((i=0; i<${#FILES[@]}; i++)); do
FILE_PATH="${FILES[i]}"
COMMAND="${COMMANDS[i]}"

while [ ! -f "$FILE_PATH" ]; do
echo "File $FILE_PATH not found. Waiting..."
sleep 3
done

echo "File $FILE_PATH found. Running the command: $COMMAND"

$COMMAND
# Check if the command succeeded
if [ $? -eq 0 ]; then
echo "Command executed successfully."
else
echo "Command failed to execute."
fi
# Update FAPolicyd configuration
fapolicyd-cli --update
done
  1. Modify the attributes of the shell script to make it executable:
sudo chmod +x /opt/veeam/vbr_fapolicyd_updater.sh
  1. Before you begin adding the Linux server to Veeam Backup & Replication, run the script. The script will wait for the files to be uploaded to the Linux server, and as it detects them, it will add them to the trusted list within the fapolicy framework.
sudo /opt/veeam/vbr_fapolicyd_updater.sh
Add Linux Server to Veeam Backup & Replication

Before you begin this section, ensure that the vbr_fapolicyd_updater.sh script is running.

  1. Add the Linux server to Veeam Backup & Replication.

    Remember: If this Linux server will be used as a Hardened Linux Repository, you must add the credentials using the "Single-use credentials for hardened repository" option.
Add your Linux server with "Single-use credentials for hardened repository"
  1. Proceed through the rest of the wizard steps.

    As long as the vbr_fapolicyd_updater.sh script is running on that Linux server, the script will find the service files as they are uploaded and add them to the fapolicy trusted list before Veeam Backup & Replication attempts to start the services and communicate with them.
  1. Click [Finish] to complete adding the Linux Server.

After successfully adding the Linux server to Veeam Backup and Replication, you can undo the changes that were made to disable tmux. The Veeam Data Mover service binaries must remain trusted by fapolicyd.

Note: The fapolicyd system records the hash of the files it trusts, so if the service files are updated in the future, the script will have to be rerun to re-add the new processes to the trusted list.

More Information    

Additional fapolicyd-cli Commands

If the Linux server will be used as a VMware Backup Proxy, execute the following commands to allow it to be able to use Network (NBD) transport mode:

sudo fapolicyd-cli --file add /opt/veeam/transport/vddk_7_0/lib64/libcares.so.2 --trust-file libcares.so.2
sudo fapolicyd-cli --file add /opt/veeam/transport/vddk_7_0/lib64/libcrypto.so.1.0.2 --trust-file libcrypto.so.1.0.2
sudo fapolicyd-cli --file add /opt/veeam/transport/vddk_7_0/lib64/libcurl.so.4 --trust-file libcurl.so.4
sudo fapolicyd-cli --file add /opt/veeam/transport/vddk_7_0/lib64/libdiskLibPlugin.so --trust-file libdiskLibPlugin.so
sudo fapolicyd-cli --file add /opt/veeam/transport/vddk_7_0/lib64/libexpat.so --trust-file libexpat.so
sudo fapolicyd-cli --file add /opt/veeam/transport/vddk_7_0/lib64/libgcc_s.so.1 --trust-file libgcc_s.so.1
sudo fapolicyd-cli --file add /opt/veeam/transport/vddk_7_0/lib64/liblookup-types.so --trust-file liblookup-types.so
sudo fapolicyd-cli --file add /opt/veeam/transport/vddk_7_0/lib64/libsqlite3.so.0.8.6 --trust-file libsqlite3.so.0.8.6
sudo fapolicyd-cli --file add /opt/veeam/transport/vddk_7_0/lib64/libssl.so.1.0.2 --trust-file libssl.so.1.0.2
sudo fapolicyd-cli --file add /opt/veeam/transport/vddk_7_0/lib64/libssoclient.so --trust-file libssoclient.so
sudo fapolicyd-cli --file add /opt/veeam/transport/vddk_7_0/lib64/libstdc++.so.6 --trust-file libstdc++.so.6
sudo fapolicyd-cli --file add /opt/veeam/transport/vddk_7_0/lib64/libvddkVimAccess.so.7.0.3 --trust-file libvddkVimAccess.so.7.0.3
sudo fapolicyd-cli --file add /opt/veeam/transport/vddk_7_0/lib64/libvim-types.so --trust-file libvim-types.so
sudo fapolicyd-cli --file add /opt/veeam/transport/vddk_7_0/lib64/libvixDiskLib.so.7.0.3 --trust-file libvixDiskLib.so.7.0.3
sudo fapolicyd-cli --file add /opt/veeam/transport/vddk_7_0/lib64/libvixMntapi.so.1.1.0 --trust-file libvixMntapi.so.1.1.0
sudo fapolicyd-cli --file add /opt/veeam/transport/vddk_7_0/lib64/libvmacore.so --trust-file libvmacore.so
sudo fapolicyd-cli --file add /opt/veeam/transport/vddk_7_0/lib64/libvmomi.so --trust-file libvmomi.so
sudo fapolicyd-cli --file add /opt/veeam/transport/vddk_7_0/lib64/libz.so.1 --trust-file libz.so.1
sudo fapolicyd-cli --update
If the Linux server will be used as a Repository, execute the following commands to allow Malware Detection functionality:
sudo fapolicyd-cli --file add /opt/veeam/transport/libRansomwareStats.so --trust-file libRansomwareStats.so
sudo fapolicyd-cli --update
To submit feedback regarding this article, please click this link: Send Article Feedback
To report a typo on this page, highlight the typo with your mouse and press CTRL + Enter.
]]>
<![CDATA[How to Adjust the Veeam Service Provider Console Web UI Session Timeout]]> https://www.veeam.com/kb3170 2024-03-13T00:00:00Z 2024-03-13T00:00:00Z

How to Adjust the Veeam Service Provider Console Web UI Session Timeout

KB ID: 3170
Product: Veeam Service Provider Console | 8.0
Published: 2020-05-07
Last Modified: 2024-03-13

Purpose

This article documents how to modify the Veeam Service Provider Console configuration to adjust the Web UI timeout.

The default Web UI timeout is 1 hour, and tokens are good for up to 48 hours.

Solution

Tip: Use the copy button in the text blocks below to simplify specifying which file to open or parameter to find.
 

Change Session Timeout Parameter

  1. Open Notepad using the "Run as administrator" option.
    Notepad must be launched as an administrator to save the config files after modifying the expiration timeout value.
  2. Open the following file:
C:\Program Files\Veeam\Availability Console\Web UI\appsettings.json
  1. Find the following parameter:
SessionExpirationTime
  1. Set the desired Session Expiration time value and save the file.
    The default is "01:00:00", which represents 1 hour.

    The maximum hour value is 24. To increase the timeout higher than 24 hours, configure the value so that before the hour value is a digit representing the number of days, followed by a full stop ( . ).

    For example, to set the timeout to 36 hours, specify "1.12:00:00" and not "36:00:00"
Expand to view additional steps if setting the SessionExpirationTime longer than 48 hours.
  1. If the SessionExpirationTime was set to two days or more (2.00:00:00 or more), open the following configuration file:
C:\ProgramData\Veeam\Veeam Availability Console\Configuration\Service\configuration.overrides.json
  1. Create a new parameter:
    "Authentication_RefreshTokenExpirationTime": "2.00:00:00",
override
  1. Set the Authentication_RefreshTokenExpirationTime value higher than the SessionExpirationTime value.
    The default Authentication_RefreshTokenExpirationTime is "2.00:00:00", which represents two days.

    For example, if you set SessionExpirationTime to "2.00:00:00" set the refreshTokenExpirationTime value to be "3.00:00:00"
  2. Save the modified configuration.overrides.json file.
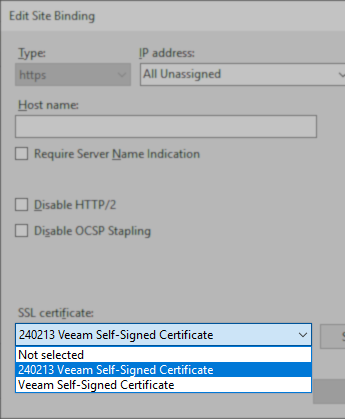
  1. Restart the Veeam Management Portal Service service.

    PowerShell:
Restart-Service VeeamManagementPortalSvc
To submit feedback regarding this article, please click this link: Send Article Feedback
To report a typo on this page, highlight the typo with your mouse and press CTRL + Enter.
]]>
<![CDATA[Granular sudo Permissions Required for Management of Linux-base Tape Server]]> https://www.veeam.com/kb4558 2024-03-11T00:00:00Z 2024-03-11T00:00:00Z

Granular sudo Permissions Required for Management of Linux-base Tape Server

KB ID: 4558
Product: Veeam Backup & Replication | 12.1
Published: 2024-03-11
Last Modified: 2024-03-11

Purpose

This article provides an example of a granular ‘sudo’ configuration for the Linux account that Veeam Backup & Replication will use when managing a Linux-based Tape Server.

Solution

  • The Linux user account used by Veeam Backup & Replication to connect to the Linux-based Tape Server use the bash shell.
  • The Linux account must have either root or root-equivalent permissions. In the latter case, some administrators may prefer to restrict the account used by Veeam Backup & Replication to execute only a specific required list of commands as a sudoer on the target Linux machine. (See example below.)
#MISC 
restricteduser ALL=(root) /usr/bin/id -au
restricteduser ALL=(root) /usr/bin/whoami

#MKDIR
restricteduser ALL=(root) /bin/mkdir -p /opt/veeam

#Check host type
restricteduser ALL=(root) /bin/uname --machine
restricteduser ALL=(root) /bin/uname -r
restricteduser ALL=(root) /bin/ls /etc/exagrid-veeam-version
restricteduser ALL=(root) /bin/ls /tmp/Veeam_enabled
restricteduser ALL=(root) /bin/ls /tmp/Veeam_enabled_Infinidat
restricteduser ALL=(root) /bin/ls /tmp/Veeam_enabled_Fujitsu
restricteduser ALL=(root) /bin/ls /tmp/Veeam_enabled*

#RM
restricteduser ALL=(root) /bin/rmdir /opt/veeam
restricteduser ALL=(root) /bin/rmdir /opt/veeam/Upload
restricteduser ALL=(root) /bin/rm -rf /opt/veeam/deployment*
restricteduser ALL=(root) /usr/bin/rm /opt/veeam/veeaminstaller

#DEPLOYMENT SERVICE
restricteduser ALL=(root) /opt/veeam/deployment/veeamdeploymentsvc --dll-version
restricteduser ALL=(root) /opt/veeam/deployment/veeamdeploymentsvc --get-port
restricteduser ALL=(root) /opt/veeam/deployment/veeamdeploymentsvc --uninstall
restricteduser ALL=(root) /opt/veeam/deployment/veeamdeploymentsvc --set-user restricteduser
restricteduser ALL=(root) /opt/veeam/deployment/veeamdeploymentsvc --disable-restricted-mode
restricteduser ALL=(root) /opt/veeam/deployment/veeamdeploymentsvc --set-base-log-path /var/log/VeeamBackup
restricteduser ALL=(root) /opt/veeam/deployment/veeamdeploymentsvc --restart
restricteduser ALL=(root) /opt/veeam/deployment/veeamdeploymentsvc --get-fingerprint
restricteduser ALL=(root) /opt/veeam/deployment/veeamdeploymentsvc --install 6160
restricteduser ALL=(root) /opt/veeam/deployment/veeamdeploymentsvc --install-server-certificate /tmp/VeeamUpload*/ServerCertificate
restricteduser ALL=(root) /opt/veeam/deployment/veeamdeploymentsvc --install-certificate /tmp/VeeamUpload*/ClientCertificate
restricteduser ALL=(root) /opt/veeam/deployment/veeamdeploymentsvc --set-max-log-size 10485760
restricteduser ALL=(root) /opt/veeam/deployment/veeamdeploymentsvc --set-max-log-count 10
restricteduser ALL=(root) /opt/veeam/deployment/veeamdeploymentsvc --get-bios-uuid

#TRANSPORT
restricteduser ALL=(root) /opt/veeam/transport/veeamtransport --version
restricteduser ALL=(root) /opt/veeam/transport/veeamtransport-link --get-user
restricteduser ALL=(root) /opt/veeam/transport/veeamtransport --disable-restricted-mode
restricteduser ALL=(root) /opt/veeam/transport/veeamtransport-link --set-user root
restricteduser ALL=(root) /bin/ls /opt/veeam/transport/veeamtransport-link
restricteduser ALL=(root) /opt/veeam/transport/veeamtransport-link --set-user restricteduser
restricteduser ALL=(root) /opt/veeam/transport/veeamtransport --set-option BaseLogDirectory --set-option-value /var/log/VeeamBackup
restricteduser ALL=(root) /opt/veeam/transport/veeamtransport --set-option FirewallPortRange --set-option-value *
restricteduser ALL=(root) /opt/veeam/transport/veeamtransport --enable-restricted-mode
restricteduser ALL=(root) /opt/veeam/transport/veeamtransport --set-option MaxLogSize --set-option-value 10485760
restricteduser ALL=(root) /opt/veeam/transport/veeamtransport --set-option MaxLogCount --set-option-value 10
restricteduser ALL=(root) /opt/veeam/transport/veeamtransport --get-port
restricteduser ALL=(root) /opt/veeam/transport/veeamtransport --uninstall
restricteduser ALL=(root) /bin/rm -rf /opt/veeam/transport

#TAPE
restricteduser ALL=(root) /opt/veeam/tapeproxy/veeamtapeproxy --set-owner *
restricteduser ALL=(root) /opt/veeam/tapeproxy/veeamtapeproxy --uninstall
restricteduser ALL=(root) /bin/rm -rf /opt/veeam/tapeproxy

#Additions
restricteduser ALL=(root) /bin/test -d /tmp/
restricteduser ALL=(root) /bin/rm -f /tmp/Veeam*
restricteduser ALL=(root) /bin/touch /tmp/Veeam*
restricteduser ALL=(root) /bin/chmod 0700 /tmp/Veeam*

# Upload and unpack deployer
restricteduser ALL=(root) /usr/bin/chmod 0766 /opt/veeam/Upload/*
restricteduser ALL=(root) /usr/bin/mkdir --parents /opt/veeam/deployment
restricteduser ALL=(root) /usr/bin/mkdir --parents /opt/veeam/Upload/*
restricteduser ALL=(root) /usr/bin/touch /opt/veeam/Upload/*
restricteduser ALL=(root) /bin/touch /tmp/VeeamDeploymentSvc*
restricteduser ALL=(root) /bin/tar xvzf /tmp/VeeamDeploymentSvc* -C /opt/veeam/deployment --no-same-owner
restricteduser ALL=(root) /bin/cp -f /home/restricteduser/* /tmp/VeeamDeploymentSvc*
restricteduser ALL=(root) /bin/chmod 0644 /tmp/VeeamDeploymentSvc*
restricteduser ALL=(root) /bin/cp -f /home/restricteduser/* /opt/veeam/Upload/*
restricteduser ALL=(root) /usr/bin/rm -f /tmp/VeeamDeploymentSvc*
restricteduser ALL=(root) /bin/rm -rf /opt/veeam/Upload/*
restricteduser ALL=(root) /bin/ls -d /opt/veeam/deployment

# Set rights
restricteduser ALL=(root) /bin/chown -hR root /opt/veeam/deployment
restricteduser ALL=(root) /bin/find /opt/veeam/deployment -type d
restricteduser ALL=(root) /bin/chmod 755 /opt/veeam/*
restricteduser ALL=(root) /bin/find /opt/veeam/deployment -type f -not -path /opt/veeam/deployment/veeamdeploymentsvc
restricteduser ALL=(root) /bin/chmod 644 /opt/veeam/deployment/*
restricteduser ALL=(root) /bin/chmod 744 /opt/veeam/deployment/veeamdeploymentsvc
To submit feedback regarding this article, please click this link: Send Article Feedback
To report a typo on this page, highlight the typo with your mouse and press CTRL + Enter.
]]>
<![CDATA[Google Cloud VMware Engine (GCVE) Support Statement]]> https://www.veeam.com/kb3178 2024-03-08T00:00:00Z 2024-03-08T00:00:00Z

Google Cloud VMware Engine (GCVE) Support Statement

KB ID: 3178
Product: Veeam Backup & Replication | 12.1
Published: 2020-05-12
Last Modified: 2024-03-08

Support Statement

Google Cloud VMware Engine (GCVE) is a fully compliant and certified full-stack cloud infrastructure sold and supported by Google. You can natively deploy VMware vSphere-based workloads in a dedicated Software-Defined Data Center (SDDC) on Google Cloud and utilize the same applications, tools, processes, and policies you use today for your on-premises infrastructure. This environment requires no specific preparations to allow Veeam Backup & Replication 12.1 or later to work with it. You can utilize Veeam Backup & Replication with GCVE to back up, restore, and replicate VM workloads (both CDP and Snapshot-based replication are supported), just as you would any other vSphere environment.

GCVE operates the service using standard VMware vSphere, vSAN, and NSX versions. In addition, general compatibility is ensured for any Veeam Backup & Replication version that supports the vSphere version used by GCVE.

Note: To ensure that all functionality is available, please set up one of the Solution User accounts, which are intended for third-party products to interact with VMware.

To submit feedback regarding this article, please click this link: Send Article Feedback
To report a typo on this page, highlight the typo with your mouse and press CTRL + Enter.
]]>
<![CDATA[Release Information for Veeam Backup & Replication 11a Cumulative Patches]]> https://www.veeam.com/kb4245 2024-03-07T00:00:00Z 2024-03-07T00:00:00Z

Release Information for Veeam Backup & Replication 11a Cumulative Patches

KB ID: 4245
Product: Veeam Backup & Replication | 11
Published: 2021-11-26
Last Modified: 2024-03-14
This update has been superseded by Veeam Backup & Replication 12.

Requirements

Before installing this Cumulative Patch using the Patch Installer, please confirm that you are running Veeam Backup & Replication 11a (build 11.0.1.1261) with or without earlier patches. You can check the installed build number in the Veeam Backup & Replication Console's Main Menu (≡) under Help > About. After the upgrade, your build number will be 11.0.1.1261 P20240304.


If you are running any Veeam Backup & Replication version between 9.5 U4b (9.5.4.2866) and 11 (11.0.0.837 P20210525), you must use the ISO below to upgrade to version 11a P20230227. Remember to review the Upgrade Checklist as part of your upgrade process.

Resolved Issues

This cumulative patch includes the following new features, enhancements and fixes for the original V11a builds:

P20240304

Intended Audience for this Update
As of March 1st 2024, version 11a is no longer supported. This update (P20240304) is provided as a courtesy to customers who, for whatever reason, wish to continue using Veeam Backup & Replication 11a for an extended time.

IMPORTANT:
If you choose to install this 11a update, you will not be able to upgrade to version 12.1 until the next minor update is available (12.1.2 scheduled to be released in Q2 2024).
Component Upgrades

Third-Party Components

The following components were upgraded to their latest versions for Veeam Backup & Replication, and all Veeam Agents included in the installation package:

Direct Restore to Cloud

  • The images used by Restore to Amazon EC2 for the following OSes have been updated to their latest builds:
    • Microsoft Windows Server 2019
    • Microsoft Windows Server 2022
    • Ubuntu 20.04

Veeam Agent for Linux 5

  • Extended supported Linux kernel range to 2.6.32 through 6.6.
  • Added support for the following Linux distributions: RHEL 8.9 & 9.3, openSUSE 15.5, SLES 15 SP5, Ubuntu 23.10, and Debian 12.
Resolved Issues

General

  • A retention processing bug may subsequently lead to a backup job failing with the error:
    Full storage not found
    
  • Replication jobs may fail due to the AUX data overflow when processing VMs with large Microsoft SharePoint servers.

Direct Restore to Cloud

  • Restore to Google Cloud Platform fails when the default VPC networks are missing.
  • Restore to Microsoft Azure may fail due to issues with disk allocation.
  • Restore to Microsoft Azure may fail due to a transport agent terminating unexpectedly when restoring from backups on the object storage repository.

Microsoft Hyper-V

  • After a SureBackup job is completed, temporarily created VMs remain listed with a "Missing" status within SCVMM.
  • In rare circumstances, additional licenses were consumed for the same machine processed by two different backup servers managed by Veeam Backup Enterprise Manager.
  • Slow guest credential testing for Hyper-V VMs managed by SCVMM.

Backup Copy

  • Backup Copy Jobs operating in periodic copy mode may not release repository task slots, preventing other tasks from starting.
  • Backup Copy Jobs operating in immediate copy mode consume excessive resources.

Tape

  • An incremental NDMP job run on a small data set may fail with the following error:
    Failed to find NDMP environment variable
    
  • A connection drop occurring when a Backup to Tape job is exchanging tapes causes the job to fail with:
    Session key set is null
    
  • Backup to Tape jobs may freeze during the backup infrastructure resource allocation step.

Scale-Out Backup Repository (SOBR)

  • Enterprise Application Plug-In jobs fail due to inaccurate reporting of free space on SOBR extents.
  • Offloading backups from the Capacity to the Archive tier may fail with the following error:
    Target FIB already exists
    
  • Capacity Tier rescan fails when multiple copies of the same Plug-in for Microsoft SQL Server backup are present.
  • Connections to Amazon Glacier Archive Repositories are not proxied through the assigned gateway server.
  • Under certain circumstances, the capacity tier offload task may fail with the following error
    Error: Array dimensions exceeded supported range
    
  • The capacity tier offload task gets stuck when attempting to process orphaned backups.
  • In rare situations, the immutability of inactive backup chains is erroneously prolonged when it’s no longer needed.
  • Under certain circumstances, the backup server may overflow Amazon S3 and S3-compatible object storage with empty metadata files.
  • Slow enumeration performance for buckets containing more than 1000 backups.

Security

  • Veeam.Backup.ProxyProvider.dll does not pass the Strong Name Validation.
  • Backup server vulnerabilities: API Endpoints on port 9393 are accessible by users without any roles assigned on the backup server; DbProviderApi access control issue.
  • Veeam Backup Enterprise Manager vulnerabilities: REST API path traversal, access control issues for /api/FailoverPlans/getAll, Content-Security-Policy misconfiguration.

Veeam Cloud Connect

  • Jobs to cloud repository may fail with the following error:
    The string universal unique identifier (UUID) is invalid
    

NAS Backup

  • The “restore attributes” function does not restore the original attributes when using a NAS backup copy restore point as a source.
  • Some Backup I/O Control functionality settings may use more proxy resources than intended.
  • Rescanning NetApp Filer with a share name containing the ampersand (&) symbol fails with the following error:
    Unexpected end of file has occurred
    

Storage Integration

  • Storage snapshot cloning fails for NimbleOS version 6.1.2.0 and later.
  • Backup job from storage snapshots fails with the following error:
    Failed to parse block info XML document
    

VMware Cloud Director

  • Poor performance of quota management and resource allocation operations in large multi-tenant environments.
  • Under certain circumstances, backup jobs may get stuck at 99% completion.

Veeam Plug-ins for Enterprise Applications

  • On AIX systems, Veeam Plug-in for Oracle RMAN erroneously applies network throttling to networks not specified in the global network traffic throttling rules.

Veeam Backup for AWS

  • Excessive backup server resource consumption due to Veeam Backup for AWS not terminating Agent.PublicCloud.Satellite processes.

P20230227

  • Vulnerability (CVE-2023-27532) in Veeam Backup Service was fixed.
    This vulnerability was reported by Shanigen.

P20220302

P20211211

  • Microsoft Windows 11 and Microsoft Windows 10 21H2 support as guest OS, Hyper-V hosts (as a target for Instant Recovery and SureBackup), for installation of Veeam Backup & Replication components, and for agent-based backup with Veeam Agent for Microsoft Windows 5.0.2 (included in P20211211).
  • RHEL/CentOS/Oracle Linux 8.5, Ubuntu 21.10, Fedora 35 distributions are now supported as the guest OS for the installation of Veeam Backup & Replication components and for agent-based backup with Veeam Agent for Linux 5.0.2 (included in  P20211211). The latter also supports Linux kernel up to version 5.16 and no longer requires installing the linux-image-<version>-dbg package on Debian 11.
  • Oracle Database 21c support by application-aware processing of image-level backup including redo log backup, by Veeam Plug-in for Oracle RMAN 11.0.101.1264 (included in P20211211) and by Veeam Explorer for Oracle.
  • RHEL 8.4 for SAP Solutions and SLES 15 SP3 for SAP Applications support by Veeam Plug-in for SAP HANA.
  • VMware Carbon Black compatibility for vSphere VMs processing.
  • LTO-9 support. Tape jobs will now identify and display the media calibration process in the Action log and will no longer time out should this process takes longer than 15 minutes.
  • Platform: added API extensions enabling Kasten K10 integration and configuration backup/restore for upcoming versions of Veeam Backup for AWS/Azure/GCP; deleting cloud-native backup appliance will no longer delete the corresponding external repositories to facilitate configuration backup restore.
  • SOBR Capacity Tier: increased timeout for certain long-running object storage operations (like clean up) to 25 hours; fixed the root causes behind offload failures with “Block not found”, “The INSERT statement conflicted with the FOREIGN KEY constraint” and “No recovery record was found for storage key” errors.
  • Tape: fixed NDMP performance regression introduced in 11a; added support for Kasten K10 backups and backup copies to Backup to Tape jobs as well as support for restoring such backups from tape.
  • Microsoft Azure: region settings have been moved into the configuration file to allow for enabling Archive Tier functionality there as Microsoft rolls out the Archive Storage class to additional regions.
  • Microsoft Hyper-V: the presence of an empty SCVMM tag should no longer cause various issues in the related functionality; VMs from nested HostGroups should no longer be skipped from processing; application-aware processing failures on VMs with a very large number of network adapters.
  • VMware Cloud Director: the new plug-in version 11.1.7 adds support for: deployment with a very large number of organizations; LDAP-integrated users with multiple roles; installation side by side with other data protection plug-ins; browsers with the locale set to a language not present in the language picker.
  • Veeam Cloud Connect: evacuating backups of a particular tenant should no longer lock the entire SOBR extent preventing other tenants from accessing their backups; encrypted tenant backups should now be correctly unpublished following the restore from Archive Tier; tenants should again be presented with a choice of keeping or removing their replicas when removing cloud hosts.

P20211123

  • Scale-out backup repository (SOBR): initiating SOBR rescan with one of Performance Tier extents being in maintenance mode, and taking said extent out of the maintenance mode at the specific moment of the Rescan process results in all backup files on this extent replaced with stubs downloaded from Capacity Tier.
  • SOBR Capacity Tier: under certain circumstances,  copy/offload to Capacity Tier starts failing with the “Attempt to overwrite existing non-sparse block version” error.
  • SOBR Archive Tier: a rare situation involving an interruption or a failure of the S3 API call to object storage during the specific operation may place Capacity Tier into a state resulting in further Archive Tier offload attempts failing with the “Specified key does not exist” error.
  • Email notifications: backup job email notifications are missing information about datastores with a lack of free disk space.
  • User interface: some UI nodes may show outdated job status information, requiring users to press F5 to refresh the view and actualize it.
  • HPE StoreOnce: updated HPE StoreOnce Catalyst library to version 4.2.4, which includes a fix from intermittent “Pipeline hanged” errors when reading data from the corresponding backup repository.

Known Issues

Please consider the following prior to installing the cumulative patch:
  • Veeam Agent for Linux: version 5.0.2 comes with veeamsnap kmod/kmp modules signed with a renewed certificate. Following the agent upgrade, you must update veeamsnap-ueficert package and enroll the new certificate to UEFI MOK, otherwise the module will fail to load. This applies only to RHEL/CentOS and SLES/openSUSE machines with UEFI SecureBoot enabled.
  • Veeam Cloud Connect: backup and backup copy jobs containing Windows 11 Hyper-V VMs and Kasten K10 backups will start failing for tenants if they install P20211211 before their service provider.


Solution

This update has been superseded by Veeam Backup & Replication 12.
If version 11a (11.0.1.x) is already installed, download and run the following patch on the Veeam Backup Server to update to the latest Cumulative Patch:
DOWNLOAD P20240304

Filename: VeeamBackup&Replication_11.0.1.1261_20240305.zip
MD5: EAB8AC6B5CFB010CE9510E08CE89D303
SHA1: 594419A9004601C3C40E0D2617AABD801B2EE951
 
As of March 1st 2024, version 11a is no longer supported. This update (P20240304) is provided as a courtesy to customers who, for whatever reason, wish to continue using Veeam Backup & Replication 11a for an extended time.

IMPORTANT:
If you choose to install this 11a update, you will not be able to upgrade to version 12.1 until the next minor update is available (12.1.2 scheduled to be released in Q2 2024).

Note: If you were provided a hotfix by Veeam Support in the past year, this patch (11.0.1.1261 P20240304) may remove them. Consider upgrading to the latest version of Veeam Backup & Replication instead, or contact support for assistance.
For new installations and upgrades from previous versions, use the following ISO, which has the most recent Cumulative Patch built-in:
Upgrading from 9.5 or 10 on your way to 12.1?

If you are running version 9.5.0.1536 - 9.5.4.2866 or 10.0.0.4461 and are planning to upgrade to version 12, do not use this ISO. This version of Veeam Backup & Replication 11a will not allow an upgrade to version 12.1 until 12.1.2 is released.

Instead, you should download the Veeam Backup & Replication 10a ISO to upgrade to 10a, and then upgrade directly to Veeam Backup & Replication 12.1.1.

Reboot may be required

Please note that a reboot may be required after installing the update. 

Please plan accordingly.

To submit feedback regarding this article, please click this link: Send Article Feedback
To report a typo on this page, highlight the typo with your mouse and press CTRL + Enter.
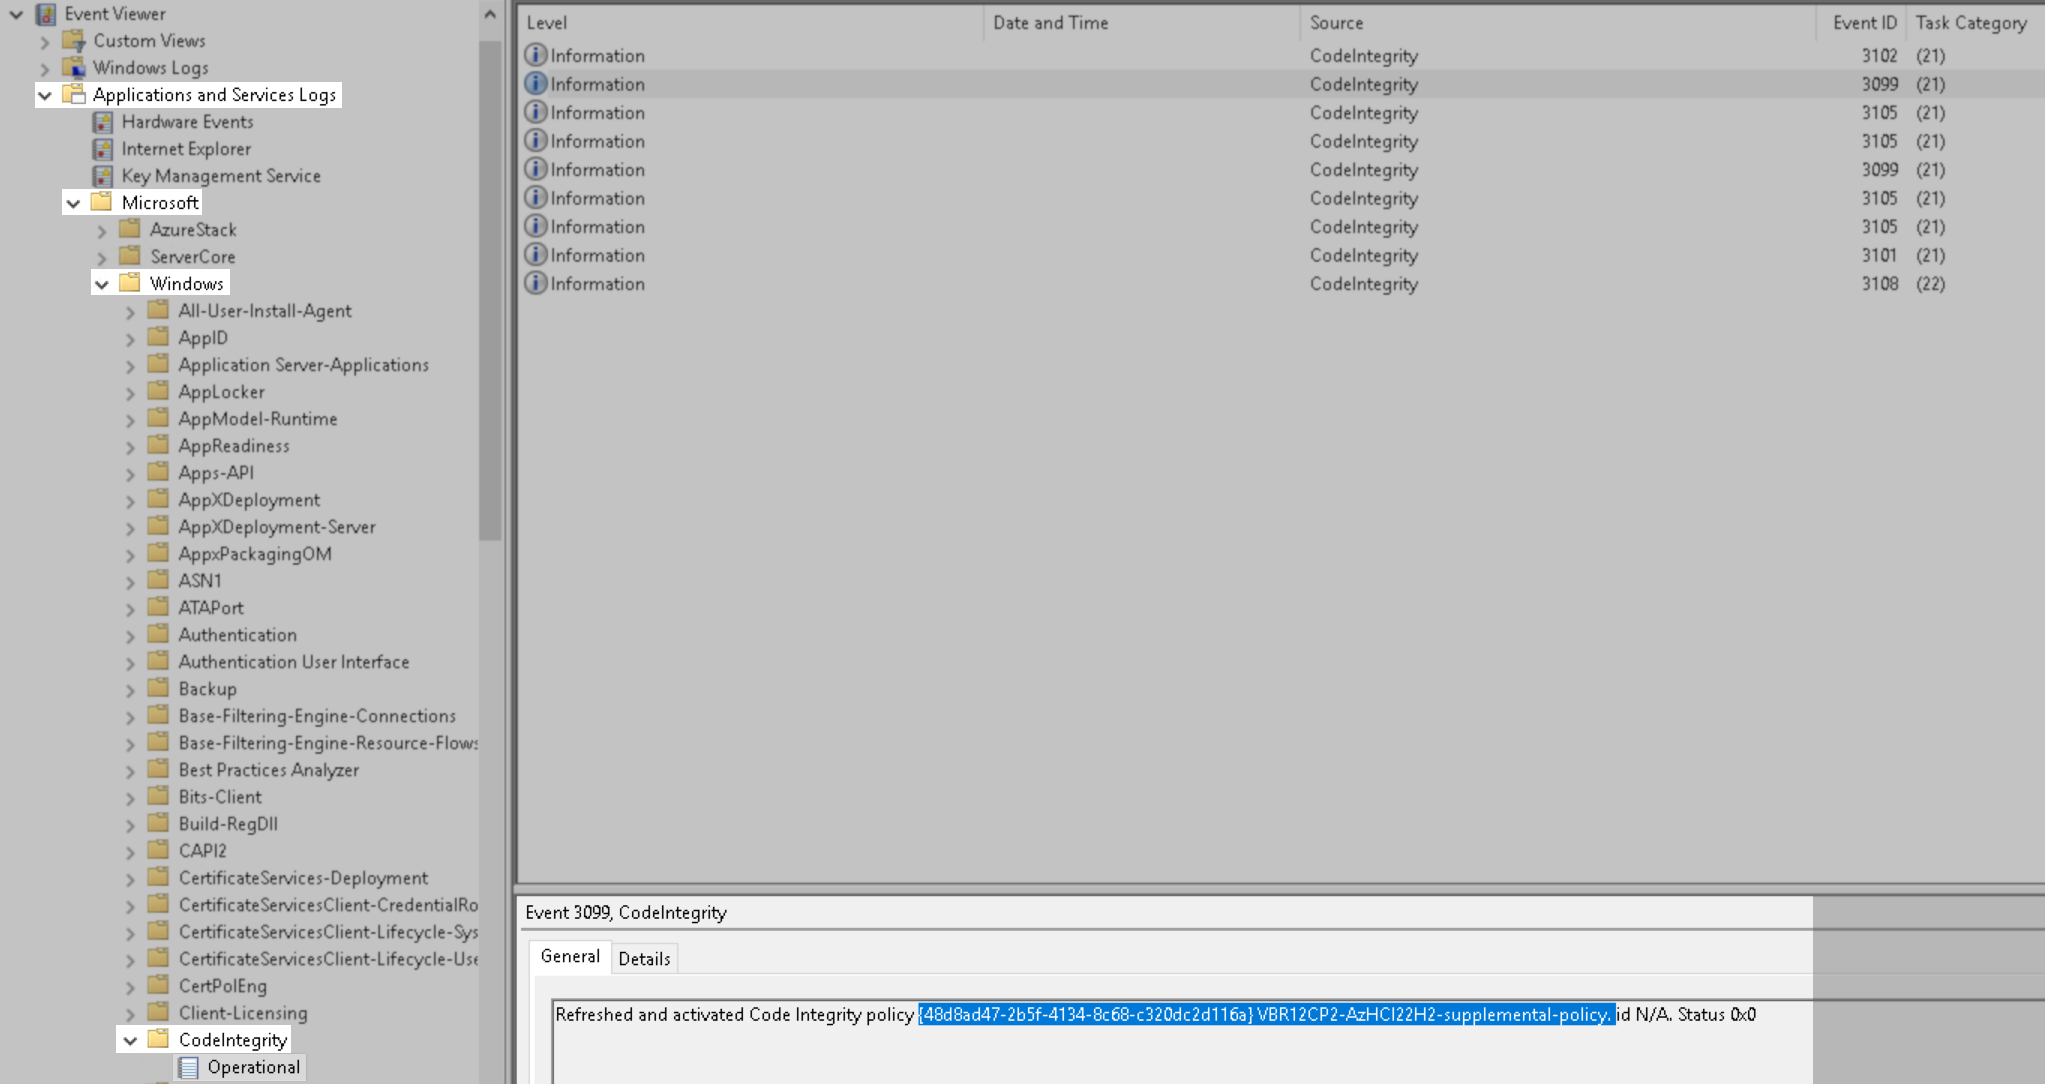
]]>
<![CDATA[Build Numbers and Versions of Veeam Backup & Replication]]> https://www.veeam.com/kb2680 2024-03-07T00:00:00Z 2024-03-07T00:00:00Z

Build Numbers and Versions of Veeam Backup & Replication

KB ID: 2680
Product: Veeam Backup & Replication | 5.0 | 6.1 | 6.5 | 7.0 | 8.0 | 9.0 | 9.5 | 10 | 11 | 12 | 12.1
Veeam Cloud Connect | 8.0 | 9.0 | 9.5 | 10 | 11 | 12
Published: 2018-07-09
Last Modified: 2024-03-13

This KB article lists all versions of Veeam Backup & Replication and their respective build numbers.

For more information on downloading the latest version of Veeam Backup & Replication, visit:

Version Build Number Release Date Release Notes
Veeam Backup & Replication 12 Releases
Veeam Backup & Replication 12.1.1 12.1.1.56 2024-01-17 KB4510
Veeam Backup & Replication 12.1 12.1.0.2131 2023-12-05 PDF
Veeam Backup & Replication 12 P20230718 12.0.0.1420 P20230718 2023-07-20 KB4420
Veeam Backup & Replication 12 P20230412 12.0.0.1420 P20230412 2023-04-14
Veeam Backup & Replication 12 P20230223 12.0.0.1420 P20230223 2023-03-07
Veeam Backup & Replication 12 GA 12.0.0.1420 2023-02-14 PDF
Veeam Backup & Replication 12 RTM 12.0.0.1402 2023-01-30 -
Veeam Backup & Replication 11 Releases
Veeam Backup & Replication 11a P20240304 11.0.1.1261 P20240304 2024-03-07 KB4245
Veeam Backup & Replication 11a P20230227 11.0.1.1261 P20230227 2023-03-07
Veeam Backup & Replication 11a P20220302 11.0.1.1261 P20220302 2022-03-12
Veeam Backup & Replication 11a P20211211 11.0.1.1261 P20211211 2021-12-22
Veeam Backup & Replication 11a P20211123 11.0.1.1261 P20211123 2021-11-26
Veeam Backup & Replication 11a GA 11.0.1.1261 2021-10-07

PDF

KB4215

Veeam Backup & Replication 11a RTM 11.0.1.1261 2021-09-24 -
Veeam Backup & Replication 11 P20210525
11.0.0.837 P20210525
2021-06-05
KB4126
Veeam Backup & Replication 11 P20210507 11.0.0.837 P20210507 2021-05-12
Veeam Backup & Replication 11 P20210401 11.0.0.837 P20210401 2021-04-01
Veeam Backup & Replication 11 P20210324 11.0.0.837 P20210324 2021-03-24
Veeam Backup & Replication 11 P20210319 11.0.0.837 P20210319 2021-03-23
Veeam Backup & Replication 11 GA 11.0.0.837 2021-02-24 PDF
Veeam Backup & Replication 11 RTM 11.0.0.825 2021-02-11 -
Veeam Backup & Replication 10 Releases
Veeam Backup & Replication 10a P20220304 10.0.1.4854 P20220304 2022-03-12 KB4291
Veeam Backup & Replication 10a CU 20210609 10.0.1.4854 P20210609 2021-06-10 KB4180
Veeam Backup & Replication 10a CU 20201202 10.0.1.4854 P20201202 2020-12-02 KB4050
Veeam Backup & Replication 10a GA 10.0.1.4854 2020-07-30 KB3228
Veeam Backup & Replication 10a RTM 10.0.1.4848 2020-07-20 -
Veeam Backup & Replication 10 P2 10.0.0.4461 P2 2020-05-27 KB3161
Veeam Backup & Replication 10 P1 10.0.0.4461 P1 2020-04-02 KB3127
Veeam Backup & Replication 10 GA 10.0.0.4461 2020-02-18 PDF
Veeam Backup & Replication 10 RTM 10.0.0.4442 2020-02-04 -
Veeam Backup & Replication 9.5 Releases
Veeam Backup & Replication 9.5 U4b GA 9.5.4.2866 2019-07-15 KB2970
Veeam Backup & Replication 9.5 U4a GA 9.5.4.2753 2019-03-26 KB2926
Veeam Backup & Replication 9.5 U4 GA 9.5.4.2615 2019-01-22 KB2878
Veeam Backup & Replication 9.5 U4 RTM 9.5.4.2399 2018-12-28 --
Veeam Backup & Replication 9.5 U3a 9.5.0.1922 2018-07-02 KB2646
Veeam Backup & Replication 9.5 U3 9.5.0.1536 2017-12-18 KB2353
Veeam Backup & Replication 9.5 U2 9.5.0.1038 2017-05-12 KB2283
Veeam Backup & Replication 9.5 U1 9.5.0.823 2017-01-20 KB2222
Veeam Backup & Replication 9.5 U1 RC 9.5.0.802 - -
Veeam Backup & Replication 9.5 GA 9.5.0.711 2016-11-16 PDF
Veeam Backup & Replication 9.5 RTM 9.5.0.580 - -
Veeam Backup & Replication 9.0 Releases
Veeam Backup & Replication 9.0 U2 9.0.0.1715 2016-08-05 KB2147
Veeam Backup & Replication 9.0 U1 9.0.0.1491 2016-03-24 KB2114
Veeam Backup & Replication 9.0 GA 9.0.0.902 2016-01-12 -
Veeam Backup & Replication 9.0 RTM 9.0.0.773 - -
Veeam Backup & Replication 8 Releases
Veeam Backup & Replication 8.0 U3 8.0.0.2084 2015-10-08 KB2068
Veeam Backup & Replication 8.0 U2b 8.0.0.2030 2015-04-28 KB2024
Veeam Backup & Replication 8.0 U2a 8.0.0.2029 - -
Veeam Backup & Replication 8.0 U2 GA 8.0.0.2021 - -
Veeam Backup & Replication 8.0 U2 RTM 8.0.0.2018 - -
Veeam Backup & Replication 8.0 P1 8.0.0.917 2014-12-25 KB1982
Veeam Backup & Replication 8.0 GA 8.0.0.817 2014-11-06 -
Veeam Backup & Replication 8.0 RTM 8.0.0.807 - -
Veeam Backup & Replication 7 Releases
Veeam Backup & Replication 7.0 P4a 7.0.0.871 2014-06-05 KB1891
Veeam Backup & Replication 7.0 P4 7.0.0.870 - -
Veeam Backup & Replication 7.0 P3a 7.0.0.839 2014-02-13 KB1854
Veeam Backup & Replication 7.0 P3 7.0.0.833 - -
Veeam Backup & Replication 7.0 R2a 7.0.0.771 2013-11-13 KB1831
Veeam Backup & Replication 7.0 R2 7.0.0.764 - -
Veeam Backup & Replication 7.0 P1 7.0.0.715 2013-09-30 KB1823
Veeam Backup & Replication 7.0 GA 7.0.0.690 2013-08-20 -
Veeam Backup & Replication 6.5 Releases
Veeam Backup & Replication 6.5 P3 6.5.0.144 2013-04-29 KB1751
Veeam Backup & Replication 6.5 P1 6.5.0.128 2012-12-24 KB1714
Veeam Backup & Replication 6.5 GA 6.5.0.109 2012-10-09 -
Veeam Backup & Replication 6.5 RTM 6.5.0.106 - -
Veeam Backup & Replication 6.1 Releases
Veeam Backup & Replication 6.1 P1a 6.1.0.205 2012-08-15 KB1671
Veeam Backup & Replication 6.1 P1 6.1.0.204 - -
Veeam Backup & Replication 6.1 GA 6.1.0.181 2012-06-04 -
Veeam Backup & Replication 6.0 Releases
Veeam Backup & Replication 6.0 P3 6.0.0.181 2011-12-14 KB1442
Veeam Backup & Replication 6.0 P2 6.0.0.164 - -
Veeam Backup & Replication 6.0 P1 6.0.0.158 - -
Veeam Backup & Replication 6.0 GA 6.0.0.153 2011-08-22 -
Veeam Backup & Replication 5 Releases
Veeam Backup & Replication 5.0 R3 Final 5.0.2.230 - -
Veeam Backup & Replication 5.0 R3 5.0.2.224 - -
Veeam Backup & Replication 5.0 R2 5.0.1.198 - -
Veeam Backup & Replication 5.0 RTM 5.0.0.179 2010-08-30 -
Veeam Backup & Replication 4 Releases
Veeam Backup & Replication 4.1.2 4.1.2.125 2010-08-04 -
Veeam Backup & Replication 4.1 R2 P1 4.1.1.105 - -
Veeam Backup & Replication 4.1 R2 4.1.0.96 - -
Veeam Backup & Replication 4.0 GA 4.0.0.80 - -
Swipe to show more of the table
To submit feedback regarding this article, please click this link: Send Article Feedback
To report a typo on this page, highlight the typo with your mouse and press CTRL + Enter.
]]>
<![CDATA[Build Numbers and Versions of Veeam Service Provider Console]]> https://www.veeam.com/kb4464 2024-03-04T00:00:00Z 2024-03-04T00:00:00Z

Build Numbers and Versions of Veeam Service Provider Console

KB ID: 4464
Product: Veeam Availability Console | 2.0 | 2.0_U1 | 3.0
Veeam Service Provider Console | 4.0 | 5.0 | 6.0 | 7.0 | 8.0
Published: 2023-06-16
Last Modified: 2024-03-04

This KB article lists all versions of Veeam Service Provider Console and their respective build numbers.

For more information on downloading the latest version of Veeam Service Provider Console, visit:

Note: Prior to version 4, the product was known as Veeam Availability Console.
Note: Prior to version 2, the product was known as Veeam Managed Backup Portal.
Version Build Number Release Date Release Notes
Veeam Service Provider Console 8 Releases
Veeam Service Provider Console 8 CP1 8.0.0.18054 2024-03-04 KB4509
Veeam Service Provider Console 8 8.0.0.16877 2023-12-05 PDF
Veeam Service Provider Console 7 Releases
Veeam Service Provider Console 7 P20230531 7.0.0.14271 2023-06-05 KB4441
Veeam Service Provider Console 7 P20230321 7.0.0.13157 2023-03-21
Veeam Service Provider Console 7 GA 7.0.0.12777 2023-01-30 PDF
Veeam Service Provider Console 6 Releases
Veeam Service Provider Console 6 Patch 1 6.0.0.8787 2022-02-02 KB4277
Veeam Service Provider Console 6 GA 6.0.0.7739 2021-09-27 PDF

KB4212
Veeam Service Provider Console 5 Releases
Veeam Service Provider Console 5 Patch 4 5.0.0.7151 2021-10-12 KB4223
Veeam Service Provider Console 5 Patch 3 5.0.0.6959 2021-05-22 KB4163
Veeam Service Provider Console 5 Patch 2 5.0.0.6883 2021-03-25 KB4127
Veeam Service Provider Console 5 Patch 1 5.0.0.6838 2021-03-03 KB4116
Veeam Service Provider Console 5 GA 5.0.0.6726 2021-02-24 PDF

KB4111
Veeam Service Provider Console 4 Releases
Veeam Service Provider Console 4 Patch 2 4.0.0.4914 2020-07-23 KB3237
Veeam Service Provider Console 4 Patch 1 4.0.0.4911 2020-07-03 KB3211
Veeam Service Provider Console 4 GA 4.0.0.4877 2020-03-31 PDF

KB3040
Veeam Availability Console 3 Releases
Veeam Availability Console 3 Patch 4 3.0.0.2795 2020-01-23 KB3036
Veeam Availability Console 3 Patch 3 3.0.0.2762 2019-09-20 KB3003
Veeam Availability Console 3 Patch 2 3.0.0.2725 2019-06-17 KB2960
Veeam Availability Console 3 Patch 1 3.0.0.2703 2019-04-11 KB2934
Veeam Availability Console 3 GA 3.0.0.2647 2019-03-28 PDF
Veeam Availability Console 2 Update 1 Releases
Veeam Availability Console 2 U1 Patch 1913 2.0.2.1913 2018-12-21 KB2835
Veeam Availability Console 2 U1 Patch 1850 2.0.2.1850 2018-11-15 KB2795
Veeam Availability Console 2 U1 Patch 1824 2.0.2.1824 2018-10-05 KB2781
Veeam Availability Console 2 U1 Patch 1817 2.0.2.1817 2018-08-30 KB2715
Veeam Availability Console 2 U1 Patch 1807 2.0.2.1807 2018-07-30 KB2694
Veeam Availability Console 2 U1 GA 2.0.2.1750 2018-06-19 PDF
Veeam Availability Console 2 Releases
Veeam Availability Console 2 Cumulative Patch 1376 2.0.1.1376 2017-12-21 KB2418
Veeam Availability Console 2 GA 2.0.1.1319 2017-11-14 PDF
Veeam Managed Backup Portal 1 Releases
Veeam Managed Backup Portal 1 1.0.0.295 2016-03-24 -
Swipe to show more of the table
To submit feedback regarding this article, please click this link: Send Article Feedback
To report a typo on this page, highlight the typo with your mouse and press CTRL + Enter.
]]>
<![CDATA[How to Offload Backup Files to Capacity and Archive Tiers via Azure Blob Private Endpoints]]> https://www.veeam.com/kb4373 2024-03-04T00:00:00Z 2024-03-04T00:00:00Z

How to Connect to an Object Storage Repository via Azure Blob Private Endpoints

KB ID: 4373
Product: Veeam Backup & Replication | 11 | 12 | 12.1
Published: 2023-01-10
Last Modified: 2024-03-06

Purpose

This article documents how to configure Veeam Backup & Replication to use Azure Blob Storage Account private endpoints (via Azure VPN or Azure ExpressRoute) for Scale-Out Backup Repository offload to Capacity Tier or Archive Tier or to connect to an Object Storage Repository in Veeam Backup & Replication 12 or newer.

Solution

The Veeam Backup Server and the Archiver Appliance must have access to CRLs used by Azure over port 80.

Prepare the Azure Environment

  1. (If using ExpressRoute, skip to Step 2.) For Azure Blob Private Endpoint support, configure a site-to-site or point-to-site Azure VPN connection to the virtual network required.
    1. For VPN support, create a virtual network gateway, of type VPN. Give it an instance name and region to match the virtual network you plan to use for the storage account, public IP address name, and the availability zone. It is assumed if you're using Azure ExpressRoute that you have configured this prior.
    2. Under ↔ Point-to-site configuration, select Configure now. You'll need to generate a certificate using PowerShell for your connection. Specify an address pool, select IKEv2 and OpenVPN (SSL) as your tunnel type, and for authentication type, choose Azure certificate, uploading the root certificate contents.
    3. ↓ Download VPN client and install this and the corresponding client certificate on the backup repository gateway servers that will be communicating with Azure Blob. If you have not specified a gateway server, all scale-out backup repository extents must have access.
  2. Create a storage account with a private endpoint. Make sure you use supported options and create a container to use.
    1. To disable public access for an existing storage account, select Networking > Firewall and virtual networks and ensure public network access is disabled. If you need to access Azure Blob from another resource without using a private endpoint, for example, to see container contents in the Azure Portal you will need to choose enabled for selected virtual networks and IP addresses instead.
    2. Under Networking > Private endpoint connections, click add a + Private endpoint.
      • Under Basics, enter a name and network interface name.
      • For Resource, target sub-resource select blob.
      • For Virtual Network, select the virtual network you want to associate. You can statically or dynamically allocate an IP address. In these instructions, we’ll be using a static IP address.
      • For DNS, make sure you’ve selected ◉ Yes to integrate with DNS zone.
  1. Ensure your backup repository gateway servers can resolve the private endpoint via DNS or add the IP address to your hosts file. If you go to the private endpoint in Azure under DNS configuration, you should be able to see a private link entry that points to the specific IP address. This is required to support Azure Archive Tier as Veeam Backup & Replication Azure Proxy Appliances are deployed dynamically.

Prepare the Veeam Backup & Replication Environment

  1. If the Object Storage Repoistory you are adding will be used as an Archive Tier for Scale-Out Backup Repository, and want to ensure that the Archive Appliance communicates via a private IP address, add the following registry value on the Veeam Backup & Replication server:

    Key Location: HKLM\Software\Veeam\Veeam Backup and Replication
    Value Name: ArchiveFreezingUsePrivateIpForAzureAppliance
    Value Type: DWORD (32-Bit) Value
    Value Data: 1

    1 = Enable using Private IP | 0 = Disable

    PowerShell cmdlet to create  the registry value and enable the setting:
New-ItemProperty -Path 'HKLM:\SOFTWARE\Veeam\Veeam Backup and Replication\' -Name 'ArchiveFreezingUsePrivateIpForAzureAppliance' -Value "1" -PropertyType DWORD -Force
  1. To configure the Helper Appliance used for Object Storage Repository Health Checks to use the private IP address, add the following registry value on the Veeam Backup Server:

    Key Location: HKLM\SOFTWARE\Veeam\Veeam Backup and Replication
    Value Name: ArchiveUsePrivateIpForAzureHelperAppliance
    Value Type: DWORD (32-Bit) Value
    Value Data: 1

    1 = Enable Archive Appliance use Private IP | 0 = Disable (Default)

    PowerShell cmdlet to create the registry value and enable the setting:
New-ItemProperty -Path 'HKLM:\SOFTWARE\Veeam\Veeam Backup and Replication\' -Name 'ArchiveUsePrivateIpForAzureHelperAppliance ' -Value "1" -PropertyType DWORD -Force

Add Object Storage Repository

Add your Azure object storage account to Veeam Backup & Replication.

  1. Under credentials, add the account and shared key, select Azure Global, and click next.
  2. Select or create a folder under an existing container and click next.
  3. All traffic to this Azure storage account should flow via your private endpoint.
To submit feedback regarding this article, please click this link: Send Article Feedback
To report a typo on this page, highlight the typo with your mouse and press CTRL + Enter.
]]>
<![CDATA[How to Connect to an Object Storage Repository via Google Cloud Private Access]]> https://www.veeam.com/kb4324 2024-03-04T00:00:00Z 2024-03-04T00:00:00Z

How to Connect to an Object Storage Repository via Google Cloud Private Access

KB ID: 4324
Product: Veeam Backup & Replication | 12 | 12.1
Published: 2022-06-14
Last Modified: 2024-03-04

Purpose

This article documents how to configure Veeam Backup & Replication to use Google Cloud Private Access to connect to a GCS bucket instead of the public IPs for Scale-Out Backup Repository offload to Capacity Tier or Archive Tier or to connect to an Object Storage Repository in Veeam Backup & Replication 12 or newer.

Connectivity from on-premises to private access can be accomplished via Cloud VPN or Direct/Partner Interconnects to Google Cloud, and Private Access enabled on the VPC Subnet.

Note: Backup repository servers located in GCE need to be on a VPC Subnet where Private Access is enabled. 

Solution

Prepare the Google Cloud Environment

  1. Make sure the VPC Subnet(s) that traffic will traverse have Private Google Access enabled:
Enable Private Google Access

Prepare the On-Prem DNS

  1. Configure DNS servers used by repository servers to have a zone for googleapis.com.
  2. Create DNS A Records for private.googleapis.com pointing to 199.36.153.8, 199.36.153.9, 199.36.153.10, 199.36.153.11. 
  3. Set up a CNAME record for *.googleapis.com to point to private.googleapis.com.
DNS Config
  1. For repository servers on-premises, ensure the CloudVPN or Cloud Interconnect uses dynamic routes or has a static route for the 199.36.153.8/30 pointing to the VPC subnet with Private Google Access enabled, and that the subnet is configured to send this traffic to the default internet gateway. 

Prepare the Veeam Backup & Replication Environment

  1. To configure the Helper Appliance used for Object Storage Repository Health Checks to use the private IP address, add the following registry value on the Veeam Backup Server:

    Key Location: HKLM\SOFTWARE\Veeam\Veeam Backup and Replication
    Value Name: ArchiveUsePrivateIpForGoogleHelperAppliance
    Value Type: DWORD (32-Bit) Value
    Value Data: 1

    1 = Enable Archive Appliance use Private IP | 0 = Disable (Default)

More Information

If the Gateway server assigned with the Object Storage Repository settings has a restricted internet connection, that machine cannot perform Certificate Renovation List (CRL) checks. In such a scenario, disable certificate revocation checks by creating the following setting on the machine assigned as the Gateway server within the Object Storage Repository settings.

Note: This setting will disable TLS revocation checks for all interactions with Object Storage performed by the machine where the registry value is created.

  • For Windows-based Gateway servers, create the following registry value:

    Key Location: HKLM\SOFTWARE\Veeam\Veeam Backup and Replication\
    Value Name: ObjectStorageTlsRevocationCheck
    Value Type: DWORD (32-Bit) Value
    Value Data: 0
  • For Linux-based Gateway servers, add the following entry to the /etc/VeeamAgentConfigIf the /etc/VeeamAgentConfig file is not present, it must be created. file:
    ObjectStorageTlsRevocationCheck=0
    
To submit feedback regarding this article, please click this link: Send Article Feedback
To report a typo on this page, highlight the typo with your mouse and press CTRL + Enter.
]]>
<![CDATA[How to Connect to an Object Storage Repository via AWS Privatelink / Direct Connect]]> https://www.veeam.com/kb4226 2024-03-04T00:00:00Z 2024-03-04T00:00:00Z

How to Connect to an Object Storage Repository via AWS Privatelink / Direct Connect

KB ID: 4226
Product: Veeam Backup & Replication | 12 | 12.1
Published: 2021-10-17
Last Modified: 2024-03-04

Purpose

This article documents how to configure Veeam Backup & Replication to use AWS PrivateLink or AWS Direct Connect for Scale-Out Backup Repository offload to Capacity Tier or Archive Tier or to connect to an Object Storage Repository in Veeam Backup & Replication 12 or newer.

Solution

Prepare the AWS Environment

  1. (If using AWS Direct Connect, skip to step 2.) 
    For AWS PrivateLink, configure a VPN connection to the VPC where you plan to deploy the PrivateLink Endpoint. One of the ways to do this is to create a tunnel on the VM gateway using AWS Client VPN.
  2. Create Endpoints in VPC:
    1. Create an S3 Interface Endpoint in your VPC. It will be assigned a DNS name that you can see in the AWS Console under VPC - Endpoints when selecting the corresponding Endpoint.
    2. An EC2 Endpoint must also be created if intending to use Archive Tier.

Prepare the Veeam Backup & Replication Environment

  1. Disable automatic updating of the AmazonS3Regions.xml file by creating the following registry value on the Veeam Backup Server.
    This will prevent Veeam Backup & Replication from overwriting the changes you'll make in the next section of this guide.

    Key Location: HKLM\SOFTWARE\Veeam\Veeam Backup and Replication\
    Value Name: CloudRegionsDisableUpdate
    Value Type: DWORD (32-Bit) Value
    Value Data: 1
  2. Disable certificate revocation checks by creating the following setting on the machine that is assigned as the Gateway server within the Object Storage Repository settings:
    • For Windows-based Gateway servers, create the following registry value:

      Key Location: HKLM\SOFTWARE\Veeam\Veeam Backup and Replication\
      Value Name: ObjectStorageTlsRevocationCheck
      Value Type: DWORD (32-Bit) Value
      Value Data: 0
    • For Linux-based Gateway servers, add the following entry to the /etc/VeeamAgentConfigIf the /etc/VeeamAgentConfig file is not present, it must be created. file:
      ObjectStorageTlsRevocationCheck=0
      
    Note: Prior to Veeam Backup & Replication 12, this setting was named S3TLSRevocationCheck.
  3. To configure the Helper Appliance used for Object Storage Repository Health Checks to use the private IP address, add the following registry value on the Veeam Backup Server:

    Key Location: HKLM\SOFTWARE\Veeam\Veeam Backup and Replication
    Value Name: ArchiveUsePrivateIpForAmazonHelperAppliance
    Value Type: DWORD (32-Bit) Value
    Value Data: 1

    1 = Enable Archive Appliance use Private IP | 0 = Disable (Default)
  4. If you plan to use Amazon Glacier for Archive Tier, review the following:
    • Certificate revocation checks must be permitted. The Veeam Backup Server and the VPC where the Archiver Appliance is deployed must have access to certificate revocation lists used by AWS over port 80 (*.amazontrust.com).
    • The following additional registry values must be created on the Veeam Backup Server:
      • Key Location: HKLM\SOFTWARE\Veeam\Veeam Backup and Replication\
        Value Name: ArchiveFreezingUsePrivateIpForAmazonAppliance
        Value Type: DWORD (32-Bit) Value
        Value Data: 1
      • Key Location: HKLM\SOFTWARE\Veeam\Veeam Backup and Replication\
        Value Name: ArchiveFreezingSkipProxyValidation
        Value Type: DWORD (32-Bit) Value
        Value Data: 1

Modify the AmazonS3Regions.xml File

This Affects All Traffic to the Modified Region
The AmazonS3Regions.xml file contains a list of regions and their respective endpoints. Modifying a region's endpoints makes it possible to force Veeam Backup & Replication to connect to a specific endpoint when that region is selected in the UI. This modification will cause all tasks that utilize the region you modify to employ the customized S3 and EC2 endpoints. If you wish to avoid interference, consider altering a region that other tasks or objects in Veeam Backup & Replication are not using. Then, use that altered region exclusively when you want to direct traffic to use the custom endpoints.
  1. On the Veeam Backup Server, edit C:\Program Files\Veeam\Backup and Replication\Backup\AmazonS3Regions.xml
  2. Find the Region section corresponding to your PrivateLink or Direct Connect location.

    Example:
     <Region Id="ap-northeast-1" Name="Asia Pacific (Tokyo)" Type="Global">
    
  3. Within that region's section, find the line <Endpoint Type="s3"> and replace the existing DNS value with the S3 Interface Endpoint DNS created in Prepare the AWS Environment > Step 2.

    Note: For S3, the AWS console will display a DNS value starting with an asterisk. When altering the AmazonS3Regions file, replace that asterisk with the word bucket.

    Example:
    <Endpoint Type="S3">s3-ap-northeast-1.amazonaws.com</Endpoint>
    
    Is changed to:
    <Endpoint Type="S3">bucket.vpce-00000000000000000-00000000.s3.ap-northeast-1.vpce.amazonaws.com</Endpoint>
    
  4. If multiple lines for <Endpoint Type="S3"> are in the Region section you are altering, remove all but the one you changed.

    Example:
    <Region Id="ap-northeast-1" Name="Asia Pacific (Tokyo)" Type="Global">
    <Endpoint Type="S3">bucket.vpce-00000000000000000-00000000.s3.ap-northeast-1.vpce.amazonaws.com</Endpoint>
    <Endpoint Type="S3">s3.dualstack.ap-northeast-1.amazonaws.com</Endpoint>
    
  5. If you plan to use Archive Tier: Within the same Region section, find the line <Endpoint Type="EC2"> and replace the existing DNS value with the EC2 Endpoint DNS created in Step 2.

    Example:
    <Endpoint Type="EC2">ec2.ap-northeast-1.amazonaws.com</Endpoint>
    
    Is changed to:
    <Endpoint Type="EC2">vpce-00000000000000000-00000000.ec2.ap-northeast-1.vpce.amazonaws.com</Endpoint>
    
  6. Save the file.
before edits.
Before Changes
After change example
After Adding Custom S3 and EC2 Endpoint
  1. Stop all tasks within Veeam Backup & Replication and restart the Veeam Backup Service to apply all changes.

Add Object Storage Repository

Now that the AmazonS3Regions.xml file has been modified, when you select the entry you changed within Veeam Backup & Replication, the software will connect to the specified endpoints.

  • For Object Storage Repository, Add Amazon S3 Storage repository. On the Bucket tab of the wizard, select the Region that matches the Region name you modified in the AmazonS3Regions.xml file.
  • For Capacity Tier, Add Amazon S3 Storage repository. On the Bucket tab of the wizard, select the Region that matches the Region name you modified in the AmazonS3Regions.xml file. Then add Capacity Tier to Scale-Out Backup Repository
  • For Archive Tier, Add Amazon S3 Glacier Storage repository. On the Bucket tab of the wizard, select the Data center that matches the Region name you modified in the AmazonS3Regions.xml file. Then, add Archive Tier to the Scale-Out Backup Repository.
To submit feedback regarding this article, please click this link: Send Article Feedback
To report a typo on this page, highlight the typo with your mouse and press CTRL + Enter.
]]>