Read the full series:
|
Ch.1 – Architecture & Requirements |
Ch.9 – Volume recovery |
In the Backup Modes in depth post we explained you the different modes that exist in Veeam Backup & Replication. In this post, we are going to dig a bit deeper on the File Level Backup method and explain the exclusions also.
This will be a rather short post, but it is certainly handy to know what your possibilities are.
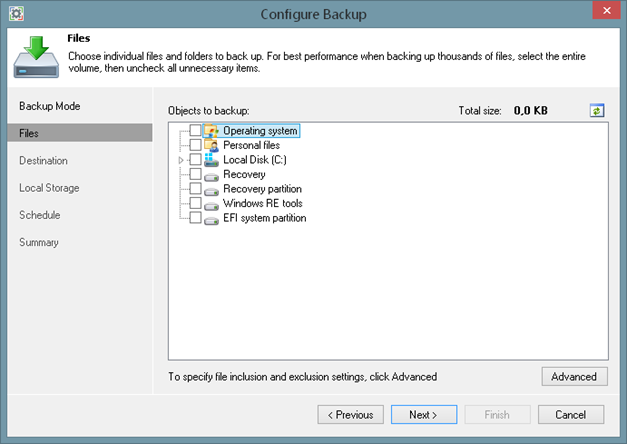
When you go for this method, you will see different things you can protect. Let’s run through them:
When Operating System is selected, Veeam Endpoint Backup automatically includes in the backup all data related to the OS: the system volume, personal files and the System Reserved partition. The backup will be performed on the volume level.
Personal Files are generally the user profile folders from your operating system. It may contain user settings, downloads, documents or even pictures – of course, only if you use the windows defined location to store these types of data. Backup will be performed on the file level.
There is also of course a possibility to select entire volumes and individual folders, or any desired combination of these. Note that selecting the entire volume, and then unchecking certain undesired folders allows for faster, volume-level backup than picking and choosing individual folders.
Keep in mind that Veeam Endpoint Backup FREE will automatically add the temporary files folder, the Recycle Bin, the Microsoft Windows pagefile, hibernation file and VSS snapshot files from the System Volume Information folder to the exclusion list.

In this example, I wanted to protect all of my Veeam data so I selected the My Data folder. Note that backup is performed in file level backup mode, which means I can add exclude and include file masks to organize my backup even better.
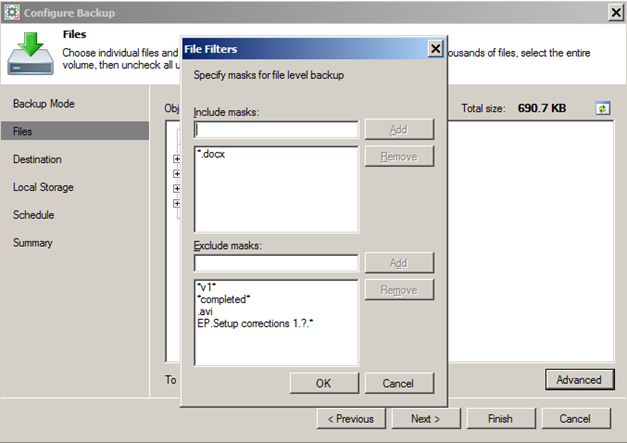
By pressing on the advanced button, File Filters window pops up and now I can start typing the needed include and exclude file masks. Important thing is exclude filter gets higher priority than the include, let’s try to use this functionality.
In this example I want to backup all the Microsoft Word Documents from the selected folder, in addition, I want to exclude any file with the”v1” and “completed” in the document’s name before file extension. I can’t remember one letter in the file name – so I used the ? wildcard with a combination of .* for the file extension. Also I want to make sure none of the .avi files are included to avoid backup file growing large.
As you can see on the screenshot below my backup now contains all the files I wanted while filtered file remains only on the disk.

You can use different types of filters for different needs:
- Specific file: OldPhotos.zip or NotAnImportant.Doc
- By extension: *.mp3 or *.temp
- By any part of a file name: *movie* or *filename*
- Match a single character: OldPhoto?.zip
- Use any combination of the above: *movie?* or myfile?.*
Conclusion
When you want to work with the file-level backup method, you can customize the backup source as you want. We’ve added some handy hardcoded options like personal files and operating system but you are still free to perform folder level backup with customizable file filters, which will make your backup file even more lightweight.
Read the next chapter: