One of the biggest challenges when backing up data from Microsoft Office 365 was Microsoft’s throttling metrics placed on SharePoint Online and OneDrive site data. This throttling is based on per account to a single site. In previous versions of Veeam Backup for Microsoft Office 365, the backup processing will download data with the one account used to authenticate the organization. Veeam Backup for Microsoft Office 365 version 4 added a new feature called auxiliary backup accounts to help mitigate this issue. Auxiliary accounts are additional accounts you can now add by security group to the organization in the Veeam Backup for Microsoft Office 365 scope. By adding auxiliary accounts, you can back up data faster from SharePoint Online and OneDrive by connecting over more streams. Creating these accounts can take time to configure and it is recommended to start the security group with at least 8 auxiliary accounts per configured proxy, that is used to process SharePoint Online backups, to start then increase by eight users at a time until you reach your optimal download efficiency. To make this process simpler, it is possible to automate the account generation in Microsoft Office 365 and import those accounts into Veeam. The rest of this article will break down the PowerShell script and help you run it successfully with the desired number of accounts. Then at the end there will be an additional script to remove all of the auxiliary backup accounts in Microsoft Office 365 from the security group in case any accounts have been compromised or for company change policies.
Create accounts
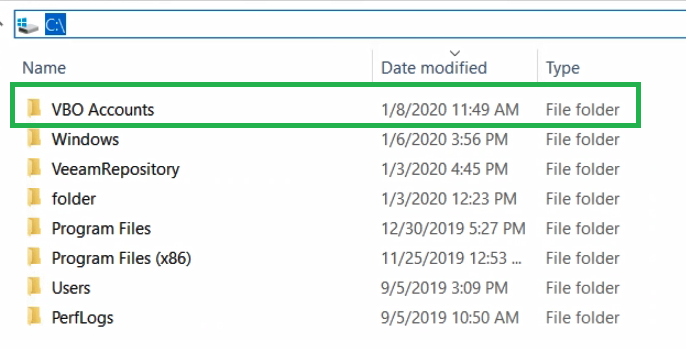
There are three processes you will need to complete to run this script successfully. The following will allow you to create the desired number of auxiliary accounts. This script will need to be run from the Veeam Backup for Microsoft Office 365 server, so this is where you will create the CSV. First you will need to create a folder on the C:\ drive named “VBO Accounts” as shown below.
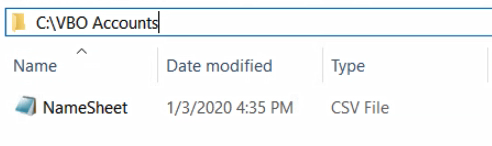
Then create a CSV file with the list of names you would like to use for the backup accounts. Example: VBOBackupAccount1, VBOBackupAccount2, VBOBackupAccount3, etc. Each account name will be listed on a different line like you see in the below picture. I like using Notepad++ for creating the files but you can also use Windows Notepad.

Once you created the list of desired names, save the file as “NameSheet.csv” to the directory of “C:\VBO Accounts\NameSheet.csv.
Next the following script will create accounts based on CSV file with randomly generated passwords, add the accounts into a Microsoft Office 365 security group, then add that security group and auxiliary backup accounts into Veeam Backup for Microsoft Office 365. These accounts will be basic authentication not MFA with application passwords. This next section, you will need to fill out the 3 variables at the top of the script specific to your deployment. Value “AzureDomain” will be the domain name of your Organization. Value “AzureAdmin” needs to be the administrative account you plan to use to sign in and create the accounts in the Azure Administrative portal. Value “VBOOrg” will be the name of the organization as it appears in the Veeam Backup for Microsoft Office 365 console. When running this command, you will need to run PowerShell as administrator and make sure your Execution policy is not restricted. Check your policy with the following command.
Get-ExecutionPolicy
If your policy is set to restricted, then run the following command.
Set-ExecutionPolicy -Scope CurrentUser Unrestricted
After completing the above steps, you are ready to run the script. When executing this script, it will ask you to sign in with the administrative account specified, then there should be no further actions required. The accounts will first be generated, SharePoint Administrator permission assigned, the passwords set, then the users added to the security group. After all users have been created, they will automatically be added to the Veeam Backup for Microsoft Office 365 console.
 #Please read in full

  #This script must be run in administrative PowerShell

  #This script will create a security group if it does not already exist and users with the proper permissions to backup with Microsoft Office 365. Once the users have been created, they will be assigned to the security group.

  #If the script does not run because Execution Policy is disabled in the system the following line will help

  #Set-ExecutionPolicy -Scope CurrentUser Unrestricted

  #Before running the script there are Four values that need to be entered specific to your company and preference below


 #This should be the email domain name for your organization
 $AzureDomain = "aperaturelabs.Biz"
 #This will be the user name used to sign in to execute scripts
 $AzureAdmin = "rin@aperaturelabs.biz"
 #This will be your organization value as it appears in Veeam Backup for Office 365
 $VBOOrg = "aperaturelabs.onmicrosoft.com"

 #-----------------------------------------------------------------------------------------

 #Tests if the path you want to save generated passwords in exists. If not, creates one.

 $path = Test-Path 'C:\VBO Accounts\passwords.txt'

 if (!$path) {

 $file = New-Item -ItemType File -Path 'C:\VBO Accounts\passwords.txt'

 }
  #First you must install and import the AzureAD, MSonline, and Veeam backup for Microsoft Office 365 Module.

  $UserCredential = Get-Credential -Credential $AzureAdmin

  Install-Module -name AzureAD

  Import-Module -Name AzureAD -ErrorAction SilentlyContinue

  Connect-AzureAD -Credential $UserCredential

  Install-Module MSonline

  Import-Module MSonline

  Connect-MsolService -Credential $UserCredential

  Import-Module Veeam.Archiver.PowerShell

  Write-Host "Loading Modules Complete"

  #This section will query the existing security group or create the security Group if you have not already

   $SecurityGroup = Get-AzureADGroup -Filter "DisplayName eq 'Backup Accounts'"

   If (!$SecurityGroup)

      {

          $SecurityGroup = New-AzureADGroup -DisplayName "Backup Accounts" -MailEnabled $false -SecurityEnabled $true -MailNickName "NotSet"

      }

  Write-Host "Generate Security Group Complete"

  #This section should create your users from a document, assign the proper permissions, and add them to the security Group
  $PasswordProfile = New-Object -TypeName Microsoft.Open.AzureAD.Model.PasswordProfile

  $PasswordProfile.Password = "FillerPassword123"

  $Names = gc "C:\VBO Accounts\NameSheet.csv"

 Write-Host "Load CSV Complete"

 foreach ($Name in $Names)
     {
  #-------------------------------------------------------------------------------------------

  #Generates each new AD user, adds user to security group, and assigns SharePoint Service Administrator role
         $User = New-AzureADUser -DisplayName "$Name" -PasswordProfile $PasswordProfile -UserPrincipalName "$name@$AzureDomain" -AccountEnabled $true -MailNickName "$Name"

         Set-AzureADUser -ObjectId $user.ObjectId -PasswordPolicies DisablePasswordExpiration

         Add-AzureADGroupMember -ObjectId $SecurityGroup.objectid -RefObjectId $user.objectid

         $Role = Get-AzureADDirectoryRole | Where-Object {$_.DisplayName -eq "SharePoint Service Administrator"}

         Add-AzureADDirectoryRoleMember -ObjectId $Role.ObjectId -RefObjectId $User.ObjectId
     }

 Write-Host "Generate users Complete"

 Write-Host "Users added to Security Group Complete"

 #This section will pause to allow the users to populate

 Start-sleep -Seconds 130

 foreach ($name in $names)
     {
  #-------------------------------------------------------------------------------------------
  #This section the password is generated for each user
         Write-Host $Name

         $Password = Set-MsolUserPassword -UserPrincipalName "$Name@$AzureDomain" -ForceChangePassword $false

  #-------------------------------------------------------------------------------------------
  #This section adds the user to the Organization in Veeam Backup for Microsoft Office 365 Auxiliary Backup Accounts
         $org = Get-VBOOrganization -name $VBOOrg

         $group = Get-VBOOrganizationGroup -Organization $org -Name $SecurityGroup.DisplayName

         $member = Get-VBOOrganizationGroupMember -Group $group | Where-Object {$_.Displayname -eq $Name}

         $pwd = ConvertTo-SecureString -String $Password -AsPlainText -Force

         $account = New-VBOBackupAccount -SecurityGroupMember $member -Password $pwd

         Start-Sleep -Seconds 15

         Set-VBOOrganization -Organization $Org -BackupAccounts $account
     }

 Write-Host "Users password set complete"

 Write-Host "Users added to Veeam Backup for Microsoft Office 365 Complete"

 #Last the connections will be disconnected

 Disconnect-AzureAD

 Write-Host "Disconnect Complete"
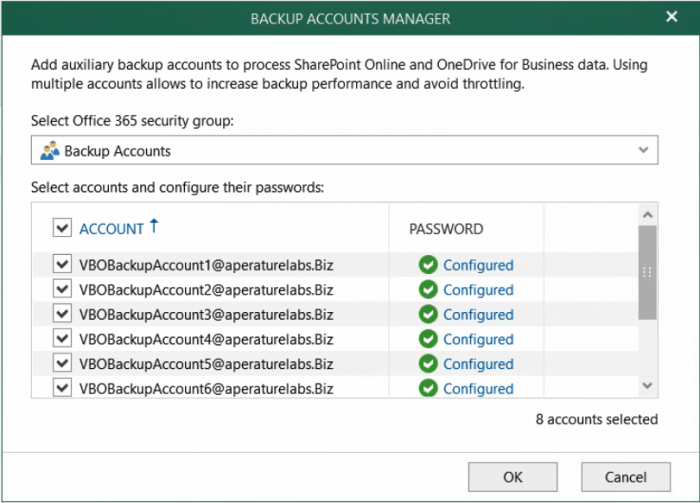
To check that everything has completed successfully, you can open the Veeam Backup for Microsoft Office 365 console, right-click on your Organization, select “Manage backup accounts…”

Your Backup Accounts Manager should look like the following.
Take down accounts
Depending on your company policies you may be asked to remove or rotate accounts. So, to save the trouble of manually deleting every auxiliary account from the Microsoft Office 365 security group you created, you can use the following script to delete all of the accounts with ease. There is only 1 variable you need to fill out on this script and that is AzureADAccount. This needs to be the administrator account used to remove the auxiliary user accounts from Azure Admin portal. When you execute the script, it will ask you to sign in with the administrator account specified, then there should be no further action required.
  #Please read in full

  #If the scipt does not run because Execution Policy is disabled in the system the following line will help

  #Set-ExecutionPolicy -Scope CurrentUser Unrestricted

  #This value will be the user name used to administrate AzureAD

  $AzureADAccount = "Rin@aperaturelabs.biz"

  #This section will connect to AzureAD module.

  $UserCredential = Get-Credential -Credential $AzureADAccount

  Install-Module -name AzureAD

  Import-Module -Name AzureAD -ErrorAction SilentlyContinue

  Connect-AzureAD -Credential $UserCredential

  Write-Host "Logged into Azure AD"

 #This Section will call the security group users

  $SecurityGroupUsers = Get-AzureADGroupMember -objectID (Get-AzureADGroup -Filter "DisplayName eq 'Backup Accounts'").ObjectID

 foreach ($SecurityGroupUser in $SecurityGroupUsers)
     {

  #-------------------------------------------------------------------------------------------
  #This section will call each user in the security group and remove them

         $user = Get-AzureADUser -ObjectId $SecurityGroupUser.ObjectID

         Remove-AzureADUser -ObjectId $user.objectid

     }

 Write-Host "All users from Security group Backup Accounts have been removed"

  #This section will disconnect you from Azure AD

  Disconnect-AzureAD

  Remove-PSSession $Session

  Write-Host "Azure AD Disconnected"
After this script runs the users will be removed from the organization but the security group will remain so you can add a new group of users with the above script.
Conclusion
In conclusion, Veeam Backup for Microsoft Office 365 v4 has raised the bar in terms of performance for enterprise environments with the addition of Auxiliary Backup Accounts. And with the tools provided in this article you can automate the deployment of these accounts in your environment to promptly utilize their benefit. If you do run into any problems along the way, there is an excellent community on the forums to help diagnose problems with any Veeam script.
Read More:
Video: Veeam Backup for Microsoft Office 365 — Configuration guide