Veeam Backup & Replication 9.5 is just around the corner. I have been testing the beta version for two months now, and I tested the first promised feature — the Veeam-Nimble integration — a month ago. Today, I’ll demonstrate the test of another enhancement — integrated Direct Restore to Microsoft Azure.
Direct Restore to Microsoft Azure was released several months ago as a standalone Azure appliance, and it is available for free at the Microsoft Azure Marketplace. Direct Restore to Microsoft Azure will become fully integrated in Veeam Backup & Replication in 9.5.
So, why am I excited? Well, with version 9.5, you will be able to instruct Veeam Backup & Replication to recover any restore point directly to Microsoft Azure without preparation or provisioning tasks in Azure. Simply right-click, and then choose to restore to Azure.
NOTE: This blog post is all about the Beta version of the new integration, so some of the screens are listed as TBD or may not have their icons/visualization complete as what you’ll see in the generally available build of Veeam Backup & Replication 9.5.
How Direct Restore to Microsoft Azure will help you
There is no question that backing up is a boring business. It’s difficult to sell the need for the latest labor-saving backup products to your CIO when you can’t prove a positive ROI without experiencing a disaster — and who really wants to do that?
So, would you be able to sell the need for better backup resources if it could do other tasks besides merely backing up your environments? What if the same product could:
- Build a test and development environment in the cloud
- Migrate your workload to Azure
- Build a warm disaster recovery (DR) instance in the cloud
With a regular Veeam backup, you can use the Direct Restore to Microsoft Azure feature to deploy all the above use cases. You can build a Test/Dev lab in Azure in a matter of minutes.
Should you wish to migrate your workload to Azure, Direct Restore to Microsoft Azure will be your best friend. It makes the process so much simpler, without impacting your production environment, because the migration will be initiated directly from the backup repository.
How to set up Azure subscription access
Our setup starts by configuring Veeam to access our Azure subscription. Browse the Veeam Backup & Replication GUI as shown below, and then press Manage Azure Accounts.

At the Manage Azure Accounts window, click the Add button.

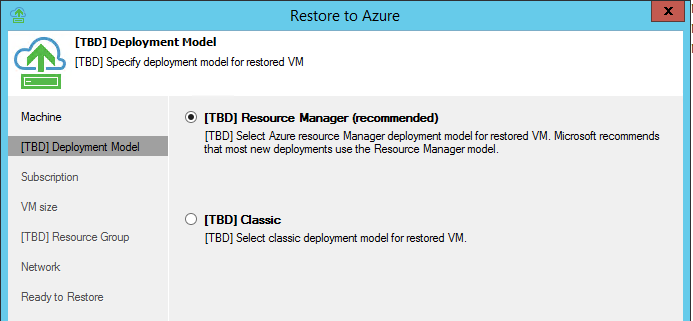
At the Initial Configuration window, you need to choose the required Azure Resource Manager deployment model first. For this demonstration, I’ll choose the Resource Manager model:

And then import the resource manager subscriptions by clicking on the “Configure Account” link:
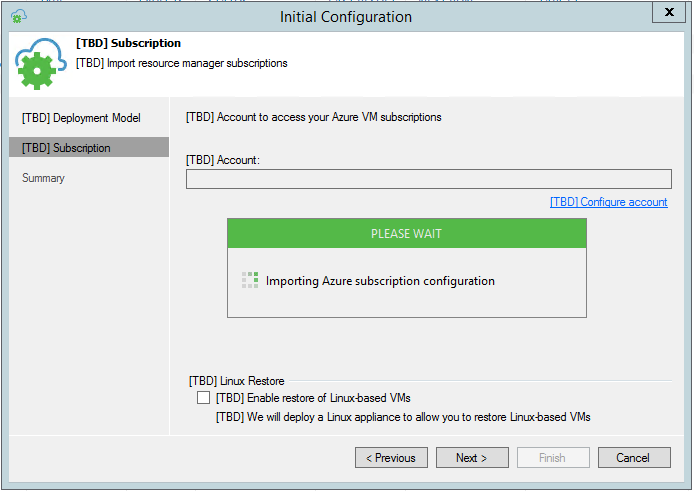
On the pop-up window, provide your Azure credentials.
Note: Make sure that you switch off the Protected Mode in Internet Explorer settings. Otherwise, you will not be able to log on to Microsoft Azure when passing through the Initial Configuration wizard.
Note: If you are planning to restore a Linux-based computer, Veeam Backup & Replication will require you to deploy a helper appliance inside your Azure environment.
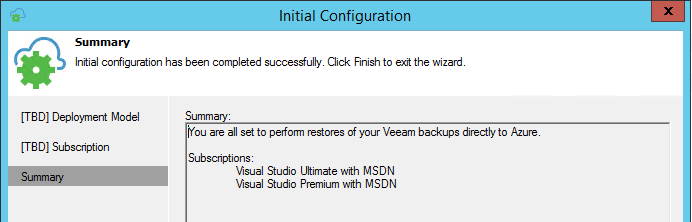
After you provided the necessary information to finalize the process, you’ll be ready to start your VM’s restore and workload migration to Azure.
Azure preparation
Depending on your desired scenario of the cloud-based restore to Azure, you can prepare the Azure environment to accept VM restores. For example, if you are migrating your SharePoint infrastructure to Azure, you can mimic the same on-premises network configuration on Azure and then attach the new VMs to their specific networks. This will help minimize the post-migration network configuration. The same applies if you were considering deploying a warm DR strategy in Azure.
Azure Proxy
One of the most frequent concerns people have towards public clouds are speed and security.
Brand new functionality called Azure Proxy address both of them by dramatically accelerating data transfers over WAN, reducing open port requirements to the single port by virtualizing all network traffic into the single port, and removing the need to deploy VPN to Azure by providing built-in encryption for the network traffic.
Deploying the Azure proxy server is very simple and fully automated, but first you need to add your Azure account to the Veeam console using the “Manage Azure Accounts” dialog.
Once you added your Azure account to the Veeam console, then you will get the new “Add Azure Proxy” option on the Backup Proxies node of the Backup Infrastructure tab:

Follow the instruction on the deployment wizard to deploy the Azure Veeam proxy servers.
![]()
Performing the restore to Azure
To start the cloud restore to Azure, click the following icon in the Veeam Backup & Replication UI:

Or, right-click the corresponding backup job:

Choose the Azure Resource Manager deployment model; in this example, I’ll use the new and recommended Azure Resource Manager model.
Specify a preferred subscription if you have more than one, and then select the Azure data center region from the Location options:

In a case you deployed the Azure Proxy, you can select it from the dropdown list on the same step. Be sure to pick the proxy located in the same Azure data center you’re restoring to.
Choose the Azure VM size and the preferred storage account:

Note: You can exclude any VM virtual disk from the cloud restore and resize the VM resources to be deployed in the cloud.
Now you need to assign the Azure VM a name, and choose a resource group the restored VM will be connected to:

Next, you need to attach the network. I created a specific Veeam network to mimic the same local LAN network:

Review the Summary to ensure the configuration is as you intended:

Upon clicking Finish, Veeam Backup & Replication will begin the restore to Azure process, during which it will also convert the on-premises VMs to Azure VMs.
Note: The process will take some time, and will depend on the Azure digest speed.
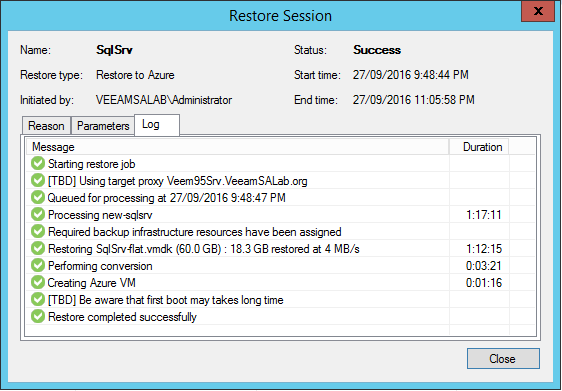
From the above screenshot, you can notice the total time for restoring the VM to Azure will take an hour and 17 minutes at a 4MB/s speed without the Veeam Proxy. The Restore process took one hour and 20 minutes.
On the below screenshots, I performed a second restore, but this time I used the Veeam Azure Proxy, as you can notice the total restore time cut by half comparing to the first test. The total restore time is 45 minutes at 8MB/s with the restore process taking 37 minutes.


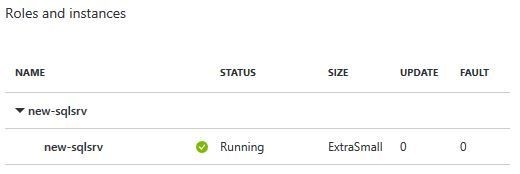
Azure check
On completion of the recovery (or migration) and conversion process, you’ll find the restored computer under Azure resources or Virtual Machines. You can use the restore point in numerous ways such as the following:
- Build a test and development environment in the cloud
- Migrate your workload to Azure
- Build a warm DR instance in the cloud
You can also connect to your Azure VM via remote desktop connection (RDP) and use that server as a PRODUCTION or TEST/DEV environment.
Conclusion
The process of restoring or migrating any workload to Azure has become a simple process using Veeam Backup & Replication with the integrated Direct Restore to Microsoft Azure feature. This opens endless possibilities and new ways of using your Veeam backups — not just for recovery, but also for the migration of your workloads to the cloud, or building test labs in the cloud.
With all the business benefits above, it’s time to book a meeting with your CIO and discuss the implementation of Veeam Backup & Replication.
See also
- Recorded webinar: Cloud restore for ANY Veeam backup