This article covers how to create a VTL (virtual tape library) on CentOS 7. When coming up with the idea for this topic, I asked myself, “Why would someone need to create a VTL?” For myself, I needed something I could play with in a lab environment without the cost of extra equipment, but this is something you can do in your production environment as well.
A year or so ago, I spoke to a customer who had a slow connection to their DR site where they were sending their backup copies. This connection would intermittently cause the backup copy time to breach the backup copy cycle, meaning that they would occasionally have missing days in their backup copies for some VMs. This was corrected by configuring a Linux machine at the DR site to be a VTL because a tape backup logic functions slightly differently than a backup copy job. In a backup to tape job, we will copy the existing restore points one for one, regardless of the copy interval. While this solved a specific need, this is a great extra copy of backup data as well. Let me show you how to set it up for free.
Setting up CentOS
We start our journey with the basics, installing CentOS with as little headache as possible. Whether you choose to go with a virtual machine or an old physical server gathering dust in the back room, you will need to download the ISO. Whatever device you choose to convert to VTL will need at least two attached drives, one for OS and one for tape dump. You can post-install partition a drive in the system, but that process will not be covered in this article.
If you are feeling up to it, they do offer cloud and container images, but I will note, I did not test with these platforms. Once you have the ISO mounted and install started, you will proceed with your preferred language and keyboard configuration.

Next, you will need to select which disk you would like the OS to be installed on.
I recommend using a static addressing on your NIC. This makes connecting to the web interface and finding the iSCSI connection easier later.

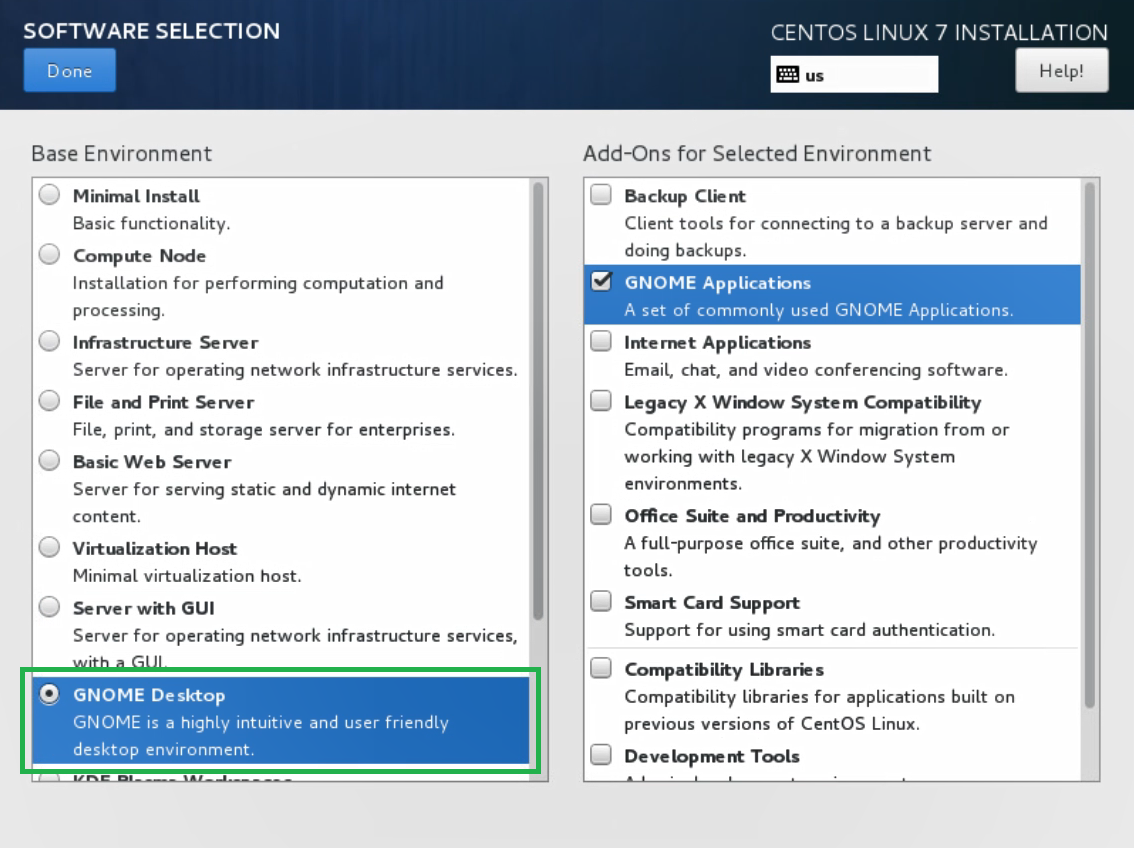
You can save yourself some time by using the GNOME Desktop Software selection. Otherwise, you will need to manually install a desktop environment manually later. The manual install will not be covered in this article. We will need to have a web interface to connect in and configure the tape library.
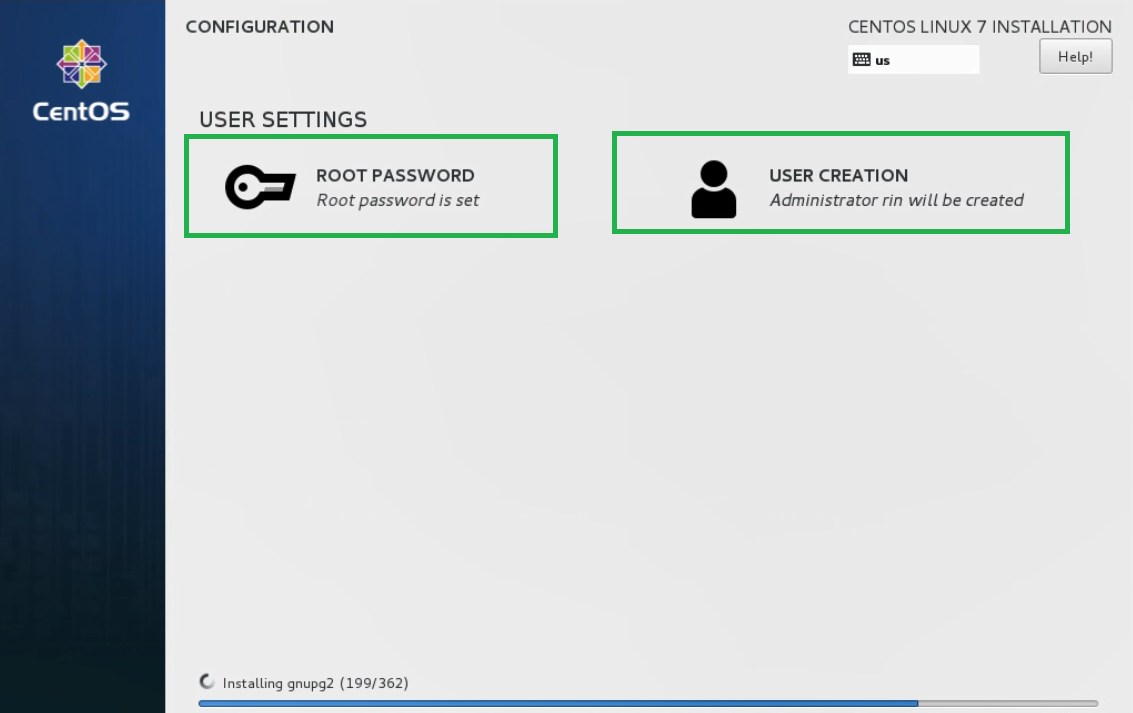
While you wait for your install to complete, you can configure your credentials.
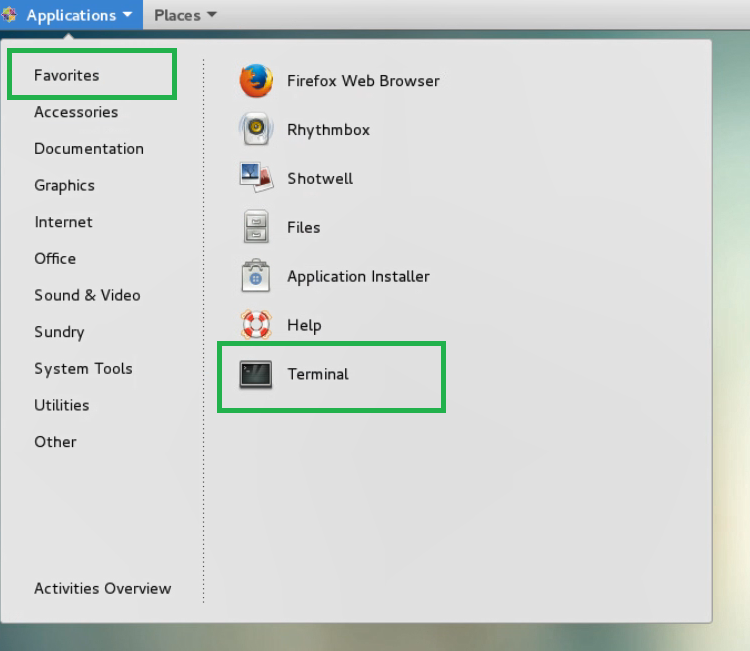
Before we go into the terminal, I will say this now: Linux is case sensitive in command line. So, if you swear you typed a path in correctly, check the case. Don’t feel bad if you miss it. Knowing better, I did it too.
Open Terminal.
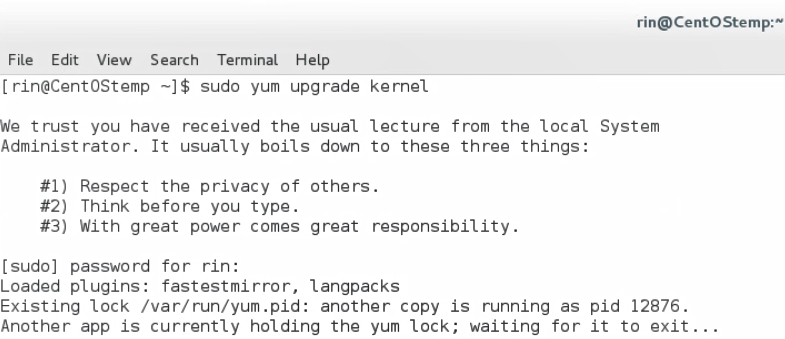
Before I start installing anything new, I like to run an update for the kernel. You will run the following command and enter the administrator password. Once this is complete, you will reboot. You can use the GUI to reboot or simply type “reboot” in the terminal, and your box will reboot.
$sudo yum update kernel
Now, we will install the modules to prepare our box for software install and connection later.
$sudo yum install httpd
$sudo yum install gcc
$sudo yum install perl
$sudo yum install sg3_utils
$sudo yum install kernel-devel
Your kernel-devel and installed-kernel version should be the same if you ran the update kernel above, but you can verify with the following commands. If they are not the same, try running the kernel update from above again.
$sudo uname -r
$sudo rpm -qa | grep kernel-devel

Installing Quadstor
Since we downloaded GNOME, this step is easy. Open your browser and download RHEL/CentOS 6.x/7.x Packages. Let the package save to your download folder.

Now, we head back to Terminal where we will create a path to the downloads folder and execute the install. The downloads path is under /home, then the name of the user you are logged in as and /Downloads. Now, this is one of the times where case matters because the “D” in downloads is capitalized.
$cd /home/[user]/Downloads
Once you are in the downloads folder, you can run the ls command to show the list of files in this folder. You will need the file name for the next part. We will first enter into a scripting shell with sh, then from here, we can execute the install with the following command. You are replacing [file] with the name of the file we need to install, including the extension .rpm:
$ls
$sh
$sudo rpm -ivh [file]
$exit

The next command will make sure that the httpd starts automatically when the machine is started.
$sudo systemctl enable httpd

If you have not already, I would recommend a reboot since we just installed several components. Once the reboot is complete, we want to make sure our components are running. The following will check httpd and quadstorvtl.
$sudo service httpd status
$sudo /etc/rc.d/init.d/quadstorvtl status

The last command you run will disable the firewalld service. In many cases, this service will prevent the iSCSI connection from being discovered from the Veeam server. Below is the command to stop the service and to check the status to make sure it is stopped.
$sudo systemctl stop firewalld
$systemctl status firewalld

Now, we are on to the fun part, connecting to the VTL interface. This is a web GUI so all you need to do is open your browser and go to http://[IP]/vtindex.html. The [IP] will be the IP address of the Linux machine, which is why it was recommended to statically assign in the beginning. If you did not or you do not remember what the IP address of the server is, you can open the terminal and type “ifconfig”. Similar to the ipconfig in Windows, it will show you the IP address assigned to each of your NICs.

The first thing you will want to configure in this interface is the physical storage. This will be the storage that your virtual tapes will be emulated to. Once you have located in the list which storage you would like to configure, click Add to the right and the Submit button on the following screen. It will take a couple of minutes. Once the storage is finished initializing, the Pool and Used fields will populate with data.

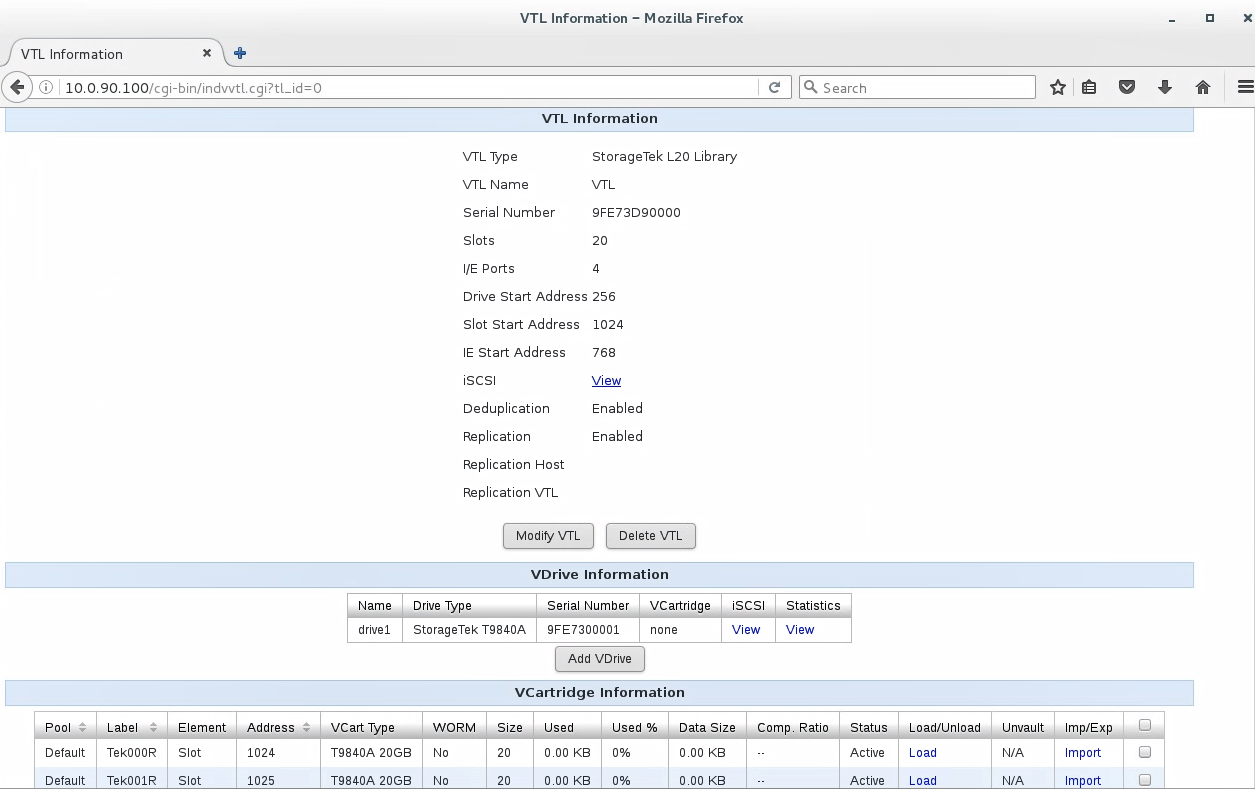
We can make our library from the Virtual Libraries tab by selecting Add VTL and filling out the sections. Name your VTL and pick the vendor you would like to emulate. Keep in mind, the VDrive Type will determine the size of your tapes based on the LTO version.

Time to add your cartridges: Scroll down and select Add VCartridges. Here, you will need to fill out the Number of VCartridges and the VCartridge Label/Prefix you would like, then click Submit.

Your screen should look very similar to the following:
Now to the Veeam server
First thing’s first, we need to establish the iSCSI connection to the Linux machine we just configured. We will do this right from Server Manager > Tools > iSCSI Initiator. The first time you select this option and you do not have the service started, it will offer to start the service for you by hitting OK. Then, select the iSCSI Initiator from the tools menu again, and it will open the iSCSI Initiator Properties.

From here, you can type the IP address of your VTL machine in the Target field and select Quick Connect… The following screen should contain your VTL.autoloader and VTL.drive. Depending on the number of drives and libraries you have configured, you will see more options. Select each item in the list and click Connect.

Once you have selected and connected every device you wish to mount to this server, you will hit Done. You should see the items you selected now in the Discovered targets list.
Now, it’s time to check device manager to make sure your tape drive is showing up properly. If you see “unknown” for your tape drive, you will need to install the OEM drivers for the tape server you selected on the Veeam server.

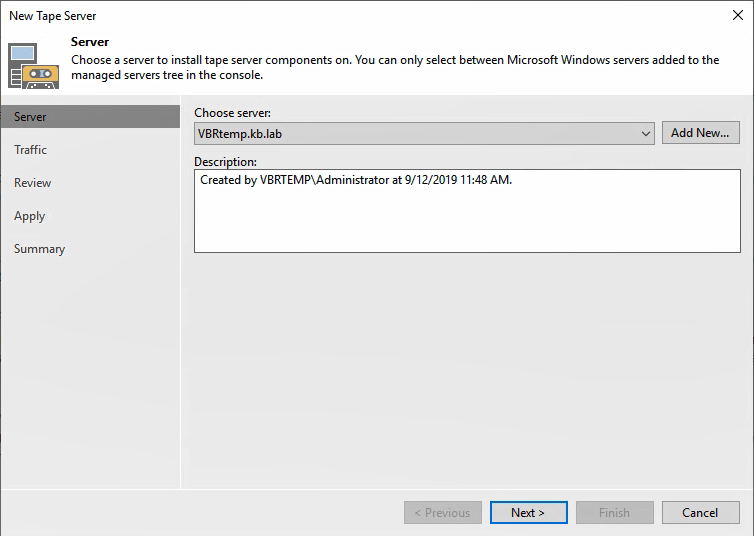
If everything looks correct in device manager, we can move to the Veeam server. In the Tape infrastructure section, you will select Add Tape server.

Choose the server you have attached the iSCSI connection from the VTL to. Hit Next/Apply/Finish through the rest of the screens. This will auto detect that there is a tape server attached to this machine and install the Veeam services we need to do tape backups.

The Veeam server will complete a tape library inventory process, then you should see your device and tapes populate.

From here, the rest is up to what you would like to configure. You can add media pools and create tape jobs just like you were sending it to a physical tape server.
Conclusion
Adding a VTL is easy as I’ve shown, and you can add an additional copy of your backup data on VTL to help meet the 3-2-1 rule and be prepared for new restore scenarios. Additionally, you can deliver better compliance for any backup storage requirements that you may have. You can read more about Veeam tape support in Help Center.