Read the full series:
|
Ch.1 — Installation |
In the previous posts of this short series, we announced the immediate availability of Veeam Agent for Linux and showed everyone how to install the software and create the first backup. But obviously the final goal of every backup is to do a restore, and this is the topic of today’s post.
Let’s restore
In the previous blog post, we ended with a successful backup file, safely stored in a NFS server:

Using the same simple command line as for the backup:
veeam
We can start the interface and see the successful backup session we completed before:

You can see in the bottom part, where all the commands are listed, there is a [R] to Recover Files. Let’s hit the R letter on the keyboard!

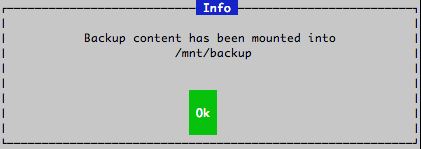
Veeam Agent for Linux shows the available backups, how many restore points are stored into the backup itself (one in this example), and once I hit enter twice to select and use the restore point the backup file is mounted in /mnt/backup:
Why this?
Because every Linux administrator has different and preferred ways to restore files and folders, so instead of forcing people to learn another interface or procedure, we decided to leave this choice to our users.
For example, you can use the famous Midnight Commander (“mc”) available in many Linux distributions to restore the files you need from the restore location:

More skilled users would prefer to use the command line, or a different tool. It’s up to you!
Volume restores
File restores are certainly going to be the most common operations, but there will be times when a restore of an entire volume is needed. For this scenario, you first need to boot your Linux server using the recovery media that you downloaded from the same location of the installable software. Using the ISO image as the boot media, the Veeam Recovery Media is started:

The recovery media starts the main UI automatically, offering users different choices:

If, like in my example, the backup to be used is not stored locally, you need to configure the network. If you have a DHCP server, this is done automatically by the Recovery Media. This can be done directly from the interface: First, you select a restore operation, like “Restore Volumes” in my example. Then you choose “Add shared folder…” and finally NFS:

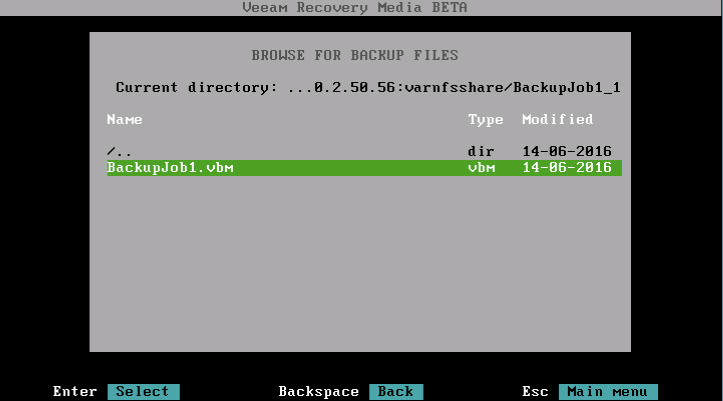
The wizard shows the content of the mounted volume, and you can browse to the mount point to find the backup set and import it:
From here, you can restore any volume: the interface shows you both the existing volumes in the underlying machine (if readable), and the volumes available in the backup:

You can easily select the volume you want to restore, confirm the selection (better think twice before erasing the wrong volume!), and start the restore operation:

If a volume is part of a LVM group, you can also re-organize the single volumes that make the group.
In the next blog post, we will talk about command line!