In this second part (the first part can be found here) of setting up and hardening a Veeam “hardened repository,” I will cover how to set up Ubuntu 20.04 in a secure way. While it’s “just a minimal installation,” I have seen many questions on this topic, so let’s clear some things up.
Before we start, let’s recap the requirements:
- A RAID 1 for the operating system on SSDs with at least 100 GB disk space
- A RAID 6/60 for the backup data
- Static IP address, gateway and DNS settings
- Recommended: redundant network connection
- Switchport: untagged
- UEFI Secure Boot is enabled
With all environmental preparations done, we can now download Ubuntu 20.04.
Download
Download the latest Ubuntu 20.04 ISO from the Ubuntu website. At the time of this writing, that was the ubuntu-20.04.5-live-server-amd64.iso. The latest ISO ensures that the Linux kernel is as new as possible to support newer hardware.
Technically you can also use Ubuntu 22.04, but there are currently no DISA STIGs (Security Technical Implementation guide) available, which we will apply in a later blog post. Additionally, Ubuntu 22.04 is only supported starting from Veeam Backup & Replication v12.
Installation
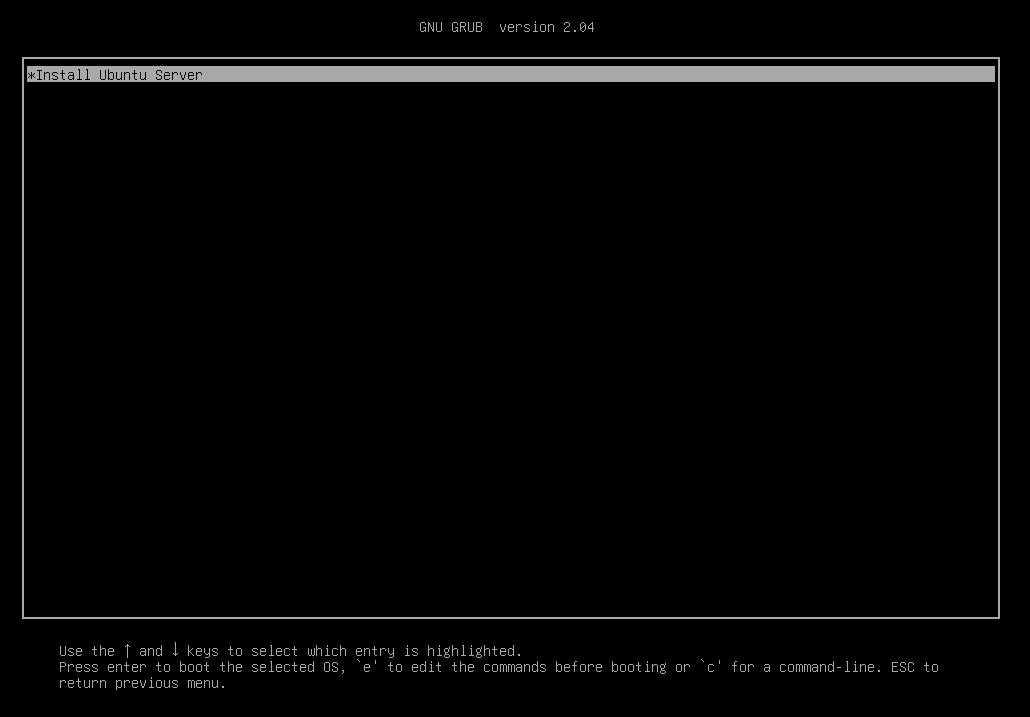
The first step of the installation is to select the “HWE”-Kernel, which is the “Hardware Enablement” kernel. If you don’t see the HWE kernel option, then you are booting in legacy BIOS mode. UEFI with UEFI Secure Boot enabled is recommended.

In the next step, confirm that you want to install Ubuntu Server.
After some time, you will see the language selection. This blog post will continue in English, but you can also install a different language if you like. For troubleshooting purposes, I always recommend using English operating systems in general.

We can continue with the current installer without updating.

The keyboard layout definition should be easy to understand, but it’s important for the passwords we create later. The recommendation is to stick to the standard you defined in your environment. If you have English US layout everywhere, then it also makes sense for the hardened repository. If you use a different layout everywhere, then it also makes sense to use that other layout for the hardened repository. I chose German for simplicity in my specific case.

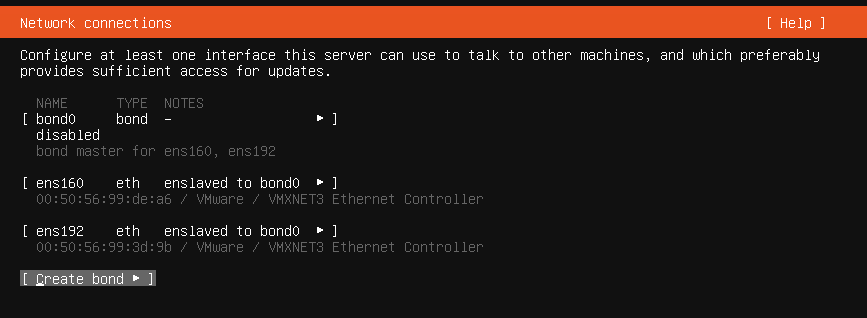
The next step is a big one: network configuration. For redundancy reasons, it’s recommended to have at least two network cards that can fail over between each other. Multiple network cards form a “bond” interface in Linux.
First up, create a bond. For bond mode, there are different options depending on your needs and capabilities of the switch. The default selection “balance-rr” requires an EtherChannel (or a similar term depending on the switch vendor) without LCAP. If your network team prefers LACP, then choose 802.3ad. For situations where the switch cannot be configured to EtherChannel with/without LACP, the “active-backup” policy can be used. That ensures high availability on the network side without load balancing between the network links.

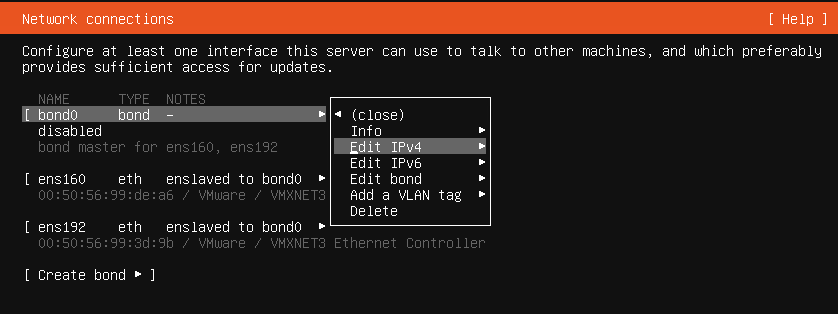
Once created, the network cards go offline and show “enslaved to bond0.”
Enable the bond interface for IPv4. Starting in Veeam Backup & Replication v12, you will be able to use IPv6 as well.
In my case, I want to use static IP addresses because that avoids any “chicken-egg” issues in case of an emergency. Imagine the DHCP server is down and you’re trying to restore…

Configure the IP address.
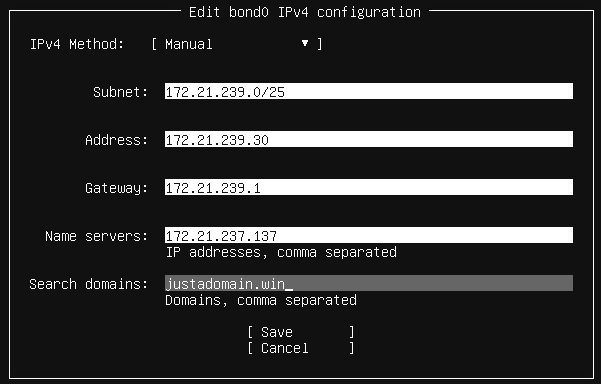
This is how it should look like:

Before continuing, do a quick ping test.

If the Hardened Repository server has outgoing HTTP internet access allowed, then the proxy settings can be left empty. From a security perspective, it’s recommended to limit outgoing HTTP traffic to the Ubuntu servers only (cz.archive.ubuntu.com in my case) or use an internal Ubuntu mirror. If a proxy server should be used, fill out the required data.

The next step is about which Ubuntu mirror server to use to get software. The concept is different than on Windows. Windows administrators usually download software from a website and then install it. For Linux, the most common way is to use a package manager to install software (similar like the Microsoft store or the Windows Package manager). The installer automatically picks an Ubuntu mirror server from the country where you are installing. That’s fine and we can continue.

Partitioning is probably the most complicated step of the whole setup. While Windows is simply installed on one partition plus an EFI system partition, there are more options in Linux. If you want to go “Windows style,” then you can select “Use an entire disk” and simply select the RAID for the operating system.
If you want to align with security best practices (e.g. CIS Benchmarks), then partitioning is a bit more complex.

My server has two volumes (disk devices) where the small one is used for the operating system and the large one for the backup data. In Linux, there are only file system paths. Everything is “mounted” to “mountpoints” inside the “root” (“/”) file system. There are no drive letters as in Windows (C:\, D:\ etc.). That means, one cannot run “out of drive letters” after 26 drives, but it also means the partitioning scheme looks a bit different than on Windows.
The goal is the following partitioning/mountpoint setup in line with CIS recommendations
| Mountpoint | Size | Comment | Special mount options |
| /home | 25 GB | user data (object storage offload cache) | nodev |
| /tmp | 5 GB | for temporary files | nodev, nosuid, noexec |
| /var | 20 GB | ||
| /var/log | 20 GB | log files | |
| /var/log/audit | 5 GB | audit auditing log files | |
| /var/tmp | 5 GB | same as /tmp | nodev, nosuid, noexec |
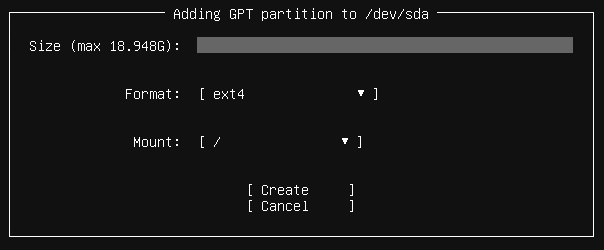
Select free space and add a GPT partition.

The /home partition is the first one. If this Hardened Repository becomes part of a Scale-Out Backup Repository, then there will be temporary data in /home/<username>/. So we make this partition 25GB in size. The mountpoint can be selected directly from the drop-down menu. The file system is left unchanged at ext4. We don’t need XFS block cloning features for the operating system partitions.

For the /tmp partition, the path must be specified manually.

Same for /var, /var/log, /var/log/audit and /var/tmp
Finally, add the root (“/”) file system without specifying the size. It takes all available free space.
The result looks like this:

The list of “available devices” is reduced to the backup data volume now. This one should be mounted to /mnt/backup and use the XFS file system.

Before writing the partition table to disk, there is a final confirmation needed. All data that existed before on the server will be deleted by continuing.

Hostname and user configuration is the next step. Ubuntu Linux requires to create at least one normal user for the system. After installation, there is the almighty “root” user (similar like administrator or LOCAL SYSTEM in Windows) plus that new user that must be created.

The root user does not have a password per default in Ubuntu (other distributions might require a root password). That means, root cannot log in at all on an Ubuntu machine. The OpenSSH server is required to add the server to Veeam Backup & Replication as a hardened repository. Enable that option and continue.

As we want to have a minimal Ubuntu Linux, we keep everything unchecked in the software selection (default).

Now it will take some time until everything is downloaded and installed. Remove the installation media and finish the installation by choosing “Reboot now.”

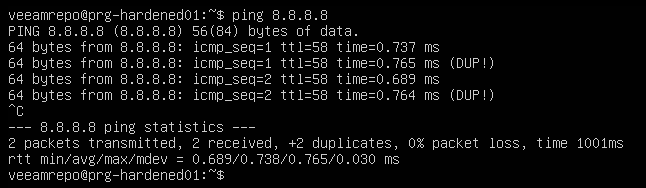
Once the server is rebooted, we can switch to remote management via SSH. If the SSH connection is refused, log into the console directly again and do a simple “ping” test (you can stop the “ping” by pressing CTRL+C). The result must be without DUP packages. If you see something like that, it’s likely the network cards’ bonding policy has an issue.
Congratulations, you finished installing the Ubuntu Linux operating system for your Veeam hardened repository.
Configuring automatic security updates
Good news: Ubuntu is installing security bug fixes automatically per default. Ubuntu has the “unattended-upgrades” package pre-installed for this use case. One can check the current settings with:
cat /etc/apt/apt.conf.d/20auto-upgrades
APT::Periodic::Update-Package-Lists "1";
APT::Periodic::Unattended-Upgrade "1";
These two lines say that the package list updates automatically and updates are installed automatically.
Bad news: Depending on your organization’s needs, you might not want to install security updates immediately. Some organizations want to test the updates on a staging system first. Only after tests with the security update prove successful will the updates be rolled out to production. That type of deployment requires an additional test system and is out of scope for this blog post.
Configuring user accounts
The “veeamrepo” user account, which was created during the installation process, has full root (administrative) permissions because it’s a member of the “sudo” group. “sudo” is the command that allows you to run a command as root (administrator on Linux). Every member of the “sudo” group can run every command with “sudo” in Ubuntu.
While installing the hardened repository, “sudo” or “su” permissions are required. After installation, “sudo” or “su” is not required anymore beginning with V12. “su” (substitute user) in this context means, that a user can enter the root password to become root. As mentioned earlier, root currently has no password. That means, one cannot use “su” to switch to the root user.
Here comes the quirks. When removing the “veeamrepo” user later from the “sudo” group, there is no usable administrative/root user available anymore. Not even a simple “shutdown” or “reboot” command would be possible. There are different options to deal with that:
- Set a password for the root user. With the default settings, root cannot log in with a password via SSH. This option adds some risk for the local console if an attacker knows that root has a password. The attacker still must know (or brute force) the root password. Protection of the root password is required in any case.
- After installing the hardened repository, there is no need for sudo for the “veeamrepo” user anymore in V12. One can remove the “veeamrepo” user from the “sudo” group and go without any root permissions. If root login is required for troubleshooting, then one can boot into “single user mode” (local console login required) and do troubleshooting. With only a minimal installation, this type of troubleshooting should not be required ever. Bigger issues could be solved by re-installing the whole Ubuntu system exactly as before again. Because the backup data is located on a second RAID-set/volume, the backup data stays where it is and only the operating system RAID-set/volume gets re-formatted
- Option 2 can be enhanced and some sudo commands can be allowed (e.g. reboot or shutdown)
- An additional administrative user could be created. In the end, that user would have the same permissions as root. The only advantage would be that an attacker must guess the username and the password here (compared to scenario 1). Compared to option 1, this is a bit of “security through obscurity,” which is considered a bad practice.
- One can configure multi-factor authentication for scenario 1 or 4. That adds complexity, and will not be covered in this blog post.
For a good balance of security and complexity, Veeam recommends going with option 3. Add a few “convenience commands” to the /etc/sudoers file and remove the “veeamrepo” user from the sudo group after installing the “hardened repository” role.
Go to the last line and add the following lines to allow reboot and shutdown.
The result should look like this.

Exit the editor with CTRL+X, confirm with “Y” and “ENTER.”
Alternatively, you can also edit the file directly by copying and pasting the commands below. The username “veeamrepo” needs to be adjusted if you chose another username.
sudo bash -c "echo 'veeamrepo ALL = (root) NOEXEC: /usr/sbin/reboot' >> /etc/sudoers"
sudo bash -c "echo 'veeamrepo ALL = (root) NOEXEC: /usr/sbin/shutdown' >> /etc/sudoers"
Once the hardened repository role is installed (a separate blog post will go through that), one can lock down the system by removing the “veeamrepo” user from the “sudo” group. Even if somebody finds out the password of the “veeamrepo” user and gets access to the local console (or SSH, if enabled), they still cannot do any harm. They cannot elevate to root via a “su” or “sudo” command.
Conclusion
An Ubuntu installation is easy, but it has many more and different steps than a Windows installation. Technically, one could almost use this system directly as a hardened repository for Veeam Backup & Replication. “Almost” means, that there are additional hardening steps possible to be aligned with security standards such as DISA STIG or CIS benchmarks. Further hardening steps will be covered in a separate blog post.