One of the most important components of Veeam Availability Orchestrator is the Failover Plan. The Failover Plan is an essential part of an organization’s disaster recovery plan. It contains the virtual machines to be protected, what steps to take during recovery, and other important information.
Now, we are going to take a look at the step-by-step process to creating your disaster recovery plan with Veeam Availability Orchestrator.
When you start the New Failover Plan Wizard, you will first be prompted to select a site. If you have multiple sites in your VAO environment, you would pick the production site of the application you are protecting.
Next, we want to give our Failover Plan a name. I like to use something that is clear and concise, such as the application name. You can also enter a description of your Failover Plan, as well as the contact information for the application you are protecting.
Next, we select the VM Group (or multiple VM Groups) containing the virtual machines of our application. As we mentioned in a previous post, VM Groups can be powered by VMware vSphere Tags. In this list, you can see the VMware vSphere Tags I have setup in my environment. In this case, I am going to select the applications with the HeliumRUN Windows Tag, since it has the virtual machines I am protecting with this Failover Plan.
Next are our VM Recovery Options. In this screen, we can decide how to handle a VM recovery failure in the unlikely event it happens. We can use VAO to run scheduled recovery tests on a regular basis, so this sort of failure would be a rare occurrence. We can also specify if we want to recover our VMs in a particular order, or at the same time, or finally how many VMs to recover simultaneously.
In the next screen, we are going to select the steps we are going to take for each VM during recovery. After we finish creating the Failover Plan, we will be able to add additional steps for individual VMs, including custom steps we upload to VAO. This is useful when we want to configure particular steps to verify the operation of an application such as Exchange, SharePoint, ISS, or SQL. For a complete list of Failover Plan steps included with VAO, be sure to take a look at the Veeam Availability Orchestrator official user guide here. Some steps, such as Verify SQL Database require credentials. If you select a step that requires credentials, you will be prompted to enter them for use.
One of the most important things to remember is that after we execute a disaster recovery plan, our disaster recovery site is now our production site. Because of this, it is very important that our applications receive the same level of protection they would on any other day. Luckily, Veeam Availability Orchestrator makes this easy by leveraging a pre-configured template job in Veeam Backup & Replication. At this screen, you can simply select the backup job you wish to use to protect your data at the disaster recovery site.
After ensuring your data is protected after your disaster recovery plan has executed, the next step is to configure Veeam Availability Orchestrator’s reporting capabilities. VAO has a completely customizable report template. These disaster recovery plan templates allow for the inclusion of all information needed during a disaster recovery plan execution, and can be scheduled to be sent to key stakeholders on a regular basis to ensure the environment is always ready for failover. For more about the reports included in VAO, be sure to check out this guide to VAO terminology.
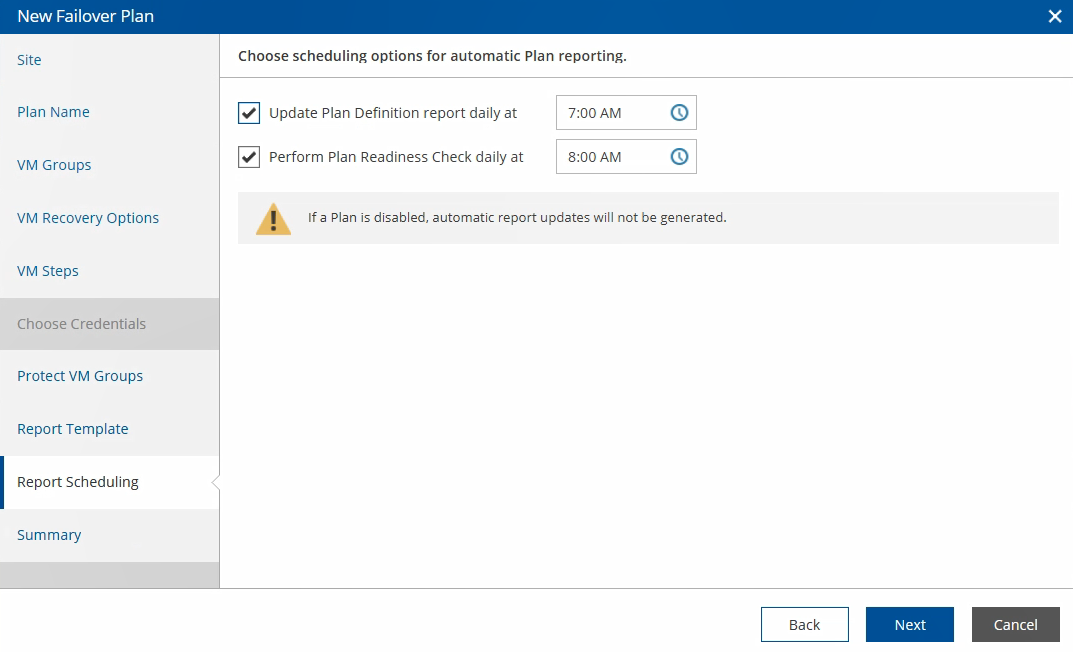
By default, the Plan Definition Report and Readiness Check are scheduled to run daily, which is a great way to check the health of our disaster recovery plan. The Plan Definition Report includes all the information about the Failover Plan we just created, as well as a log of changes that have been made. The Readiness Check is a light-weight test that checks to ensure we are ready for a failover at a moment’s notice. If for some reason our Readiness Check has an error, we can then act to remediate it before a disaster strikes.
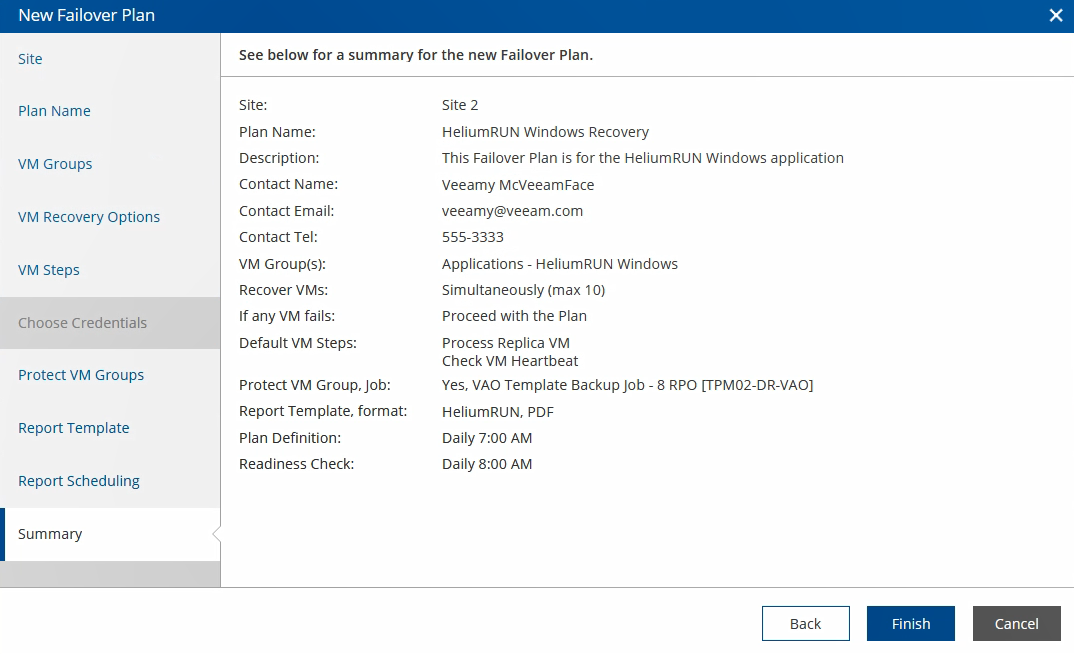
Finally, we are presented with a summary screen that shows us how our Failover Plan has been configured. Once we click Finish, we have completed setting up our Failover Plan.
If we want to make any changes to our Failover Plan, it’s as simple as right-clicking on our Failover Plan and selecting “Edit,” or highlighting our Failover Plan and clicking “Manage” and then “Edit” on the navigation bar. The edit state is where we can add specific steps to each virtual machine, or to the failover plan in general. For example, I have uploaded a script to be run in the event of a disaster to make some DNS changes for my environment DNS changes.
This screen can be used to add either Pre or Post failover steps, or steps to each VM individually. The steps can also be put into a particular order if desired. The best part of this functionally is the ability to create a custom flow of steps as needed for each VM. For example, I may want to use the included steps of Verify Web Server Port and Verify Web Site (IIS) for a web server in the Failover Plan, and different steps on the SQL server. All of these steps will then be captured in a Plan Definition Report the next time it is run.
Congratulations, you are now protecting your application with Veeam Availability Orchestrator! If you want to take a look at creating your own Failover Plan, you can download a 30-day FREE trial of Veeam Availability Orchestrator.


