Have you ever gotten tired of doing the same routine operations over and over again? What about that one where you create a new Virtual Machine (VM), install the guest Operating System (OS), enable the necessary features, apply updates and then install the typical set of software? Well, there’s a remedy for this problem and you’ll only need to do everything once! The process includes preparing a base reference VM which can be used later as new applications and services are requested. This reference VM is called a VM template and it can help you in many ways. Now, let’s look at how this can be done!
Option 1. Use an existing VM
The easiest way to create a VM template is to create a Hyper-V clone of your existing VM. Just power it off, copy its hard disk and then store it somewhere. Sounds simple? With this manual copy of the VHD(x) you’ll be able to create a new Hyper-V VM anytime and attach the previously saved virtual hard disk to it. This however is not a recommended procedure… so why wouldn’t I recommend it? The first problem this method introduces is that you’ll risk a conflict between the original source VM and cloned virtual machine due to network misconfigurations as well as duplicated NetBIOS and FQDN names. Even if you fix this on either of them, some applications still might have problems working properly.
Note: Despite the common belief, it won’t bring the issues of a cloned SID (except for a first domain controller to the domain). Instead you may have troubles with 3rd party software components that depend upon SIDs and Windows features such as WSUS as cloned VMs may encounter issues getting updates from your WSUS server. For details, refer to this article by Mark Russinovich.
In addition to the above, it’s not a supported delivery mechanism from the Windows licensing point of view. Essentially you could purchase just one license and copy it repeatedly which would lead to audit problems further down the line!
Option 2. Reference image with SYSPREP
The famous SYSPREP utility is a native tool designed by Microsoft for this exact scenario – cloning a Windows OS. SYSPREP strips the computer’s SID and cleans up the necessary information within the system registry, destroying the Windows activation and system-specific data, thus preparing the OS installation for duplication. SYSPREP is included in all editions of Windows Server and client operating systems.
Note: SYSPREP default location: %windir%\system32\sysprep\sysprep.exe
A few things to keep in mind while using SYSPREP:
- If the original VM is already joined to a domain and then cloned, both the original and cloned virtual machines will have the same Domain SID (this is not the machine SID). This will no doubt cause issues. That’s why you shouldn’t join a reference VM to the domain!
- SYSPREP can reset Windows activation not more than 3 times as it’s a default limitation of the utility. Be careful, if you’re going to make changes to a reference VM template and need to run SYSPREP more. However, there is a workaround.
Ok, now that we’re done with our precautions, let’s go back to our Hyper-V VM template. What are the exact steps you must follow to complete the virtual machine cloning?
1. Create a reference VM: Install guest OS, enable roles and features and then apply the needed Windows Security patches and hot fixes.
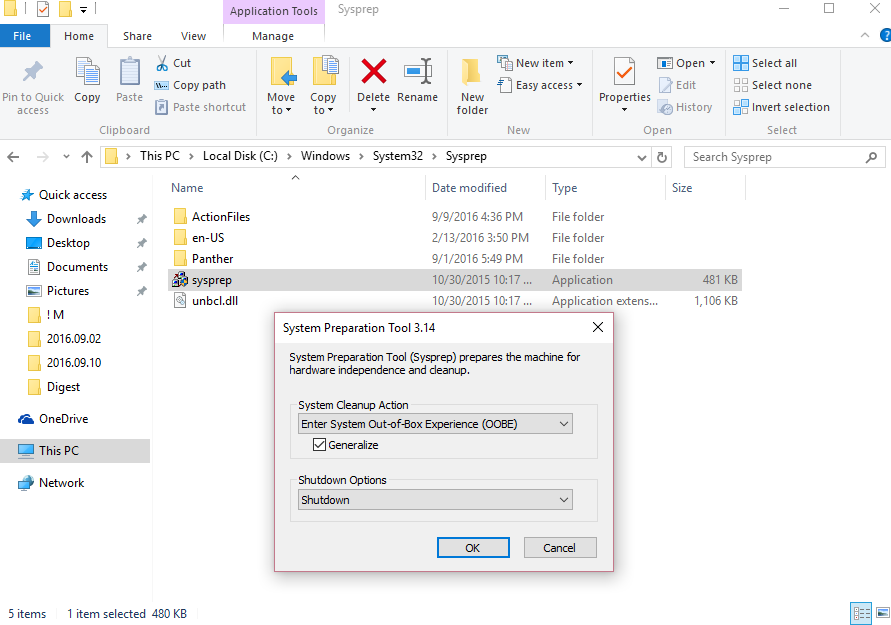
2. Run SYSPREP (Enter system out-of-box experience, enable generalize, shutdown option: shutdown). Although the utility has more functions, we will stick to the “generalize” option as it cleans up the Windows event logs, network settings, Windows Media player settings, shell settings and licensing information.
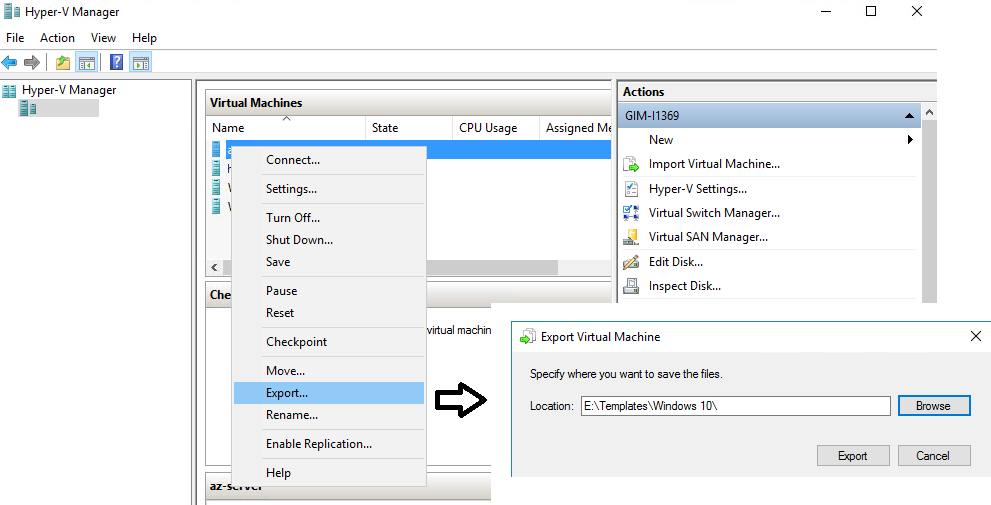
3. Once the VM is prepped and shut down, go to Hyper-V Manager and export the VM.
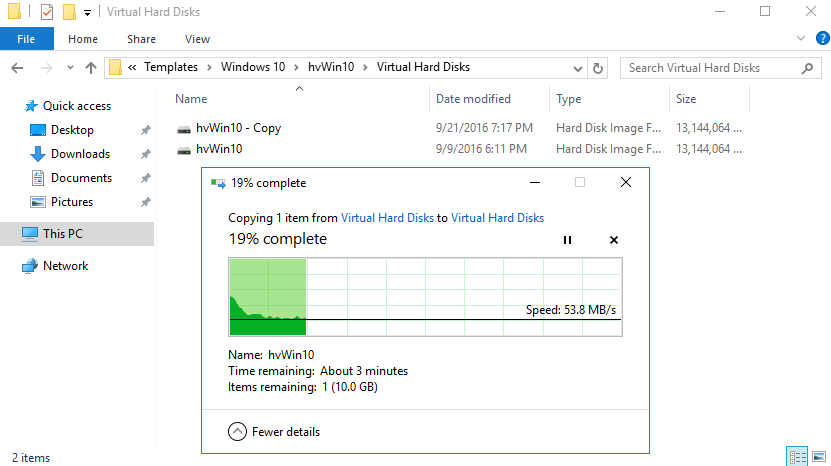
4. When you need to deploy a VM out of this template, go to the folder where you exported the VM to and copy the virtual hard drive over to your Hyper-V VM folder. But, make sure you COPY the VHD(x). This will allow you to continue to utilize the reference in the future.
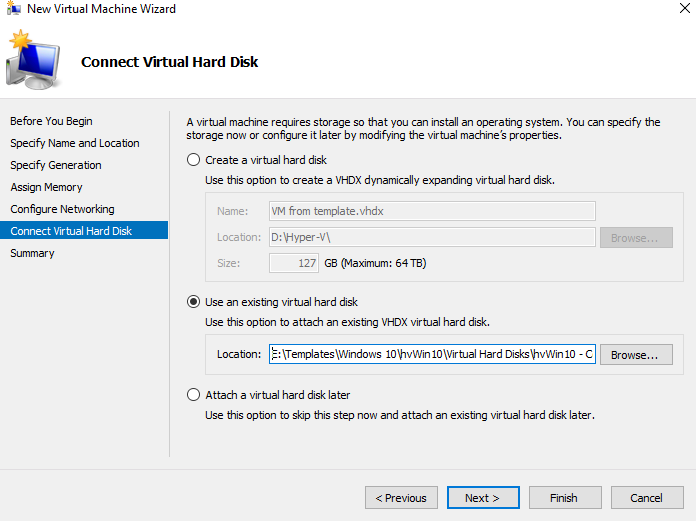
5. Create a new VM per the usual steps and attach the copied VHD(x) to it.
6. Power the VM on and then answer the ‘out-of-box experience’ questions in the Windows Welcome program to set it up properly. This experience is enabled when we chose to run SYSPREP with the out-of-box experience switch enabled.
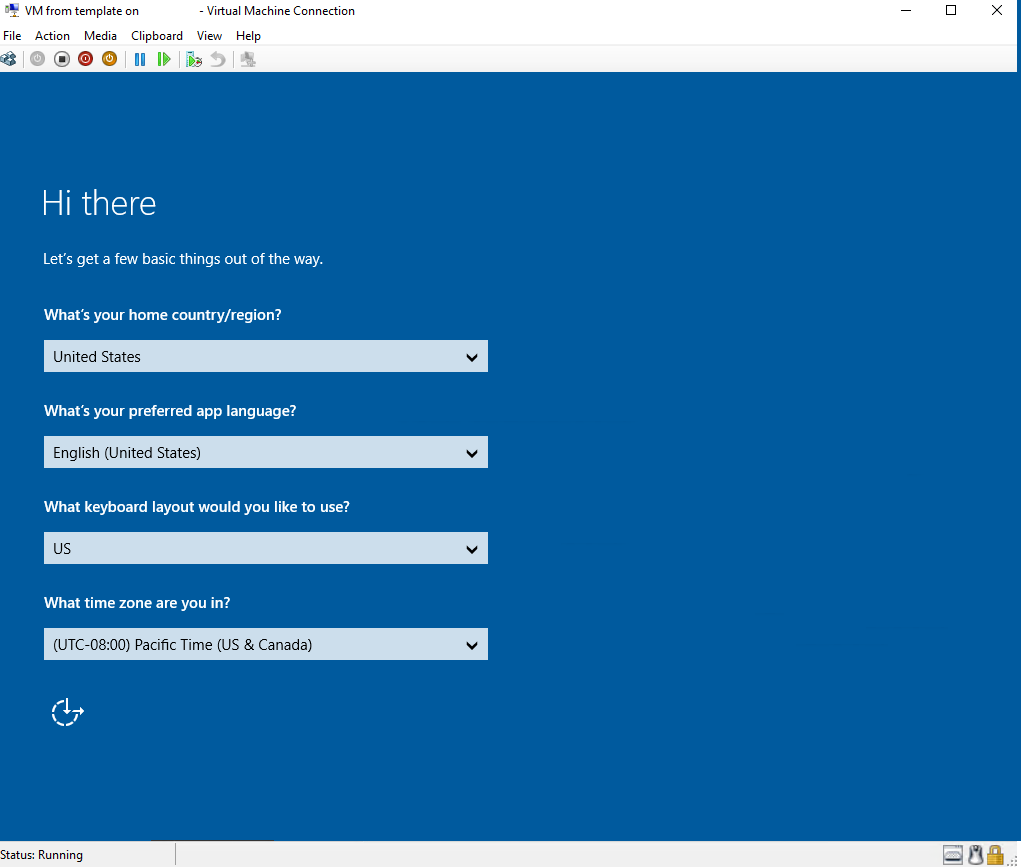
7. Now you will be prompted to go through the familiar wizard to configure your language, user preferences and then set up the administrators’ password. That’s it!
Even though these steps take some time, this way is for sure much faster than installing everything from scratch.
Other Options
The last option is to use System Center Virtual Machine Manager (SCVMM). Yes, I realize that this component is not often installed within smaller Hyper-V infrastructures, but it can be pretty helpful. Perhaps you even already own SCVMM as it is included within the System Center bundle, meaning that if you own one piece of System Center you own them ALL! So, be sure to check with your licensing team to see if you have the rights to VMM.
Now, SCVMM allows you to maintain a VM template library and selecting the desired options for both Windows and Linux VMs is very flexible. Since this post is not intended to cover these specific details, please refer to this article or watch the demo for details. However, VMM is slightly more complicated than the first methods I shared and it is a more ‘Enterprise’ style approach.
Conclusion
I hope you learned something new today and use this process to avoid repetitive and very tedious deployments. VM templates are a great way to maintain a consistent deployment image and a great base from which you can deploy applications and services to your business. If you happen to have another way of doing Hyper-V VM templates, please share it in the comments! I’ll be happy to discuss it and we’ll all be happy to learn.