When it comes down to Hyper-V resource management, you’d better be sure about utilization in your own environment. There is some specific monitoring software, allowing you to get an overview of system consumption and even perform capacity planning for future, but sometimes it might not be enough. Built-in Hyper-V features, on the other hand, that let you care about the future right at the configuration stage. Hyper-V dynamic memory is one of these technologies, and below, you’ll find out how you can manage your Hyper-V VMs better with it.
Intro to Hyper-V dynamic memory
Dynamic memory is a Microsoft Hyper-V feature first introduced in Windows Server 2008 R2 SP1 and expanded in Windows Server 2012. This technology allows hypervisor to handle RAM consumption by host VMs in a flexible way, if possible. For example, hypervisor can dynamically add more RAM to a VM when the guest-OS needs it, or to reclaim excess back when a VM goes idle.
Even though RAM is not as much of an issue these days and pricing for RAM modules is noticeably dropping over the years, sometimes you can find this technology very handy. What if you’re operating with a limited budget or using old servers that can’t be easily upgraded and given additional RAM? In addition to that, this technology works perfect with a great number of VMs, keeping overutilization under control, allowing you to forget about wasting resources and providing better visibility towards your system. It can be especially helpful when you have a lot idle or low-loaded VMs (ex. VDI environments).
Hyper-V dynamic memory settings explained
Let’s look at Hyper-V dynamic memory settings and see how we should set them up.
All these dynamic memory settings should be configured within VM settings in Hyper-V Manager. Keep in mind that to enable or disable dynamic memory, the VM must be powered off at the moment. So once you create a VM or edit an existing one, you’ll select the amount of RAM for a VM and there are two options: Assign a certain value (static) or enable dynamic memory and let the hypervisor re-assign it on-the-fly. With the static option, the amount remains the same regardless if a VM is starting up, idle, performing an action or shutting down. While with dynamic memory, the amount is adjusted according to VM experience.
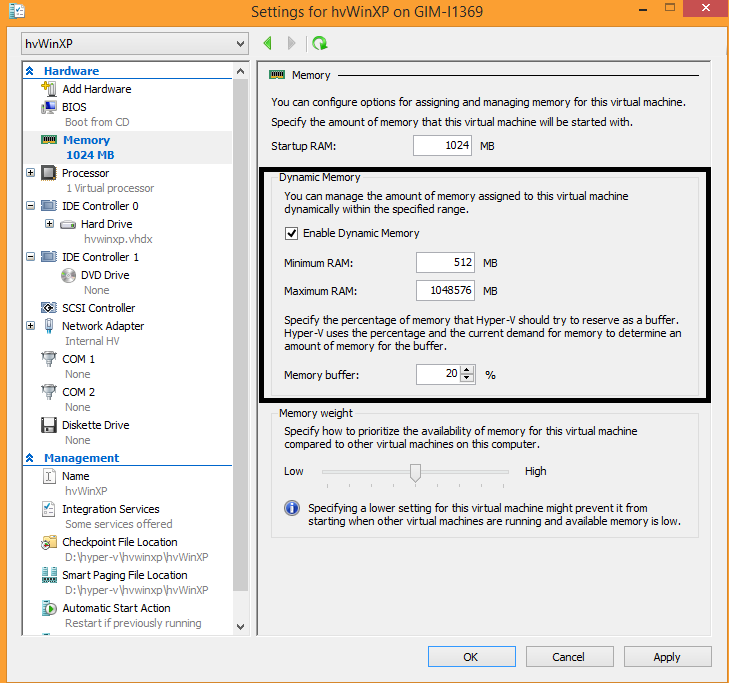
When you decide to configure dynamic memory, there are few values you should set up.
Startup RAM. The amount of RAM assigned to the VM during its startup. This value can be the same as the “minimum RAM,” or more — up to the “maximum RAM.” The startup RAM value can’t be configured when a VM has been powered on.
Once the VM boot is complete and the hypervisor started, it will try to use the amount of RAM configured as the minimum RAM.
Minimum RAM. The minimum amount of RAM that the host should be trying to assign to a VM, when it’s booted. When multiple VMs are demanding memory, the Hyper-V host can reallocate RAM away from the VM until this minimum RAM value is met.
This setting can be only reduced (down to 32 MB with 2MB step), not increased while the VM is running. Be careful with that, as the changes take place immediately and you will have to power the VM off if the value is occasionally set too low.
Maximum RAM. The maximum amount of RAM that the host provides to a VM.
This option can be only increased, not reduced while the VM is running. There is a 1TB maximum you can allocate as per Hyper-V in Windows Server 2012 R2 limitation.
All values above can only be configured with odd numbers in increments of 2MB.
Memory buffer. The percentage of memory that Hyper-V should allocate to the VM as a buffer.
The value can be configured within 5-200% range with 20% set by default.
A Hyper-V host uses the current VM demand for memory to figure out how much memory for the buffer it should be reserving. For example, for a VM with a current RAM consumption at 1TB, Hyper-V is keeping a 20% buffer and allocating the VM 1.2TB of RAM.
Memory weight. The priority you’re setting for this VM compared to other VMs running on the same Hyper-V host.
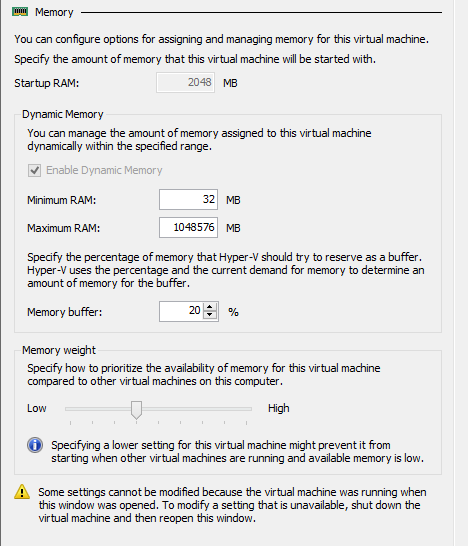
Keep in mind that memory adjustment is fast but rather conservative. It means that a virtualization host doesn’t provide all the resources at once even if it can do that right away. Instead, it would be trying to keep things according to the actual RAM consumption and the memory buffer settings.
Dynamic memory in action
To show how exactly it works, I’ve set up a test VM (Windows 8.1 64-bit, Veeam Backup & Replication v9 pre-installed) with the parameters from the figure above. Startup RAM – 2GB, Min RAM – 32 MB, Max RAM – 1TB, memory buffer – 20%. Then I launched the VM and found out that during the initial OS boot, it was assigned with 2GB RAM as expected.
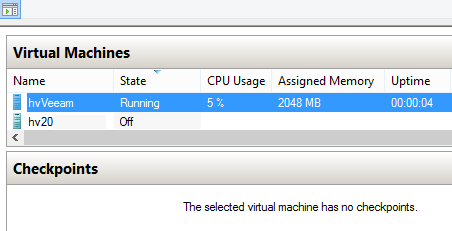
Once the system booted, I noticed the hypervisor began to regain RAM from the VM, which was idle. RAM was going down and reached 698 MB at rest.
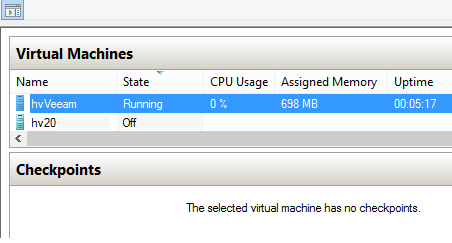
Then, I started Veeam Backup & Replication application and ran the backup job, just to bring some workload to the VM. As expected, the VM demanded more RAM from the hypervisor and the hypervisor gradually allocated more RAM to it.
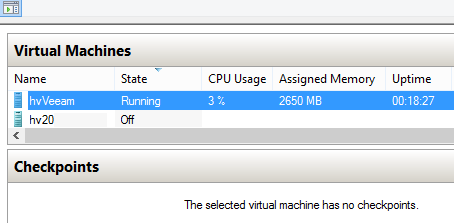
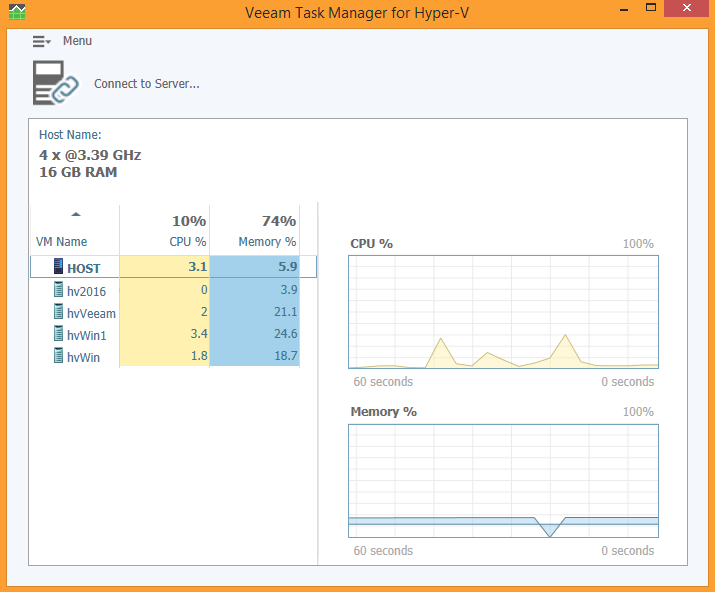
I’ve also been checking the RAM value from the guest-OS and noticed that the internal Task Manager might be reacting slow to the RAM amount change or just showing an incorrect value. That’s why it is better to trust Hyper-V Manager information or use a dedicated Veeam Task Manager for Hyper-V for CPU and RAM monitoring in the first place.
Conclusion
Hyper-V dynamic memory is a great help for Hyper-V administrators. The technology allows to run multiple VMs with RAM overutilization and dynamically balance the resource consumption, according to actual VM load. Whenever you’re tight on RAM resources or have a desire to manage available computing resources better, you know what to enable.
