In this blog post, I will show you how you can deploy Veeam Backup & Replication 9.5 with Update 3 to a virtual machine. This is a really handy, little script because it can help you get Veeam going in your lab in a snap. The basic steps to accomplish this are as follows.
1. Create a virtual machine running Windows Server 2016. In my case, I created a Hyper-V VM called Management01.

2. Download a copy of Veeam Backup & Replication and prepare either an already existing license file or request a trial one from the same download page.
3. In our case, we stored both files in F:\Temp1

4. Grab a copy of the PowerShell script from my GitHub repository and save it to the same F:\Temp1 location
5. Open an Administrative PowerShell Prompt and change the path to F:\temp1. Then type Import-Module .\Install-Veeam-HyperV.PS1 -Force -Verbose and press Enter. This will load the Install-Veeam Module which we will use to deploy Veeam to our lab.

6. Type Install-Veeam -VMName Management01 -GuestOSName -Management01 -VMPath F:\dcbuild_test and run it.

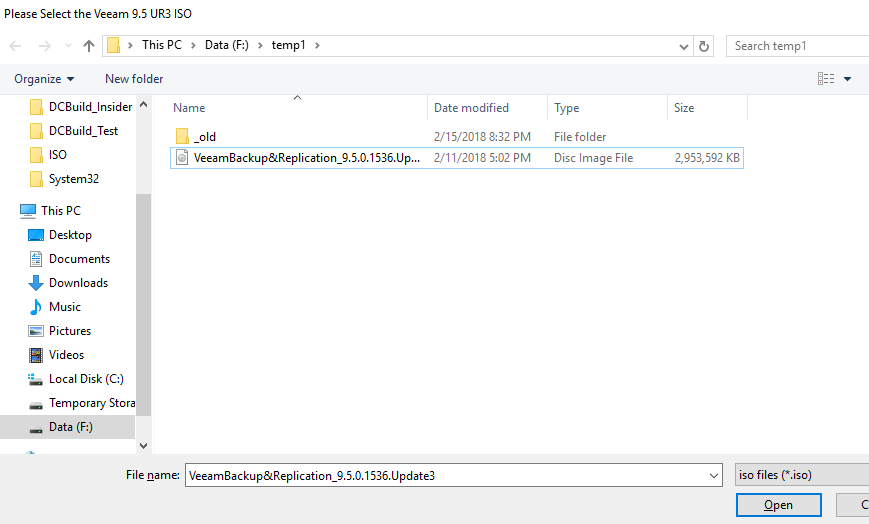
7. On the Please Select the Veeam 9.5 UR3 ISO window, browse to F:\temp1\VeeamBackup&Replication_9.5.0.1535.Update3.iso
8. On the Please Select the Veeam License File window, browse to your license file prepared at step 2. In my case, I used my Veeam NFR license.

9. Input the credentials for your lab. In my case, I will install using my Domain Administrator Account “MVPDays\Administrator”. We will pipe this into the VM using PowerShell direct with the $DomainCred variable.

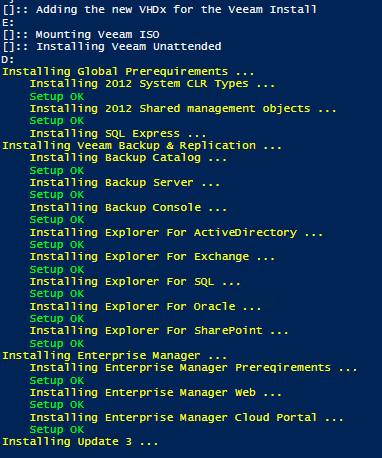
At this point it is time to sit back and relax as the next steps will happen automatically:
-
- Add a new VHDx file from the host
- Format the new VHDx file and giving it a volume label of Veeam
- Mount the VHDx to the host
- Copy the Veeam ISO specified earlier
- Copy the Veeam license file specified earlier
- Install 2012 System CLR types
- Install SQL Express
- Install the Veeam Backup & Replication 9.5 server
- Install the Veeam Backup Console
- Install the Explorer for Active Directory
- Install the Explorer for Exchange
- Install the Explorer for SQL
- Install the Explorer for Oracle
- Install the Explorer for SharePoint
- Install the Enterprise Manager web and Cloud Portal
- Finally update to Rollup 3
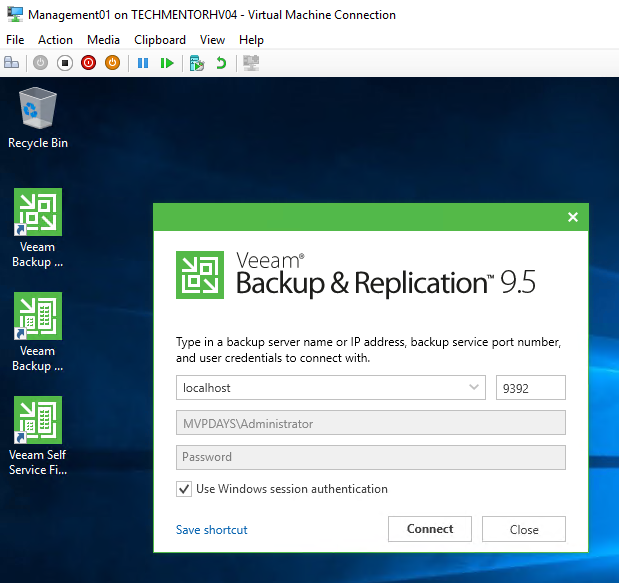
Your finished product will look just like this:
I hope you enjoyed this post, and please feel free to update my code and use it in your lab. As always, happy learning!