Windows Deployment Services (WDS) is a great addition to the Windows product set. Out of the box, it’s able to deploy Windows VMs, and with a couple of small tweaks, it’s possible to have WDS build Linux and VMware servers, all from a selectable Preboot eXecution Environment (PXE) boot menu.
To configure WDS to be able to deploy Windows and Linux systems requires some command line changes. Essentially, the PXE boot loader used by Windows needs to be swapped out for a Linux one. Once done, a menu entry is created to allow the Linux PXE boot menu to hand over to Windows for Windows builds, and IIS is used to provide a web interface for downloading the Linux config files.
The WDS setup I currently use builds Windows, CentOS and ESXi. I’ll be focusing on those three operating systems as I go through this article. There is no reason that others couldn’t be used.
Taking a clean Windows server, I like to provide a 60GB C: drive for the OS and a 300GB WDS drive for the various WIM files for deployment of Windows and for the Linux install files.
The installation and configuration have several steps:
Setup the WDS Server
The server will need WDS and IIS to be installed. This can be done either via the server manager tool, or if you like, the PowerShell approach.
Install-WindowsFeature –name Web-server -includemanagementtools

Install-Windowsfeature –name WDS -includemanagementtools
Now that we have the basic Windows Deployment Services server installed, we need to make some changes to the DHCP pool. If you like, you can add a second NIC to this server and have a dedicated network built off it, but personally, I like to be able to build my servers on the main network anyway, so I prefer to update the central DHCP server with the additional WDS DHCP attributes:
The DHCP settings I use are:

The “Boot Server Host Name” is the IP address of the WDS server.
The “Bootfile Name” is the WDS executable that we want the client to run.
The other three options are pretty standard for most DHCP setups.
On the WDS server, launch the configuration wizard and finish up the WDS configuration. There are a few minor changes I like to make to the setup.
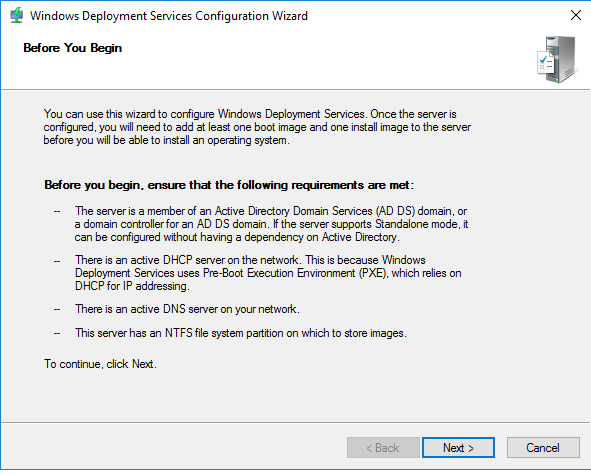

You can integrate this server with AD, as at this point we are configuring the Windows options, but I prefer a standalone server that responds to all requests and doesn’t need AD pre-staging.

I change the C:\RemoteInstall to E:\RemoteInstall – E: being the second drive that I add to the WDS server specifically for WIM files, Linux files and so on.

As above, I like my PXE server to respond to all requests as it just saves having to approve things in AD.
The last option to change is on the PXE menu, for that you’ll have to launch the WDS deployment console and right-click on the server name and change the option under the boot tab from “Require the user to press F12 key to continue the PXE boot” to “Always continue the PXE boot.”

You can now add .WIM files to WDS. Grab a “boot.wim” and “install.wim” from a Windows 2016 ISO and you’re good to go with WDS deploying Windows images.
You should be able to PXE boot a VM and get the standard Windows-only WDS boot screen. It’s good to test at this point just to make sure that everything works because from here we start to make some changes to the fundamentals of WDS which will allow it to provide both Linux and ESXi installs.
Change the Windows Deployment Services boot loader
At this point, the WDS server is ready to deploy Windows images, but we want it to do more than that. It needs to be able to deliver Linux-based images as well, so the first thing to do is to change the WDS boot loader to a Linux PXE-based one.
To do this, we need a copy of sysLinux. Do NOT download anything newer than 3.86 as it won’t work with ESXi as their installer is still based on 3.86.
Once you have a copy of sysLinux 3.86, extract it all to a temp folder, and we need to move a few files around. This is a little bit of messing around and the most annoying part of the whole install!
From the sysLinux 3.86 zip file, extract:
- core\pxeLinux.0
com32\menu\vesamenu.c32
com32\modules\chain.c32 - Rename pxeLinux.0 to pxeLinux.com
- Copy the files to your remoteinstall\boot\x64 and remoteinstall\boot\x86 folders
- In both x86 and x64 folders, rename pxeboot.n12 to pxeboot.0
From the CLI, run the following commands — this changes the boot loader over to the Linux PXE loader.
wdsutil /set-server /bootprogram:boot\x86\pxeLinux.com /architecture:x86

wdsutil /set-server /N12bootprogram:boot\x86\pxeLinux.com /architecture:x86

wdsutil /set-server /bootprogram:boot\x64\pxeLinux.com /architecture:x64

wdsutil /set-server /N12bootprogram:boot\x64\pxeLinux.com /architecture:x64
Finally, in both the x86 and x64 folders, create a subfolder called pxeLinux.cfg, and in there create a file called “default” and copy in the following text — this will set up your boot menu.
DEFAULT vesamenu.c32
PROMPT 0
NOESCAPE 0
ALLOWOPTIONS 0
# Timeout in units of 1/10 s
TIMEOUT 0
MENU MARGIN 10
MENU ROWS 16
MENU TABMSGROW 21
MENU TIMEOUTROW 26
MENU COLOR BORDER 30;44 #20ffffff #00000000 none
MENU COLOR SCROLLBAR 30;44 #20ffffff #00000000 none
MENU COLOR TITLE 0 #ffffffff #00000000 none
MENU COLOR SEL 30;47 #40000000 #20ffffff
MENU BACKGROUND flow.jpg
MENU TITLE PXE Boot Menu
#—
LABEL wds
MENU LABEL Windows Deployment Services
MENU DEFAULT
KERNEL pxeboot.0
#—
LABEL CentOS68
MENU LABEL CentOS 6.8
KERNEL /web/CentOS/6.8/images/pxeboot/vmlinuz
append initrd=/web/CentOS/6.8/images/pxeboot/initrd.img root=/dev/ram0 init=/Linuxrc ramdisk_size=100000 ks=https://[IP of your WDS server]/CentOS/6.8/centos-base-ks.cfg
#—
LABEL CentOS72
MENU LABEL CentOS 7.2
KERNEL /web/CentOS/7.2/images/pxeboot/vmlinuz
append initrd=/web/CentOS/7.2/images/pxeboot/initrd.img
#—
LABEL VMWare500U3
MENU LABEL VMWare 5.0.0 U3
KERNEL /web/VMWare/5.0.0/U3/mboot.c32
APPEND -c /web/VMWare/5.0.0/U3/boot.cfg
#—
LABEL VMWare553b
MENU LABEL VMWare 5.5 U3b
KERNEL /web/VMWare/5.5.0/U3b/mboot.c32
APPEND -c /web/VMWare/5.5.0/U3b/boot.cfg
#—
LABEL VMWare60
MENU LABEL VMWare 6.0
KERNEL /web/VMWare/6.0/mboot.c32
APPEND -c /web/VMWare/6.0/boot.cfg
#—
LABEL VMWare65
MENU LABEL VMWare 6.5
KERNEL /web/VMWare/6.5/mboot.c32
APPEND -c /web/VMWare/6.5/boot.cfg
#—
LABEL Abort
MENU LABEL AbortPXE
Kernel abortpxe.0
#—
LABEL local
MENU LABEL Boot from Harddisk
LOCALBOOT 0
Type 0x80
Change IIS settings
As IIS is needed to host the CentOS and ESXi install files, I always create a web file structure on the data VMDK. Mine looks like this:
E:\web – root directory where IIS points
E:\web\centos\7.x\7.1 – CentOS 7.1 install files
E:\web\vmware\6.5 – VMware 6.5 install files
In IIS, file browsing needs to be enabled so that the Linux installer and the VMware installer can pull files.
Launch the IIS administration tool and click on your server -> Default site -> Directory browsing and enable it.

You can also make the server HTTPS which isn’t a bad idea.
Add Linux
At this point, we can add in a Linux install. The way I do this is:
download the smallest ISO version of CentOS (normally the minimal ISO install), mount the ISO and copy the contents to “E:\web\centos\7.x\7.[version]” or something that is equally memorable. Once done, you can add in things like a kickstart file to make the install truly hands off. As an example of this, here is the entry I use in the default pxeLinux.cfg file:
LABEL CentOS72
MENU LABEL CentOS 7.2
KERNEL /web/CentOS/7.2/images/pxeboot/vmlinuz
append initrd=/web/CentOS/7.2/images/pxeboot/initrd.img inst.repo=[IP of your WDS server]/CentOS/7.2 ks=[IP of your WDS server]/CentOS/7.2/centos-base-ks.cfg
Add VMware
And for the final part, let’s drop in ESXi 6.5. Again, this is just a matter of copying all the files from the VMware ISO into the relevant folder on the WDS server, but once that’s done, you should edit the boot.cfg file in the VMware folder and remove the spaces. So it looks like this:

In conclusion, modifying the WDS server, IIS and the various config files can be a bit of pain, but once the tweaks have been made, you’ll be able to use the PXE menu to hand over to WDS and select any Windows OS that supports a WIM file. Plus you can get it to launch Linux installs that perform a full hands off install and the same goes for VMware. You can also add in other applications such as GParted and Memtest which can all come in quite handy.
See Also: