In the next several articles we will take you through the steps of deploying a Microsoft Windows Server 2016, configuring it, enabling a Hyper-V role and protecting your data with Veeam Backup & Replication software.
Windows Server 2016 comes in Standard and Datacenter editions and offers several types of installation for both editions: Desktop Experience (full GUI mode), Core (no GUI) and Nano Server. We will go through the installation and configuration of Windows Server 2016 with a Core type deployment, the initial setup and preparing it for the Hyper-V role.
Let’s begin.
Windows Server 2016 Core minimum system requirements
Before you start, check that your hardware meets these minimum system requirements first. This would be the very basis of it since these are just for running the system itself. To run your production workload, you need to size accordingly.
First, download and boot our server from the ISO. Once the boot start and the desired language is chosen you will be welcomed with the screen (Figure 1) to choose the installation type.
Note: Nano Server deployment is not on the list, because you would need to go through a different set of steps to install it. You can find the full guide on how to do this in our dedicated Nano Server Deployment blog series.
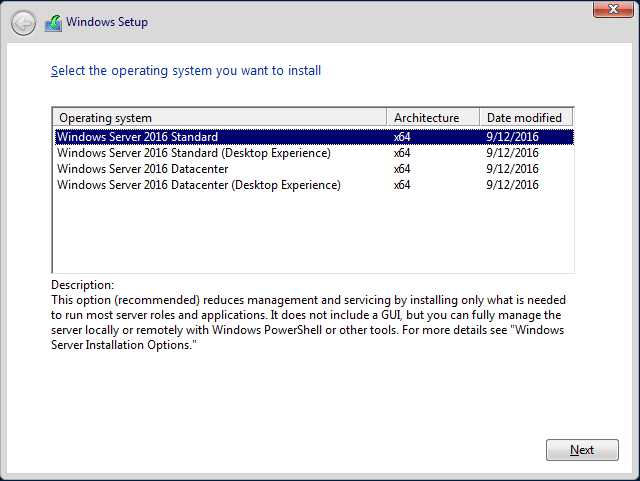
We’ll go with the “Windows Server 2016 Standard” which represents the Core mode of installation and then accept the license terms to start our server disk partitioning. From the minimum system requirement, Windows Server 2016 on Core mode requires a 32 GB disk space as a system drive, so we’ll go ahead and use a 50 GB disk. Note that the system disk will not be used for hosting any Hyper-V configuration files as we will use an ISCSI storage for that as well as for hosting of VMs’ files.
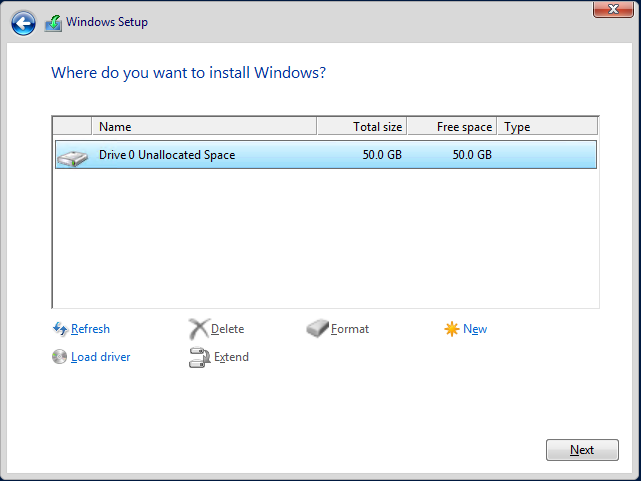
Next is our selection here to partition the full size of the drive and then start the installation of the server.
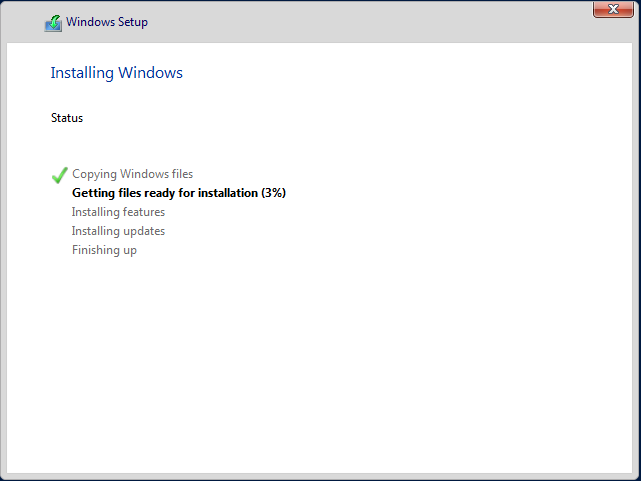
The installation process is fast and the process will automatically reboot the server, to be greeted by changing the server password:


Windows Server 2016 initial configuration
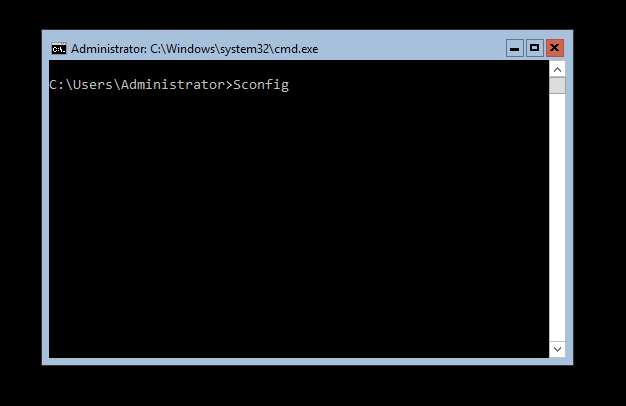
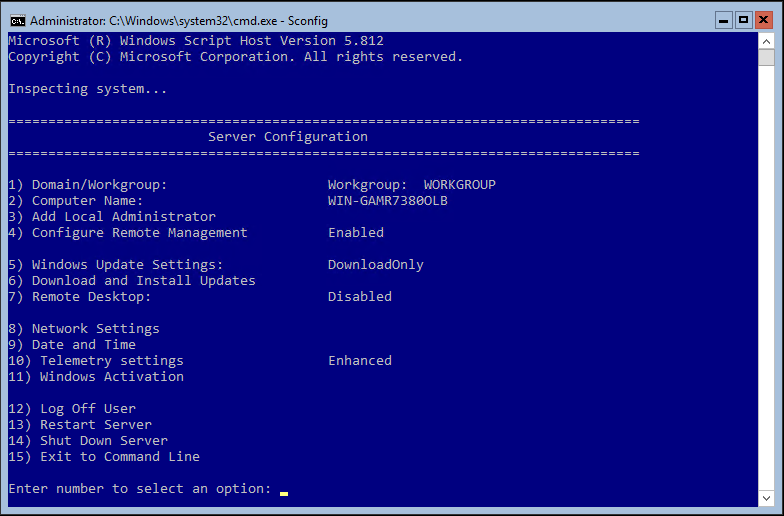
Since we’re doing the Core mode installation, all that you get is a command line window which you use to configure the server via commands and/or scripts including PowerShell. To start our initial server configuration, let’s type “Sconfig” command to start the server configuration (Figure 5).
You are greeted with the default parameters and options that you can change (Figure 6).
To change the Computer name, choose option 2. Once submitted, a restart will be required (Figure 7).

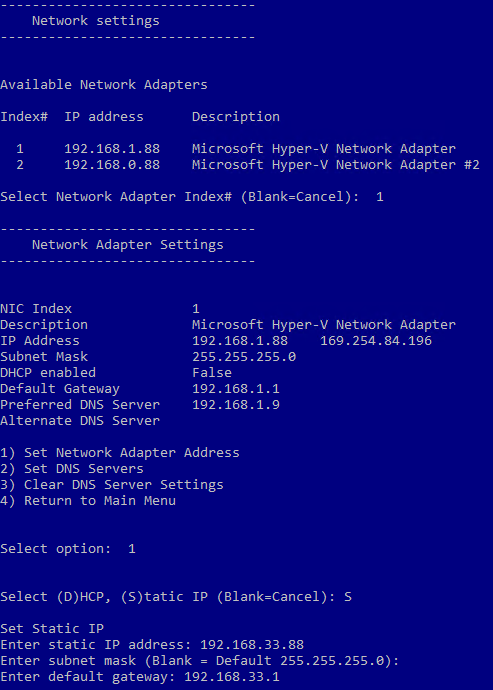
The next step is changing the IP address. We are going to use two IP addresses: One for production and one for the storage (ISCSI). For this, we will choose option 8 and then select each adapter to configure the desired IP address (Figure 8).
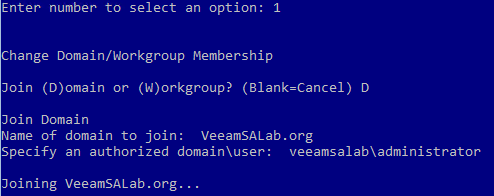
Now, we are ready to join the server to our domain by selecting option 1 (Figure 9).
These are the basic steps to get you started, but I recommend to go through the list and configure and modify any configuration suitable for your environment. For example, I will enable remote desktop by selecting option 7 and then check the date and time by pressing option 9 and so on.
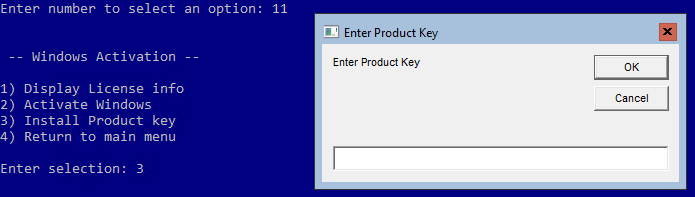
Another important step that we need to go through before we connect our storage and install Hyper-V role is activate our Windows copy. Select option 11 and then option 3 (Figure 10).
iSCSI configuration
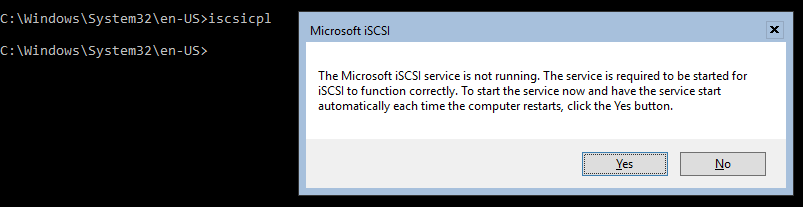
Time to attach our storage to the server. To do so, type the following command into the server’s command line interface:
iscsicpl
You will be greeted with the “Microsoft iSCSI” notification about the iSCSI service not running, so we’ll go ahead and press YES to start it (Figure 11).
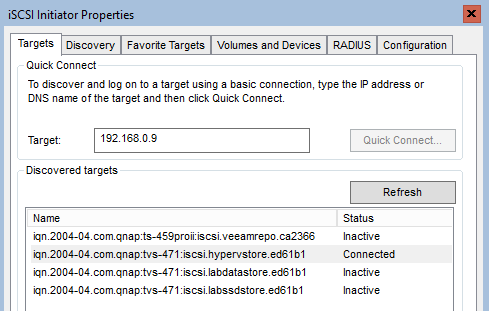
Once the service is running, the iSCSI Initiator Properties window opens where you will be able to enter your iSCSI storage IP address and connect to the storage (Figure 12).
Once the iSCSI storage is connected to the server, time to add the storage to our server and assign a disk before we start the Hyper-V configuration.
Before getting into the disk management steps, I’d like to note that it is best to use Microsoft’s new ReFS format with Windows Server 2016 as it has superb benefits and is the future of file systems. Okay, now to the steps:
- Diskpart to start the object managing tool
- Use “list disk” to select the new iSCSI disk and attach it to the server by “Select disk 1” command (assuming the disk number is 1)
- Use “online disk” command to bring the disk to an online state.
- To make sure the partition is set to writable enter the “attributes disk clear ”
- “List partition” to list all the available partitions of the storage
- “Select partition 1” select the desired partition
- “Assign letter=V” to add the desired letter to the volume.
- Exit
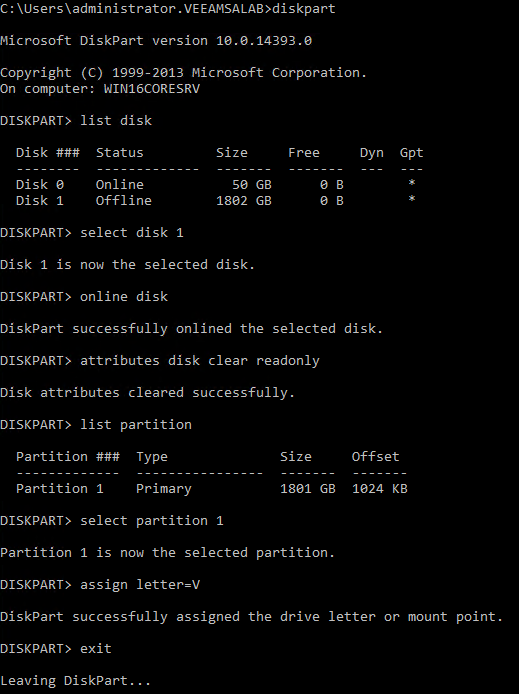
Now our storage is connected to drive V: on our new Windows Server 2016.
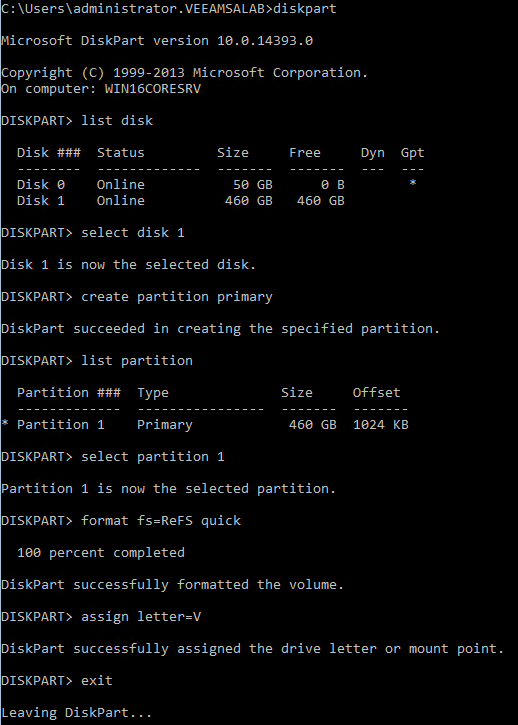
If the storage is brand new, you need to create and format the partition before you assign a letter as shown on Figure 14.
That’s it! We went through the installation and initial configuration of the Windows Server 2016 in Core mode. We connected our server to the storage in preparation for Hyper-V role that will be covered in the next article.