How to Configure WDS to PXE Boot Veeam Agent for Microsoft Windows Recovery Media
| KB ID: | 4574 |
| Product: | Veeam Agent for Microsoft Windows |
| Published: | 2024-05-15 |
| Last Modified: | 2024-05-31 |
Purpose
Solution
The information provided below is intended only as general guidance. The method and configuration documented in this article are used by our internal team to test the PXE boot functionality of the Veeam Recovery Media. It should not be regarded as the sole way or as an officially "Veeam-supported" method of achieving this result.
Moreover, Veeam Support will not provide assistance with configuring PXE booting of the Veeam Agent for Microsoft Windows recovery media. In this scenario, the sole responsibility of Veeam Software is to ensure that the recovery media are capable of being PXE booted. The configuration and implementation of PXE booting within an environment rest with the environment's administrator(s).
Please keep in mind that if WDS is already configured and in use within the environment, the configuration settings suggested in this article should be reviewed by an Administrator to ensure they do not impact or conflict with existing WDS usage.
Configuring WDS To Accept Connections
These steps will configure WDS to accept all connections and cause PXE booting to continue with minimal interaction.
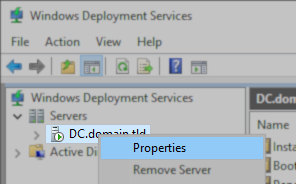
- Open the Windows Deployment Service control panel. (wdsmgmt.msc)
- Expand the Servers node, right-click on the server, and select Properties in the context menu.
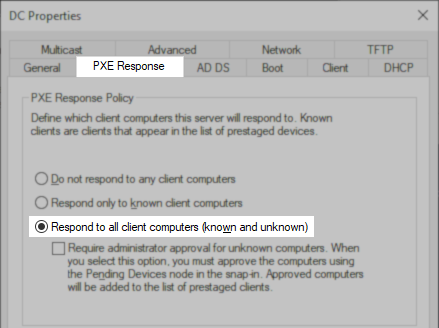
- On the PXE Response tab, select the option Respond to all client computers (known or unknown)
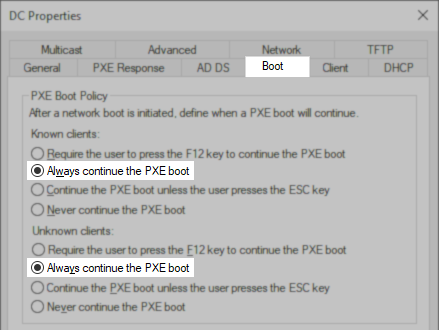
- On the Boot tab, select the options labeled Always continue the PXE boot
This step is optional. If this option is not enabled, an additional key must be pressed to start the PXE boot process.
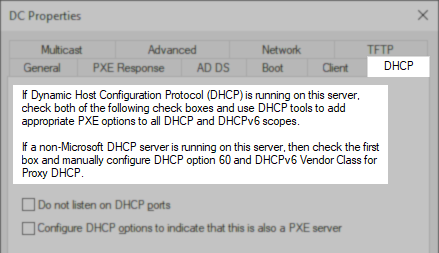
- Review the DHCP tab and select the appropriate options.
The options selected will be based on the environment itself, therefore, we cannot advise which options should be selected.
- Click OK to save the WDS server properties.
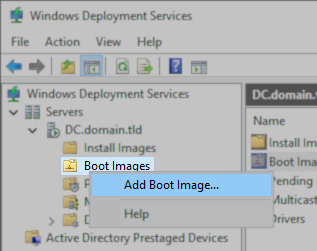
Add the Veeam Recovery Boot Image
- Open the Windows Deployment Service control panel. (wdsmgmt.msc)
- Expand the Servers node, then expand the server's node, and right-click on Boot Images
- In the context menu, select Add Boot Image...
- Select the boot.wim file from the sources folder on the Veeam Agent for Microsoft Windows Recovery Media (VEEAMRE).
The boot.wim file on each Veeam Recovery Environment (VRE) ISO is customized to the machine that generated the file. Generally speaking, the VRE built for one machine can be used for another of the same OS version.
Usually, each machine generates its own Veeam Recovery ISO to ensure the Recovery Environment contains all necessary drivers. While it is certainly possible to boot the Veeam Recovery ISO created by one machine with another, issues may occur if hardware drivers necessary to complete the restore are not present (e.g., server-grade network adapters or RAID controllers that Windows does not natively have drivers for).

- On the next step of the Add Image Wizard, change the Image name and Image description to something identifiable.
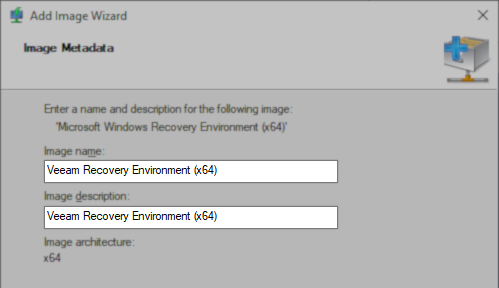
- Continue through the remaining steps to add the boot image.
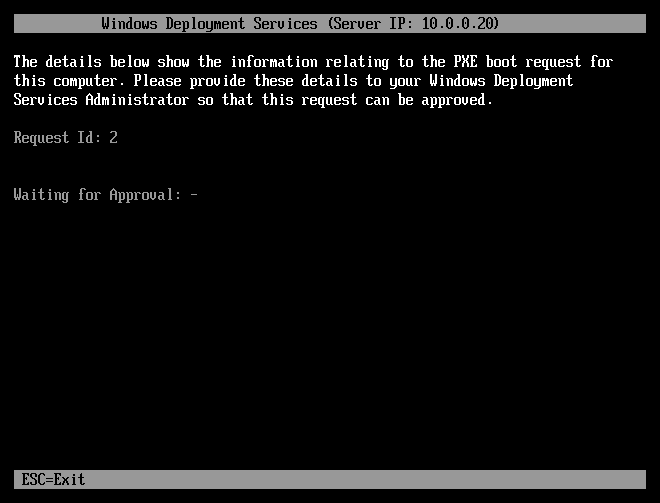
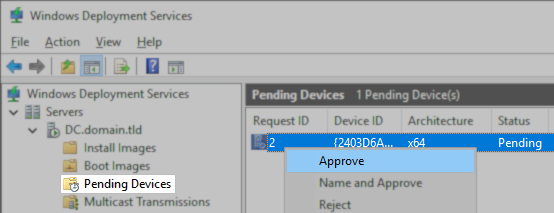
Network Boot Veeam Recovery Environment
On the machine that you want to network boot the Veeam Recovery Environment, configure the boot settings to use PXE boot.
Once the Veeam Recovery Environment is loaded, proceed with BareMetal restore as needed.
More Information
Consideration Notes
With the settings demonstrated in this KB, any user could, in theory, configure a machine on the same network as the WDS server to use PXE boot and gain access to the Tools included with the Veeam Recovery Environment, just as they could if they used the recovery media creation tool to create a bootable USB drive and booted from it.

If this KB article did not resolve your issue or you need further assistance with Veeam software, please create a Veeam Support Case.
To submit feedback regarding this article, please click this link: Send Article Feedback
To report a typo on this page, highlight the typo with your mouse and press CTRL + Enter.
Spelling error in text
KB Feedback/Suggestion
This form is only for KB Feedback/Suggestions, if you need help with the software open a support case