Why the 3-2-1 backup rule is vital for your business
To put it simply, we all should “hope for the best, prepare for the worst.” The 3-2-1 Rule does just that; it helps you prepare for the worst while keeping the computer backup simple and easy. Take 10 seconds and think of the worst three things that could happen to your data. Now imagine if you followed the 3-2-1 Rule, would you be able to recover your data? I estimate 95% of you would say yes, and when using the revised 3-2-1-1-0 Backup Zip Code, I believe that number would jump to 99.999%. Having a near-100% chance to recover your backups against endless combinations of threats that can occur daily should be enough for most to see the value in using a rule like this.

How to back up Windows 10 from your computer
Windows 10 built-in backup tools
Microsoft has packaged two options for you to backup Windows 10 data: the newer File History introduced in Windows 8, or the more traditional image backup introduced in Vista but most notable from Windows 7.

How to back up your files to an external hard drive or network location using Windows 10 Backup
Open the File History backup utility
The simplest way I have found to access the built-in backup tools is by hitting the Windows key on your keyboard or clicking on the Windows icon at the bottom left of your desktop and then typing “backup.” The first option should be “Backup settings,” select this. You should then see the screen shown below.

You can also access both backup options from the Windows control panel. But, I have found this introduces a limitation when configuring File History backup that prevents you from adding new folders outside of the default, pre-defined locations. You are still able to exclude folders with this method; I recommend using the settings>backup view to configure File History if you require customizing and adding new locations to your backup scope.
Select a location for your File History backups
From the Windows settings backup window, start by clicking on the plus sign next to Add a Drive. A small window will pop up, and Windows will do a quick search for any existing, attached drives to choose. If you’re interested in leveraging a network shared location, select show all network locations at the bottom, this will complete another quick search to populate all the pre-existing, available shared folders or drives on your network.

Select the folder or drive where you want back up files to, this will automatically turn on File History backup. If you’re ok with the default folders selection, then you’re all set. If you want to backup to a different folder from this list, jump down to the next step.
Choose the interval, retention, and folders to back up
Now that you have chosen where you will back up your files to and File History is turned on, select “More options” (just below the slider to turn File History on and off), and you will be presented with the customization window for your File History backups. Here you can change the default hourly backup interval to a range of every 10 minutes to once a day. Next, you will find the retention option on how long you would like to keep file versions. Forever is selected by default and can be modified, allowing until space is needed or a range of 1 month to up to 2 years. Next, you will see the option to add a folder with the same plus sign you saw when adding a drive above. Selecting this will open a Windows File Explorer browser to choose your additional folders. Now, if a folder is already on the list, you can select the item and hit remove at the bottom of the more options window. You will see the same “Add a folder” button under “Exclude these folders.”

How to restore files to your computer from a backup
Open the Windows 10 backup and restore tool
A great thing about the File History restore is you have a couple of simple-to-use options to launch the restore wizard and get the files you need quickly.
The first option is to open Windows File Explorer and navigate to the folder location where the file you want to restore is located. Next, on the top ribbon under the Home tab, you will see history, click here to launch the File History recovery wizard for this location. You may also select the file directly and right-click and select restore previous versions.


The second option is to navigate to the backup settings where you initially turned on File History and select more options, scroll to the bottom of this page, and you will see” Restore files from a current backup.” This will launch the same File History recovery wizard but will show all locations that were backed up.

Select the files or folders you want to restore
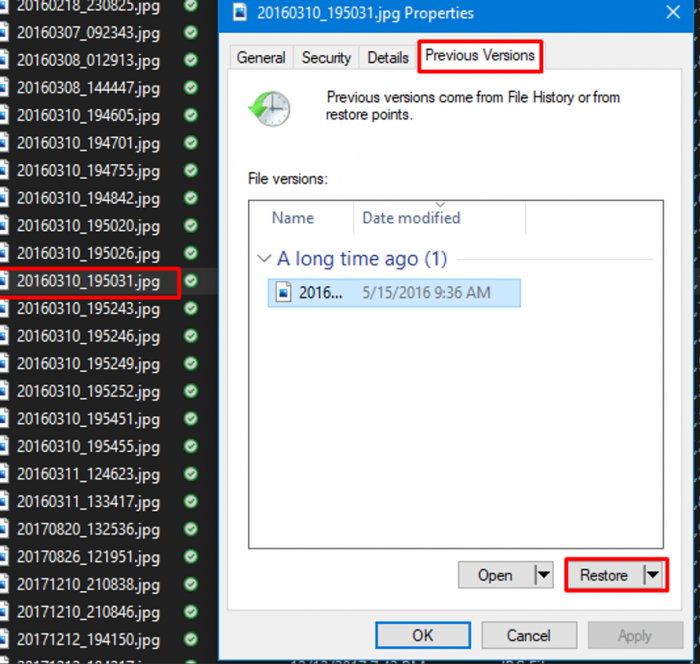
Now that the File History recovery wizard is open, locate the file(s) and folder(s) you would like to restore and click the green undo icon. This will restore them to the original location. If you right-click on this icon, you can select restore to, which will bring up a new File Explorer window to pick the destination. The second screenshot below to the right is the “View from File or Folder” properties “Previous versions” tab where you can restore from too.

How to create a complete, full-system image backup of your computer in Windows
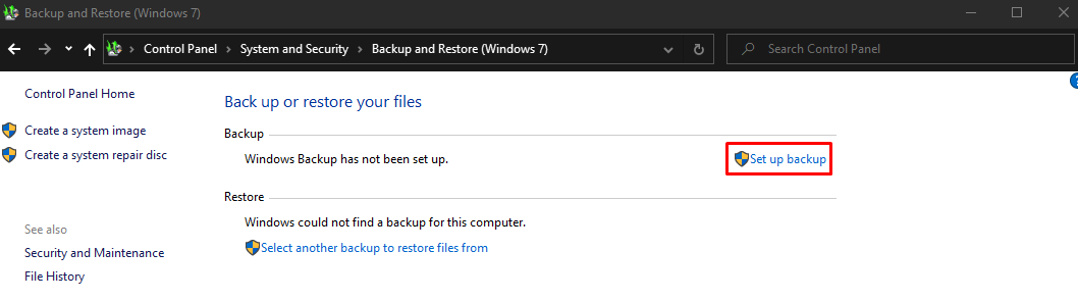
Open the system image tool
As with the File History setup, you can launch the Backup and Restore Image Tool from the control panel or backup settings just under File History. The main difference here is it does not matter which way you launch it — you have the same options in configuring the image-level backup.
Choose where to save the system image and what to back up
With the system image backup, you can either choose a drive location, save it to a network share or folder.

Next, you will need to decide if you want the recommended default settings or itemize what you would like to back up by drives and user data.

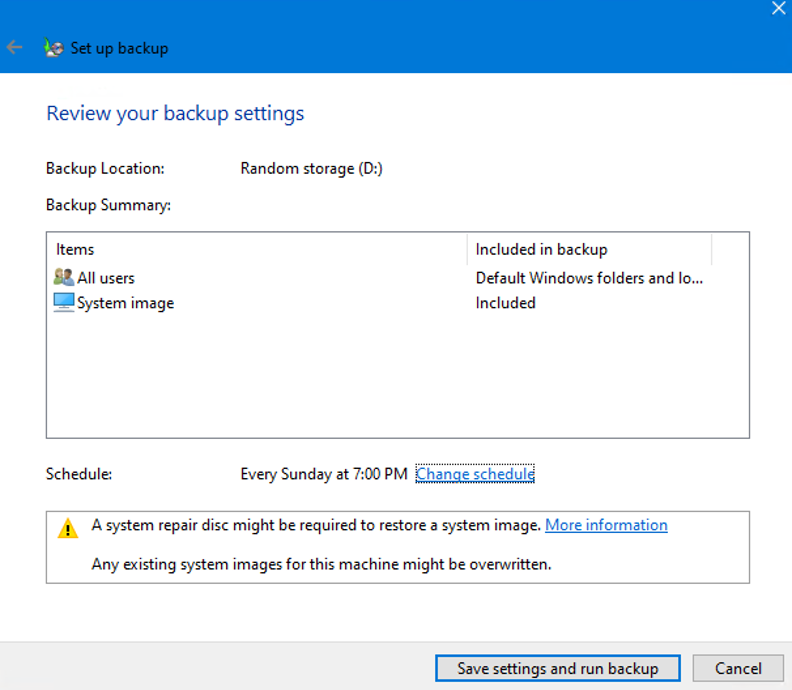
The final step in configuring your Windows image backup is to verify your settings and adjust the schedule as needed.
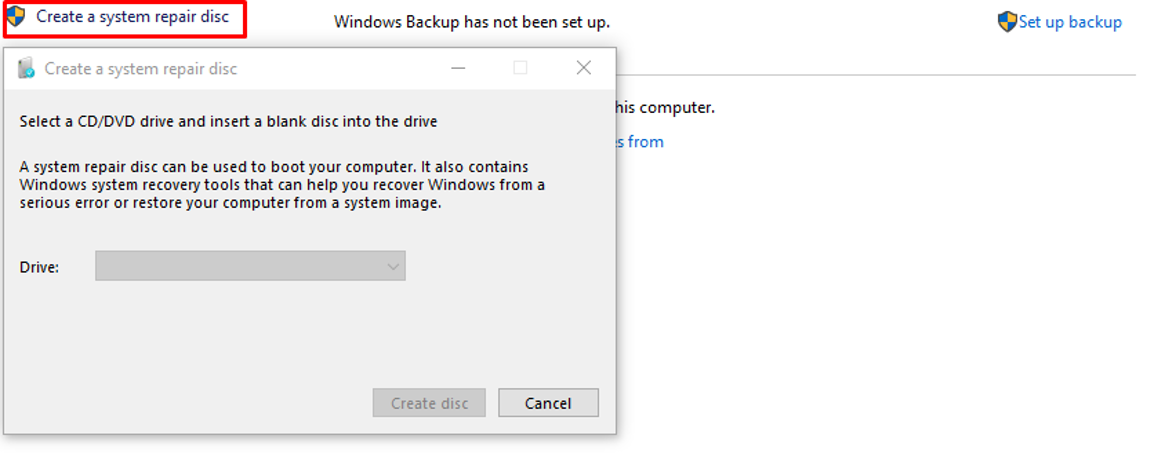
How to create recovery media to access the Windows recovery environment
In Windows 10, you have three options to use as your recovery media. The first one, “Create a system repair disc” will require an optical drive to burn a CD/DVD, which in many new laptops is not a standard feature anymore.
Creating a recovery drive and using installation media to restore your PC are both similar in what they are, but how the base system files are obtained is what sets them apart from one another. Both of these will require a USB drive that will be formatted into a bootable recovery media. The process of creating a recovery drive copies the existing Windows systems files from your current laptop or computer. Using installation media to restore your PC is a convenient way to recover if you forgot or lost your recovery drive. You can always go to the Microsoft software download website and download a copy of Windows 10 installation media to get into the Windows Recovery Environment (WinRE) and complete a restore.


How to restore Windows 10 from a system image backup
Boot into Windows Recovery Environment
In order to fully restore system image backups, drive or installation media to your laptop and restart or power cycle the machine. The initial screens will be slightly different depending on the media you used to boot from, but have no fear, the steps to complete the restore are the same. For install media, you need to make sure when prompted to use the “Repair your computer” selection and the not “Install now” button.


Open the advanced recovery option
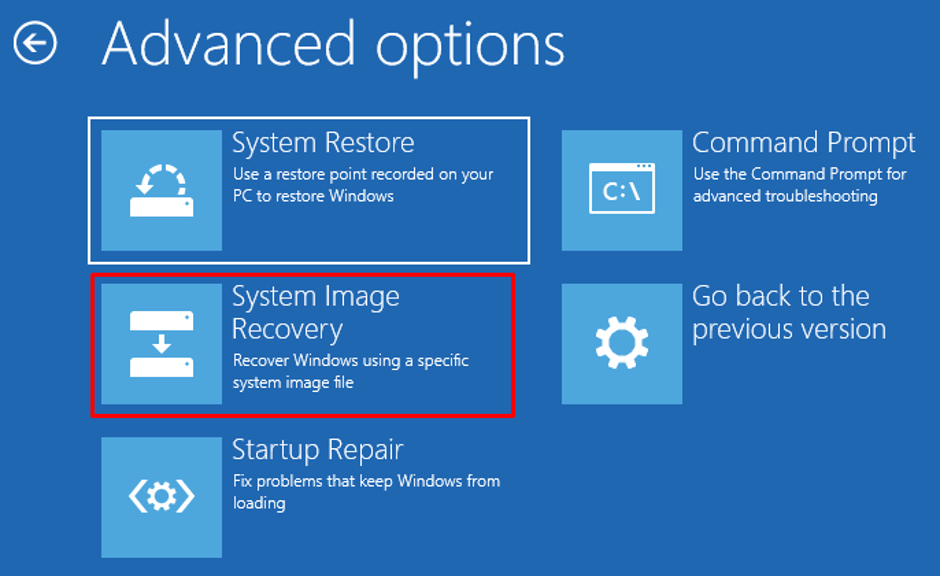
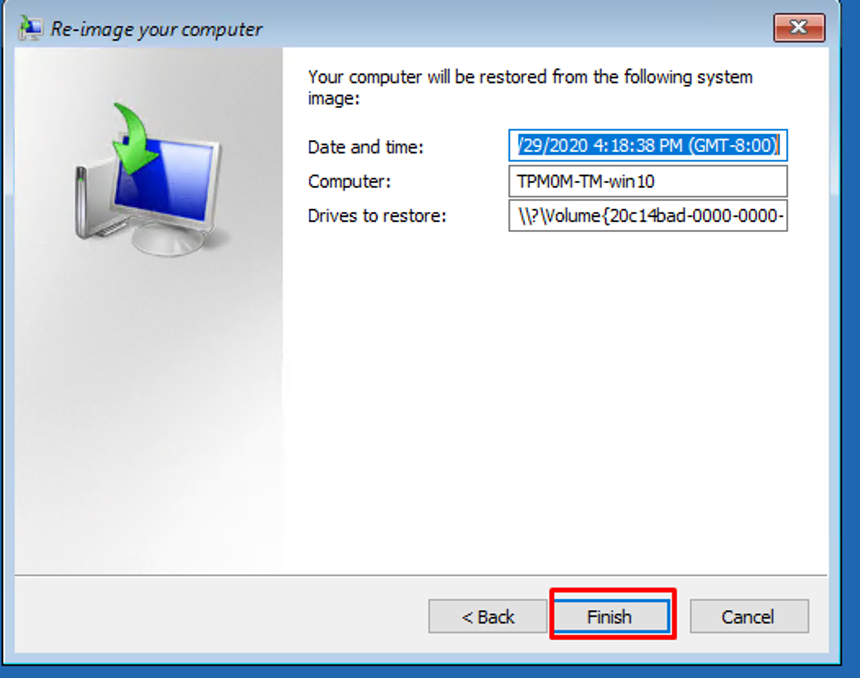
Choose a system image and start the system image recovery

Additional restore options

Finalize restore
How to Backup a Computer: Free vs Professional Backup Solutions
Windows 10 File History and image level
Microsoft is an innovative company that produces multiple great products spanning a range of markets, use cases, and focus points. But, with this broad scope of initiatives under their umbrella, certain things have to be moved lower on the priority list to make way for progress. I feel Windows 10 backup features are an excellent example of a lower priority item in the grand scheme of things for Microsoft, and it shows in some of the limitations, issues, and lack of creature comforts that affect the overall user experience.
The key factors I came across in my testing and using Windows backups is you have to choose to do File History, image backup or both, to cover all your bases since File History can only protect, backup, and restore folders/files. In contrast, image level can protect your whole system, but cannot restore individual files or folders. In doing both for a complete solution, you will have to manage two backup jobs and the increased space requirements to store both forms of backups. Next, I found with my testing, the native integration with storing your backups in the cloud is pretty much non-existent. Maybe there’s some crafty workarounds with mapping OneDrive folders as shared drives, but I’m not sure if Microsoft technically supports this. If you already use the MS OneDrive App and Automatic file sync, there’ll be some tweaking on how the sync works to keep “Always keep files on this device” enabled. Ensure you have your OneDrive sync folders added to the scope for File History since OneDrive moves file locations from default library locations to the MS OneDrive folder.
Free, third-party backup software
Backup is a big business, and many companies (Veeam included) offer free backup solutions that get the job done, are simple to use, rich in features, and go above and beyond what you get included with Windows. To learn more about Veeam’s free laptop backup with Veeam Agents, check out this blog from the legendary Rick “Rickatron” Vanover: Working from home? How about free backup! Spoiler alert, you can send backups to OneDrive natively for offsite cloud backups and configure an offline backup solution with USB drives. Download Veeam Agent for Microsoft Windows FREE.
Veeam professional backup solution
Need a top-shelf offering with all the bells and whistles to protect more than your priceless family photos, personal data, and family laptop/desktop? Start with Veeam Agent for Microsoft Windows FREE or Veeam Backup & Replication Community Edition with centralized agent management. Then grab yourself a Veeam Universal License trial key and unleash the full power of the #1 Backup and Recovery.