Veeam Backup & Replication is the single backup, recovery and data security solution for all workloads, both on-premises and in the cloud. As the foundation of Veeam Platform, Veeam Backup & Replication delivers simple, flexible, reliable and powerful data protection. It eliminates downtime with instant recovery, while keeping the environment safe from cyberthreats with native immutability and tested backups — all from one software-defined, hardware agnostic solution.
With Veeam Backup & Replication, you can back up and restore the following objects.
- Virtual machines: VMware vSphere VMs, Microsoft Hyper-V VMs and Nutanix AHV VMs (requires an additional plug-in), Red Hat VMs;
- Cloud VMs (AWS EC2 instances, Microsoft Azure and Google Cloud VMs);
- NAS Share, i.e. backup of file shares from the following sources: Microsoft Windows, Linux-managed server, Enterprise NAS systems such as NetApp Data ONTAP, Lenovo ThinkSystem DM Series, Dell EMC Isilon, NFS file shares and SMB file shares;
- Physical machines, Windows, Linux, or macOS operating systems, via agents installed on each computer.
Step-by-step installation guide

Accept the User Account Control.

This will open the Veeam Backup & Replication window as shown below. It is recommended you install the entire suite. If you install just a single component, you will have to run the setup.exe file gain to install the other components.
– Click on Install under Veeam Backup & Replication icon, as shown in the red box.

As the system is currently initializing the setup, please wait for it to complete.
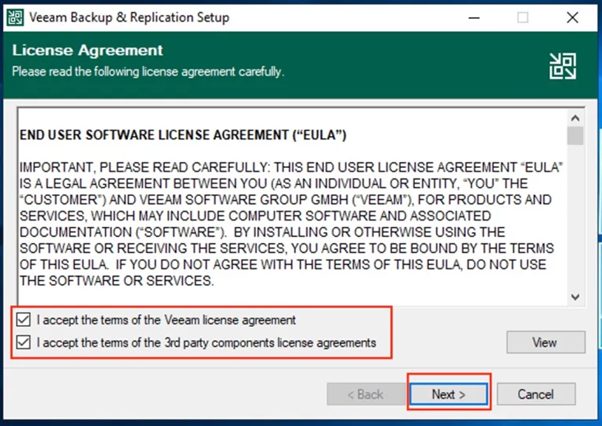
Accept the agreement as shown below and click on “Next”
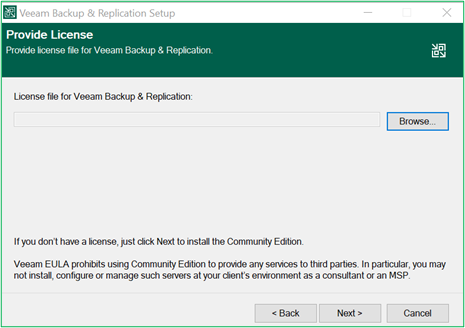
On the Provide License window, locate the license file that was attached to the Veeam’s “Welcome email” and that you should have saved to your local drive. In this example, we will use the Veeam Backup Essentials license file.

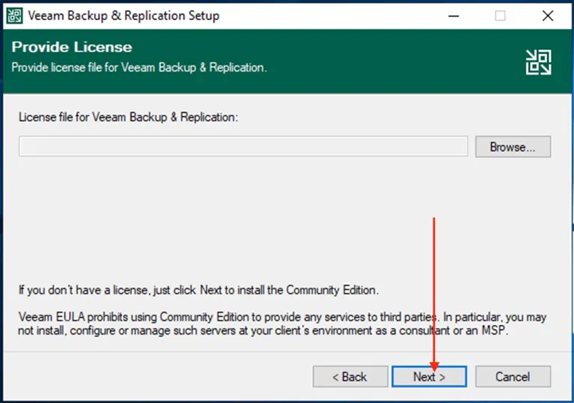
Once the license file has been attached, click “Next”
The following window below should be left as default without making any changes. Click “Next”

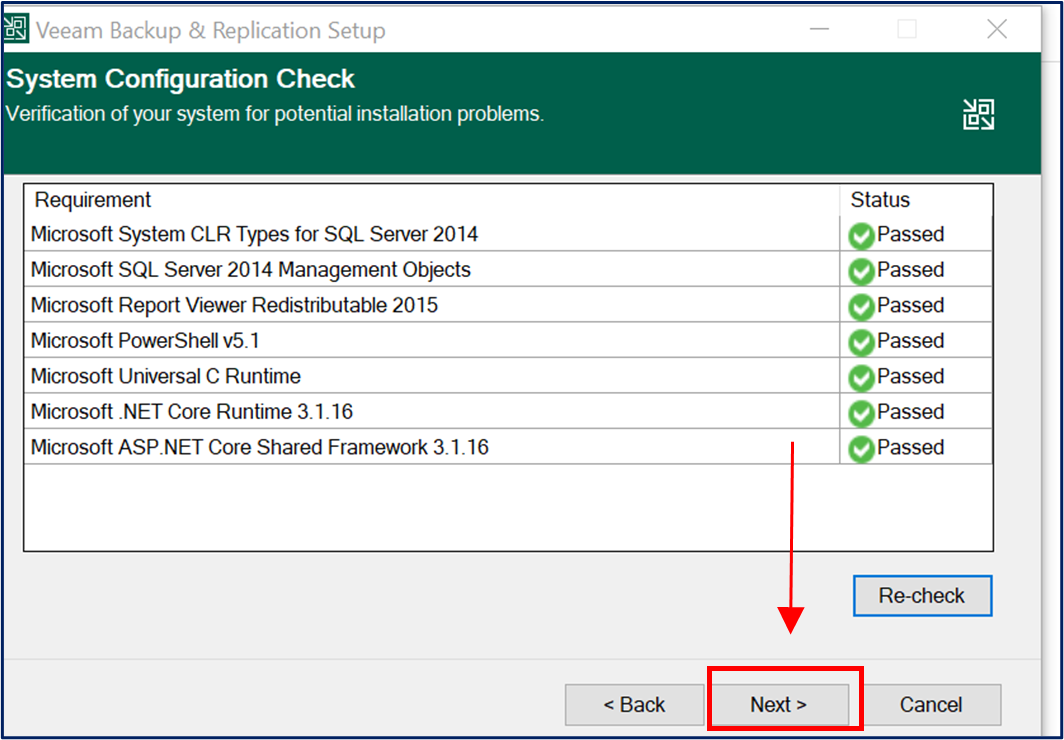
Veeam Backup & Replication will check your System Configuration. Click “Install” to deploy the missing features, then click “Next”

On the Service Account window, it is recommended that you select “LOCAL SYSTEM account” to use the custom database. Then click “Next”.

On the SQL Server Instance window, leave the default selection and click “Next”

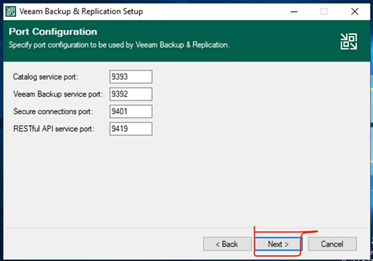
On the Port Configuration window, leave the default configuration and click “Next”
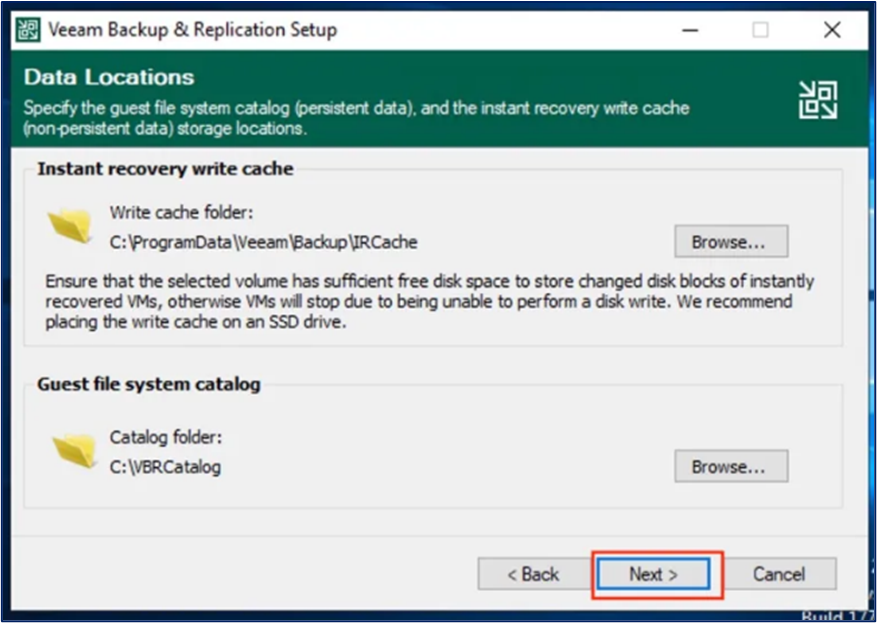
On the Data Locations window, click on Next to proceed.
On the Ready to Install window, click “Install” and wait until the wizard successfully complete the installation.

Once the installation is complete, click on “Finish”.

AFTER INSTALLATION
Access Veeam Backup & Replication Console to add your workloads and update your licenses.
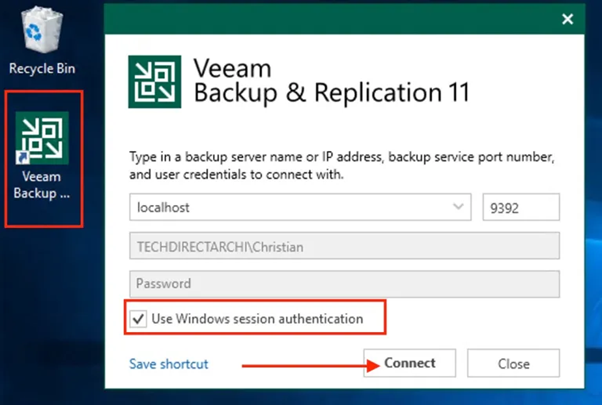
In the Windows Start menu, select Apps > Veeam > Veeam Backup & Replication Console. Alternatively, to access the Backup & Replication console, open Veeam using the Veeam Backup & Replication Console shortcut created on your desktop and click on connect as shown below.
Add Server
From the console landing page, select the Server Tools tab and then

Then click “Add Server”

Now you are ready to add ANY workloads you wish to backup and recover.

Manage account
To manage your account, add users, update licenses and more, access the drop-down menu from the console landing page and follow the wizard instructions.
