- Veeam Support Knowledge Base
- How to Relocate Veeam Backup & Replication Backup Files
How to Relocate Veeam Backup & Replication Backup Files
| KB ID: | 1729 |
| Product: | Veeam Backup & Replication | 12 | 12.1 | 12.2 | 12.3 | 12.3.1 | 12.3.2 | 13 | 13.1 |
| Published: | 2013-02-08 |
| Last Modified: | 2026-01-29 |
Cheers for trusting us with the spot in your mailbox!
Now you’re less likely to miss what’s been brewing in our knowledge base with this weekly digest
![]()
Oops! Something went wrong.
Please, try again later.
- KB2236 —Moving backup files to/from a Scale-Out Backup Repository.
- KB2321 — Changing the backup location of Veeam Agent jobs operating in Standalone mode (not directly controlled by Veeam Backup & Replication) but targeting a Veeam Backup & Replication server's repository.
- KB4493 — Moving backup data for a file backup or object storage backup to a different repository.
- KB1856 — How to Seed a Backup Copy Job
Purpose
Solution
Summary
This article documents two methods of relocating backup files:
- Modern method using built-in Move Backup feature.
- Legacy manual file relocation method.
Limitations of the Legacy Method
The legacy method for relocating backup files was developed before the advent of the native built-in backup file relocation features, Move Backup & Copy Backup. The legacy method involves the user manually moving backup files, whereas the built-in Backup Move and Backup Copy features use the same engine that creates restore points to automate the backup relocation process. Customers are strongly encouraged to use the built-in Move Backup function when possible. The legacy method documented in this KB article has the following limitations, which are not present with the built-in Move Backup function (explained in italics for each entry below).
- Backup files manually moved to a Fast Clone capable repository (ReFS or XFS) will not utilize Fast Clone until a new Active Full is created.
The built-in Backup Move function, on the other hand, uses technology that migrates backup files in a way that preserves Fast Clone functionality without requiring a new Active Full. - Manually moving spaceless Synthetic Fulls created by Fast Clone will be inflated to their full size on the destination storage.
The integrated Backup Move function can preserve the space savings of fast clone created synthetic fulls when used to move backup files between Fast Clone compatible repositories. - The legacy methods documented in this article should not be used to move backup files to or from an Immutable Hardened Linux Repository.
The built-in Backup Move function can handle the intricacies of managing the immutable state of files in the source or destination Immutable Linux Repository, enabling it to be used to migrate to or from an Immutable Hardened Linux Repository.
Modern Method - Using Built-in Move Backup Feature
Primary Methods
Backup Jobs
Backups Copy Jobs
Alternate Method to Change the Repository a Job Uses
For more information about the Backup Move feature, please review Veeam Backup & Replication User Guide - Backup Move. That user guide mentions, "Alternatively, you can change the repository in the job settings." Which is what is described here:
- Disable the backup job(s) planned to be moved.
- (Optional) Create a new repository for the new location where backup files will be located.
- Edit the Backup Job.
- Switch to the Storage tab.
- Using the Backup repository drop-down selector, select the new Repository the job should use.
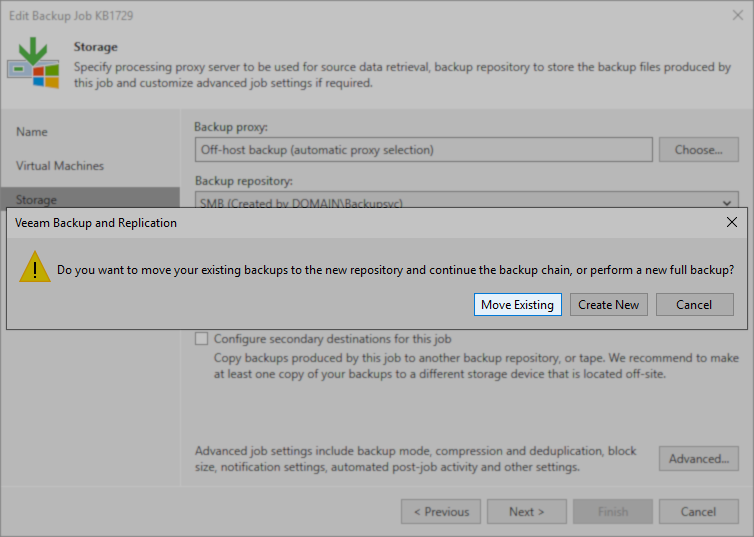
- Click Next, and a pop-up will appear asking if you want the software to move the existing backup files to the new repository or create a new full backup (start a new backup chain).
- Select Move Existing.
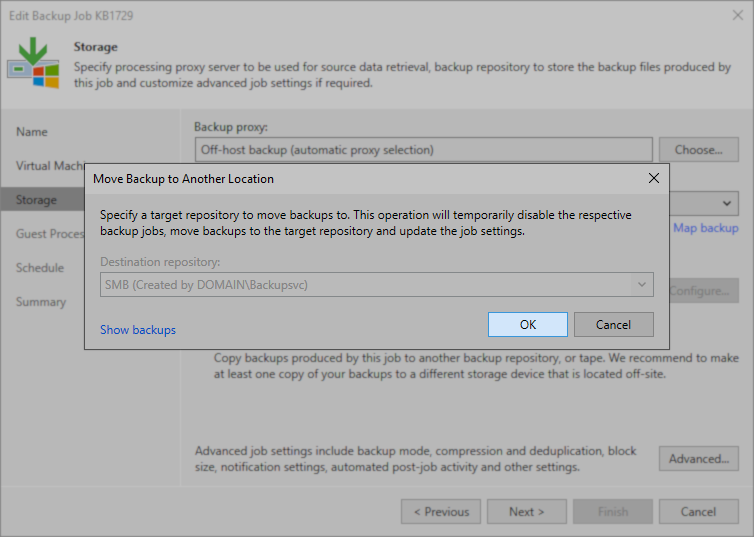
- The Move Backup to Another Location window will appear, and the repository selected in Step 5 will be preselected and greyed out. Click Ok to start the Move Backup task in the background.
- Click Next, Apply, and Finish to complete editing the backup job.
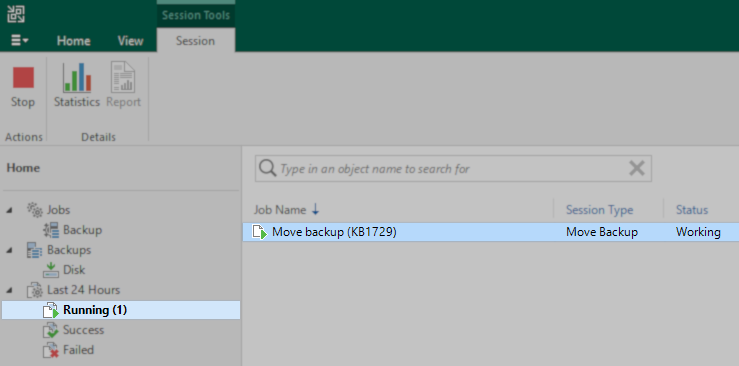
- Under the Last 24 Hours > Running node, you will notice a Move Backup task occurring. You may double-click on that task to check the progress of the Backup Move task.
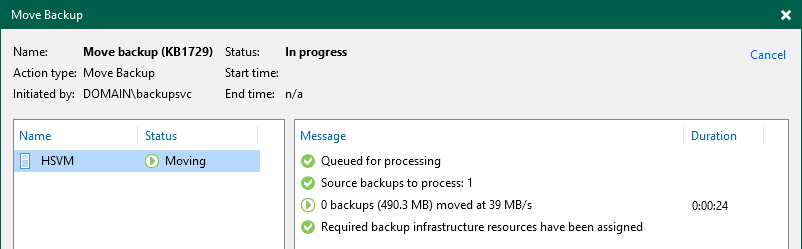
- When the Move Backup task is completed, the job may resume being used.
Legacy Method - Manual File Relocation and Remapping
Procedure Outline
- The existing backup files are manually copied or moved to the new location.
- The repository associated with the new location is rescanned to make Veeam Backup & Replication aware of the relocated restore points.
- The existing jobs are reconfigured to use the repository representing the new location, or, if a new Veeam Backup & Replication server will be using the relocated backup files, a new job is created and mapped to the relocated restore points.
- The old restore points are removed from the Veeam Backup & Replication configuration or from disk entirely.
Use case
This method is useful in scenarios where the built-in Move Backup function is not advantageous. For example, if the connection between the old and new repositories is slow, it may be more efficient for the backup administrator to physically move the backups from one site to another.
Manual Relocation Procedure
- Disable the backup job(s) planned to be moved; this will prevent additional restore points from being created during the repository transition. Disabling the job/jobs will also stop any SQL Transaction Log backups, as those running during the transition will cause the final step to fail.
- (Optional if reusing an existing backup repository)
Create a new repository for the new location where backup files will be located. - Manually move the backup files to the new repository path. You must include the metadata file (.vbm), full backup files (.vbk), and any needed incremental files (.vib or .vrb).
Note:
- It is recommended that all backup files be moved, but you may omit incremental files if needed. However, if you decide not to move/copy all backup files to the new storage, you must use the “Forget Missing Restore Points” function to clear any references to backup files that were not moved/copied (detailed in Step 7).
- There will be folders created inside the directory/path for job names. If your repository path is set as E:\Backups, Job A will go to E:\Backups\Job A.
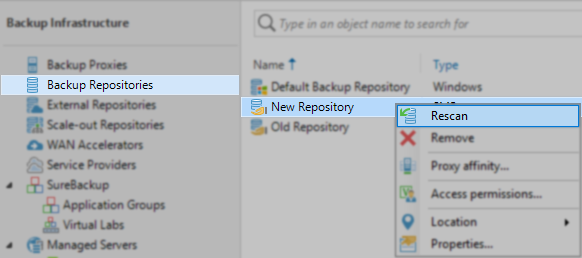
- Rescan the destination repository.
- If the backup files are not encrypted, skip this step.
If the backup files are encrypted, the encrypted backup will appear under the Backups > Disk (encrypted) node in the inventory pane. In the working area, select the imported backup and click Specify Password on the ribbon, or right-click the backup and select Specify password. (More Information)

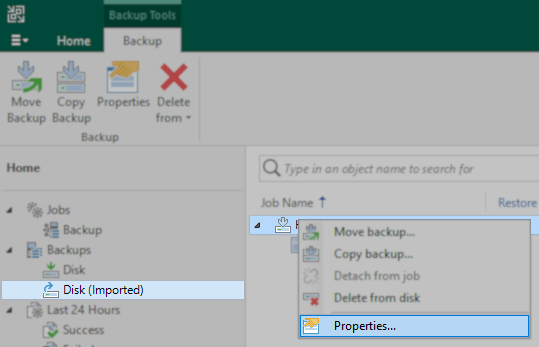
- Observe that after the Rescan has been completed, there will be duplicate entries for the backup files. One is associated with the old Repository under Backups > Disk, and the other is associated with the new repository under Backups > Disk (Imported).

 linked to the new repository.")
- Validate that all backup files associated with the job were relocated by checking the properties of the Backup entry under Disk (Imported).
- If no files are listed in italics, all files were correctly relocated to the new repository. Proceed to the next step.
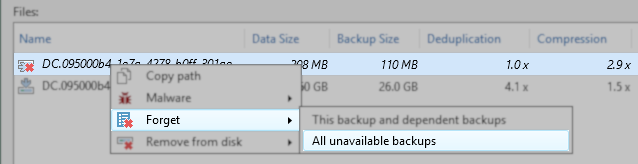
- If files are listed in italics, this indicates known files were not copied, either unintentionally or intentionally:
- If files are unintentionally missing, go back to Step 3 and ensure all files are moved.
- If files were intentionally omitted during Step 3, right-click on any italicized entry and select Forget > All unavailable backups.
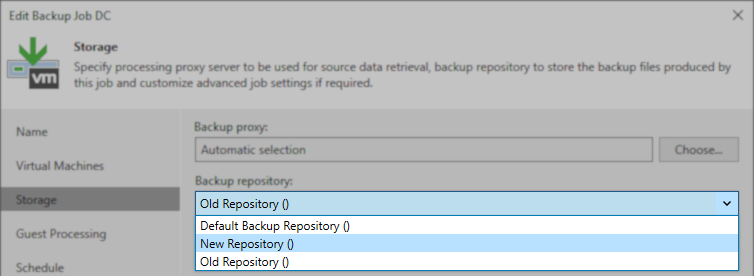
- Edit the Backup or Backup Copy Job, and go to the Storage or Target tab, and from the drop-down menu, select the new repository.
- After selecting the new repository, click the Map backup link, and in the Select Backup window that appears, expand the repository and select the backup that was relocated.
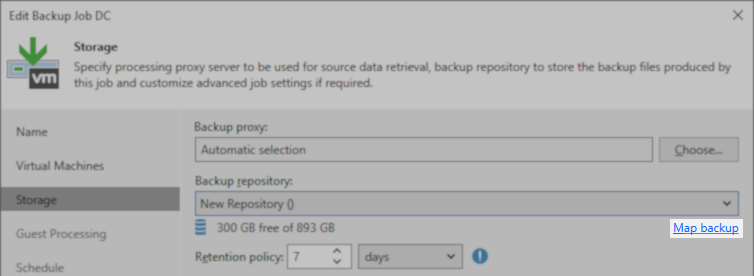

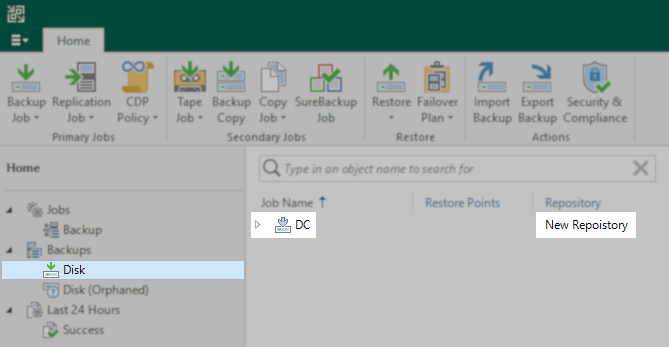
- Press Next through the rest of the pages of the wizard to finalize the setting. If no error occurs, and the job now lists the new repository in its Repository column, the mapping has been completed.

- Verify migration by checking under Backups > Disk to see that the Job's backup files listed there are now associated with the new repository.
- After testing that the job functions as expected and uses the new repository, the restore points on the old repository can be removed from the Backups > Disk (Orphaned) section using the Delete from disk operation.

Note
If you have attempted to manually import the backup, before performing the steps outlined in this article, you must first "Remove from configuration" any backups that were manually imported. These will be identifiable in the Backups > Disk (Imported) section. They will be listed with the suffix _imported and will have no repository listed in the Repository column.

If this KB article did not resolve your issue or you need further assistance with Veeam software, please create a Veeam Support Case.
To submit feedback regarding this article, please click this link: Send Article Feedback
To report a typo on this page, highlight the typo with your mouse and press CTRL + Enter.
Spelling error in text
Thank you!
Your feedback has been received and will be reviewed.
Oops! Something went wrong.
Please, try again later.
You have selected too large block!
Please try select less.
KB Feedback/Suggestion
This form is only for KB Feedback/Suggestions, if you need help with the software open a support case
Thank you!
Your feedback has been received and will be reviewed.
![]()
Oops! Something went wrong.
Please, try again later.