How to register Veeam Data Cloud Vault in Veeam Backup for Microsoft Azure
This article is specifically for Veeam Backup for Microsoft Azure v8.
With the release of Veeam Backup for Microsoft Azure v8.1, the process for adding Veeam Data Cloud Vault as a repository has been fully integrated.
Purpose
Solution
Software Prerequisites
- Veeam Backup & Replication v12.3.1
- Veeam Backup for Microsoft Azure v8
Instructions
Part 1: Register Veeam Data Cloud Vault Repository
- Register the Veeam Data Cloud Vault repository in Veeam Backup & Replication.
Note: When adding the repository, DO NOT enable the option "Enable manual credentials input wizard mode (advanced)."
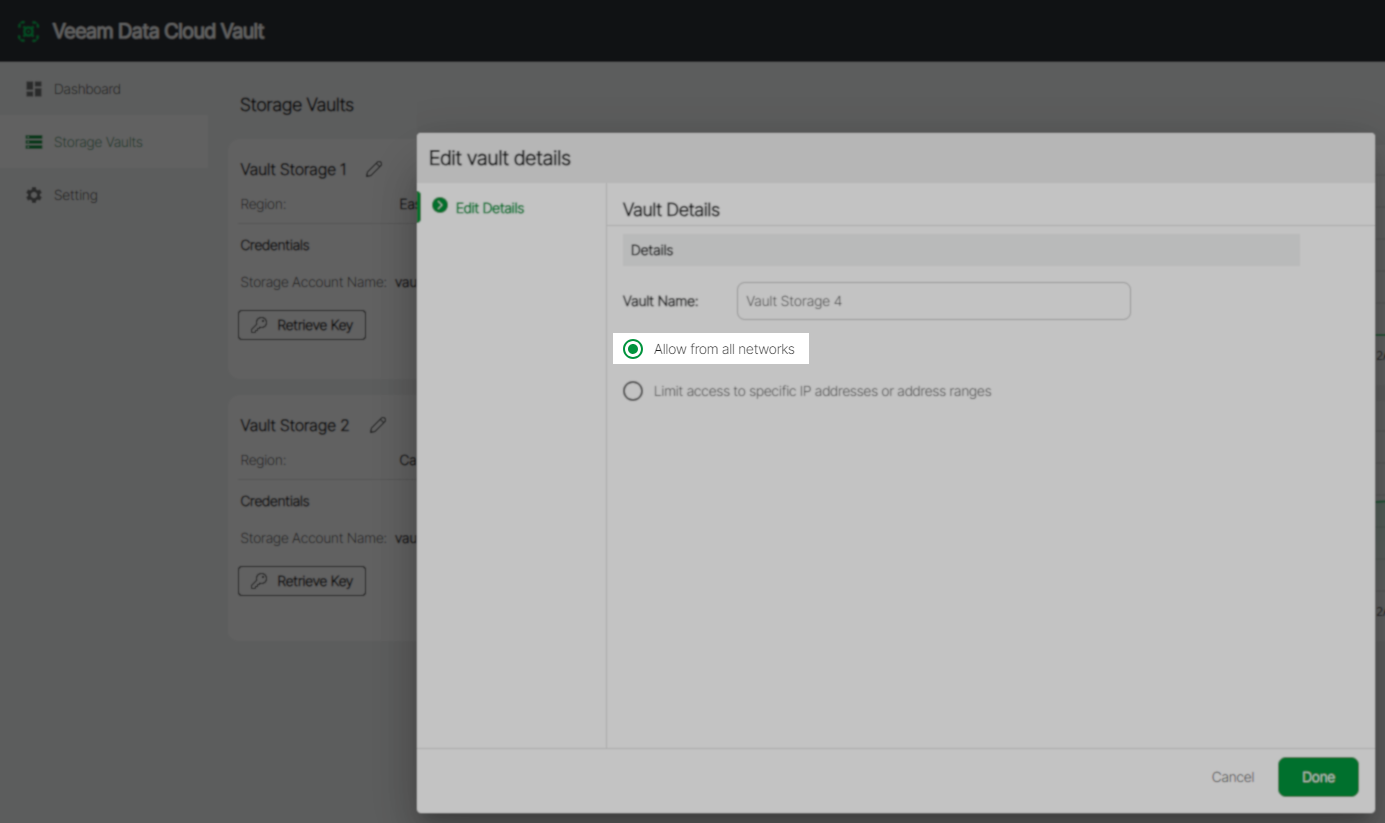
The repository must be added using the Authorize... link on the Account tab to ensure the connection details are correctly added to the Configuration Database and can be queried in later steps of this procedure. - After registering Veeam Data Cloud Vault using Veeam Backup & Replication, navigate to the VDC Portal and select the "Allow from all networks" option for the registered Vault.
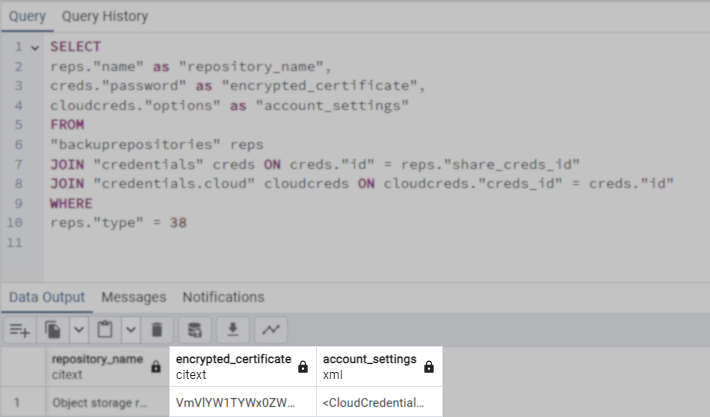
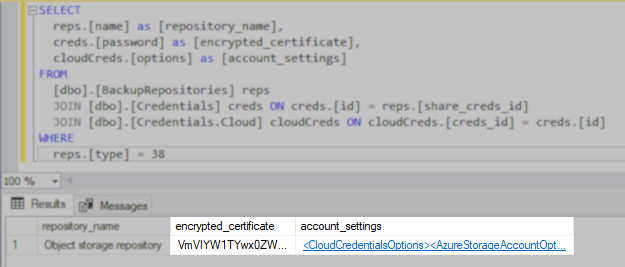
Part 2: Extract Veeam Data Cloud Vault Connection Details from Configuration Database
Expand the section below based on which SQL Database engine is used to host the Veeam Backup & Replication configuration database.
Hint: To identify which database engine is in use, use the PowerShell script from KB1471.
Part 3: Extract the Certificate Data from the Encrypted Value
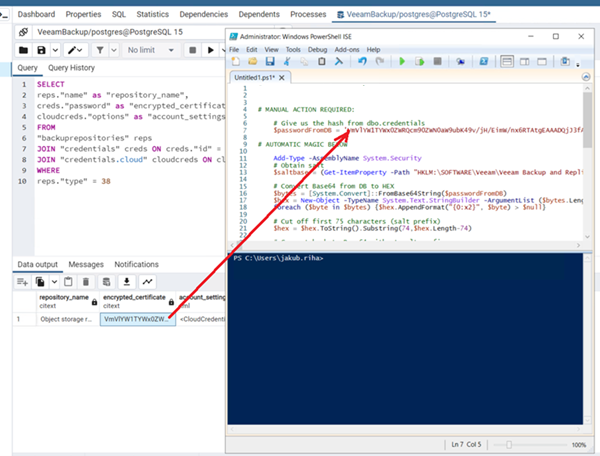
- Open Windows PowerShell ISE using the Run as administrator.
- Start a new script, if a new one is not automatically opened, and paste in the following script:
Do not run the script yet.
- On Line 4, replace the
INPUT_DATA_HEREplaceholder with theencrypted_certificatevalue copied from the configuration database in Step 7 (in Part 2).
.png?ck=1746631925649)
- Run the updated PowerShell script and save the output value of $chars to a file for use in the next steps.
Save the file with the extension .crt to make it easier to find in Step 13.

Part 4: Import the Certificate and Export PFX File
- Open the Certificate Manager (certmgr.msc).
- Expand the Personal node, right-click on Certificates, and select Import from the context menu under All Tasks.
- When prompted to specify the file to be imported, select the file created in Step 11.
Depending on the file extension of the file created in Step 11, you may have to change the file extension filter in the file Open browser. - On the Private key protection step, select the option Mark this key as exportable.
The password field can be left empty.
- When prompted to specify the file to be imported, select the file created in Step 11.
- After importing the certificate, right-click on the certificate and under All Tasks select Export.
- Select the option for Yes, export the private key.
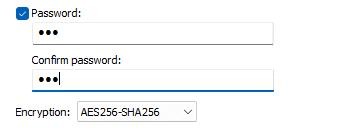
- Choose AES256-SHA256 as the encryption and specify a password that will later be used in Veeam Backup for Microsoft Azure.
- Save it as a PFX file.
Part 5: Add the Service Account to Veeam Backup for Microsoft Azure
- Log in to Veeam Backup for Microsoft Azure.
- Add a new Service Account.
- On the Type tab of the wizard, select Specify existing service account.
- On the Login tab of the wizard:
- Specify the Application ID and Tenant ID using the information within the account_settings value saved in Step 7 (in Part 2).
account_settings example:<CloudCredentialsOptions> <AzureStorageAccountOptions> <TenantId>4eff6498-b64e-4bc5-9443-fa212bfdddfg</TenantId> <EnvironmentType>0</EnvironmentType> <ApplicationId>cabb0705-3ec3-430a-8c6b-9835e6e72c61/ApplicationId> <RegistrationMode>2</RegistrationMode> <CertificateSerialNumber>2EB6C292C71FF4AA4CB53A71BDE9109E</CertificateSerialNumber> <CredentialsType>2</CredentialsType> <TenantLicenses/> </AzureStorageAccountOptions> </CloudCredentialsOptions> - Select the radio option for Certificate and provide the PFX file exported in Step 13.
- Specify the Application ID and Tenant ID using the information within the account_settings value saved in Step 7 (in Part 2).
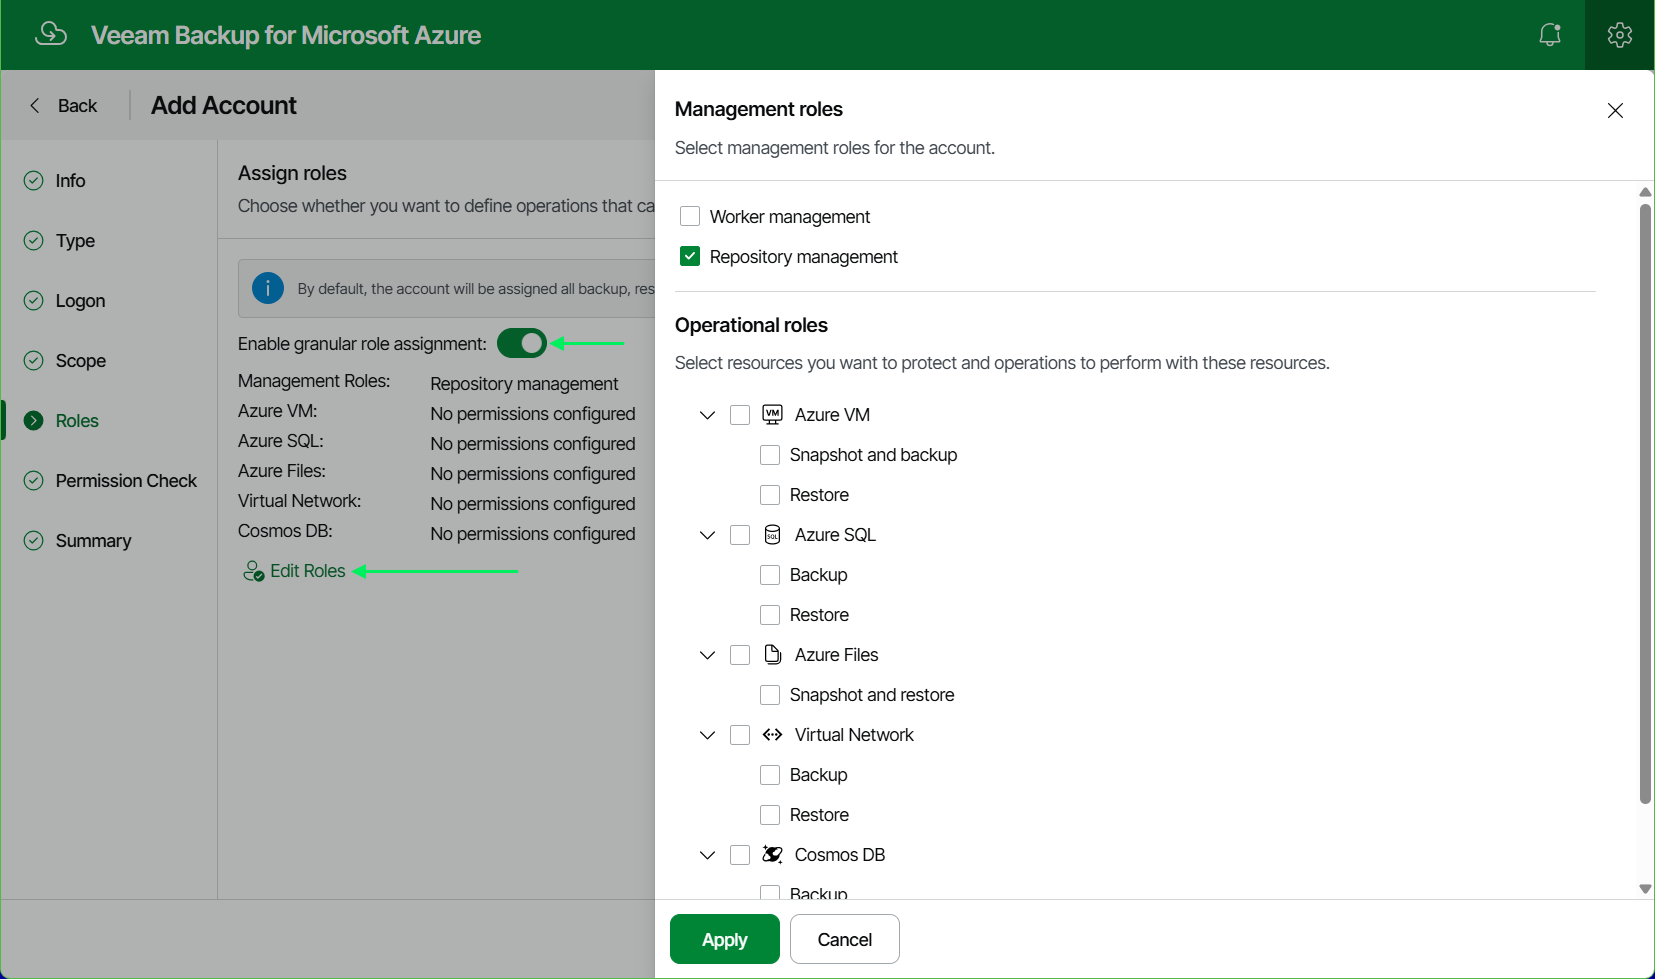
- On the Roles tab of the wizard, toggle the Enable granular role assignment, then click the link to Edit Roles.
- Check only Repository management.
- Uncheck all Operational roles.
- Complete the Service Account creation wizard and use the newly registered Veeam Data Cloud Vault repository.
Note: The Permission check step of the wizard will fail with the error, "Your account is missing the required permissions." this is expected.

Part 6: Add the Repository
- After adding the storage account, create the Repository:
If this KB article did not resolve your issue or you need further assistance with Veeam software, please create a Veeam Support Case.
To submit feedback regarding this article, please click this link: Send Article Feedback
To report a typo on this page, highlight the typo with your mouse and press CTRL + Enter.
Spelling error in text
KB Feedback/Suggestion
This form is only for KB Feedback/Suggestions, if you need help with the software open a support case