The physical (and mental!) process of migrating from legacy to virtual can be sometimes a difficult job for admin because the virtual sphere terms and features are sometimes different from what was learned earlier. For those of you who are learning about the many aspects of virtualization and Hyper-V, we will continue to publish helpful posts that explain various Hyper-V features.
Today, I want to tell you about Hyper-V Virtual Switch (vSwitch) in Windows Server 2012 R2. First, though, take a second and read through the following questions:
- What is Hyper-V vSwitch?
- Which vSwitch types are in Hyper-V and what are their differences?
- What’s the PowerShell command to remotely configure vSwitch?
- How can I configure one VM (virtual machine) to see only the internal network, but not the internet?
Did any of these questions ring a bell with you? If so, please keep reading. I’ve got answers!
What is Hyper-V Virtual Switch?
The Hyper-V vSwitch is a software-defined, layer-2, Ethernet network-traffic switch. It allows administrators to connect VMs to either physical or virtual networks. It’s available by default within the Hyper-V Manager installation and contains extended capabilities for security and resource tracking. Like other Hyper-V features, vSwitch has been improved with every new Hyper-V version. Today, vSwitch is considered to be very solid, but still continues to be improved. For example, within Hyper-V 4.0 (that one in Windows 2012 R2), got a lot for tenant isolation and protecting the network against malicious VMs.
Since I don’t really see a reason for theory without practice, I’d now like to move on to Hyper-V Manager and let you see this functionality with your own eyes.
Hyper-V vSwitch setup
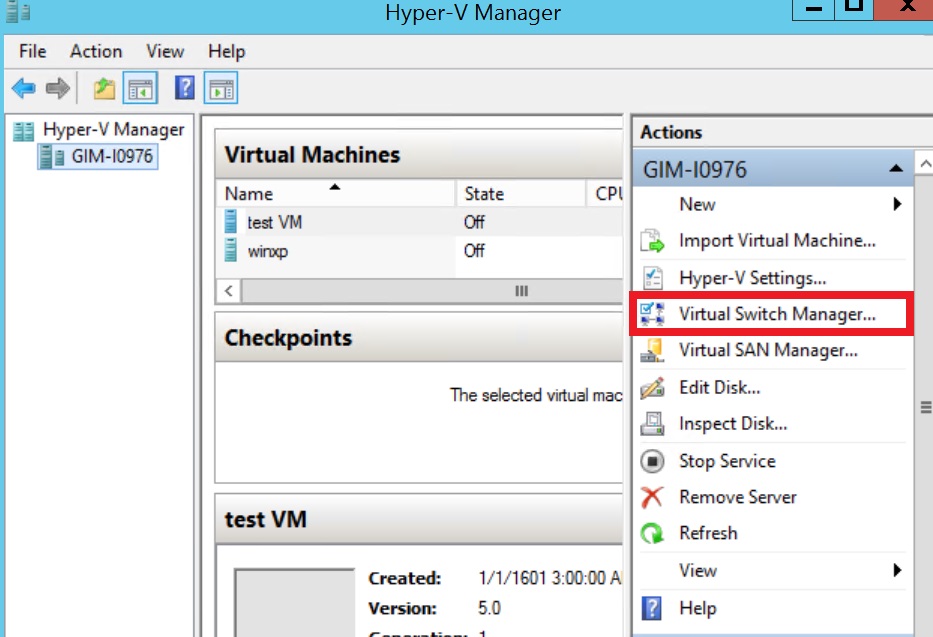
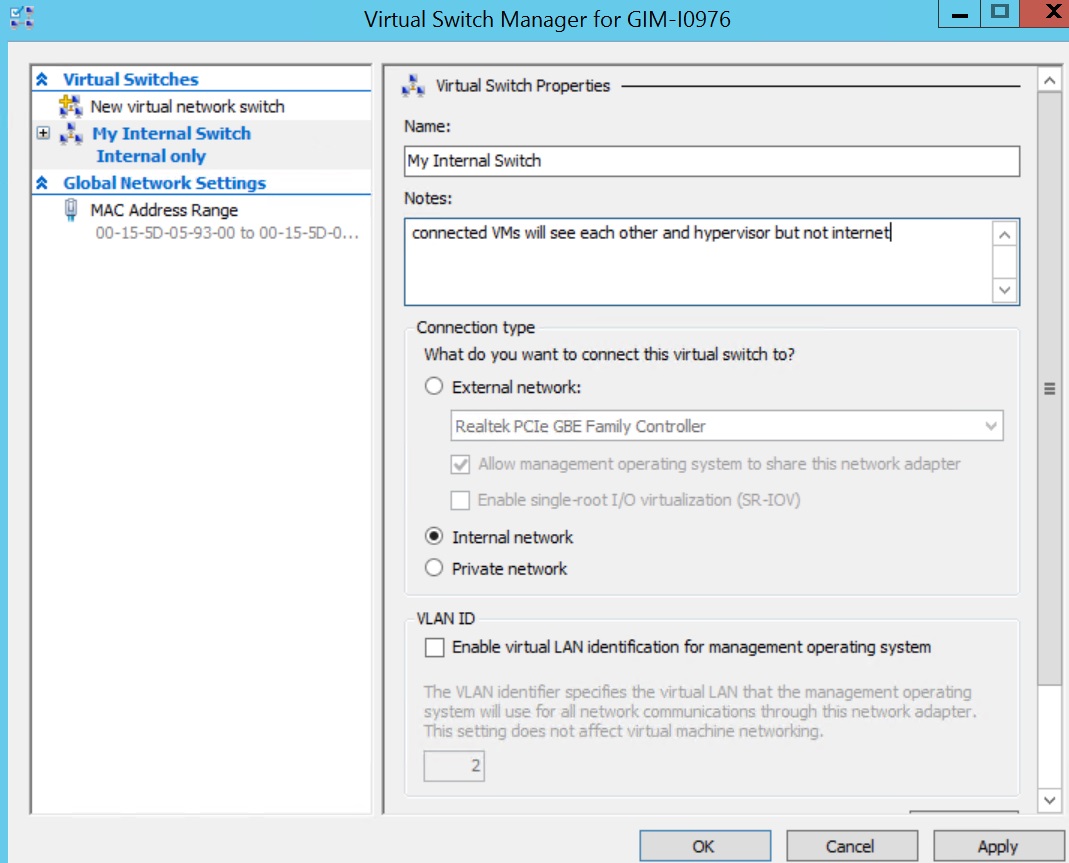
There is no pre-configuration of vSwitch during Hyper-V setup. If you attempt to create a VM right after the set-up process, you won’t be able to connect it to a network. To set up a network environment, you’ll need to select Virtual Switch Manager in the right pane of Hyper-V Manager.
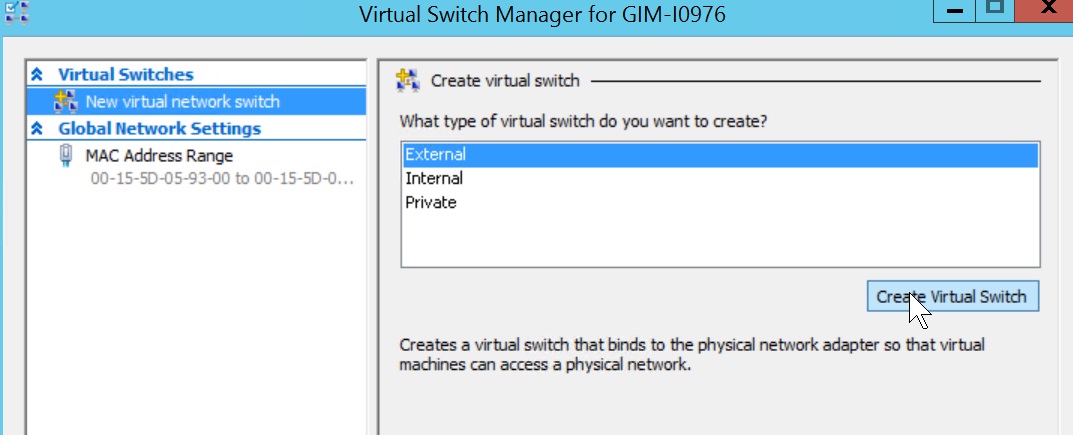
Virtual Switch Manager helps configure vSwitch and Global Network Settings, which simply lets you change the default MAC address range if you see any reason for that (Note: changing the MAC range won’t affect an existing virtual switch)
Creation of the virtual switch is just easy as following. There are three vSwitch types available:
- External vSwitch will link a physical NIC of the Hyper-V host with a virtual one and then give your VMs access outside of the host, meaning your physical network and internet (if your physical network is connected to internet).
- Internal vSwitch should be used for building an independent virtual network when you need to connect VMs to each other and to a hypervisor as well.
- Private vSwitch will create a virtual network where all connected VMs will see each other, but not the Hyper-V host. This will completely isolate the VMs in that sandbox.
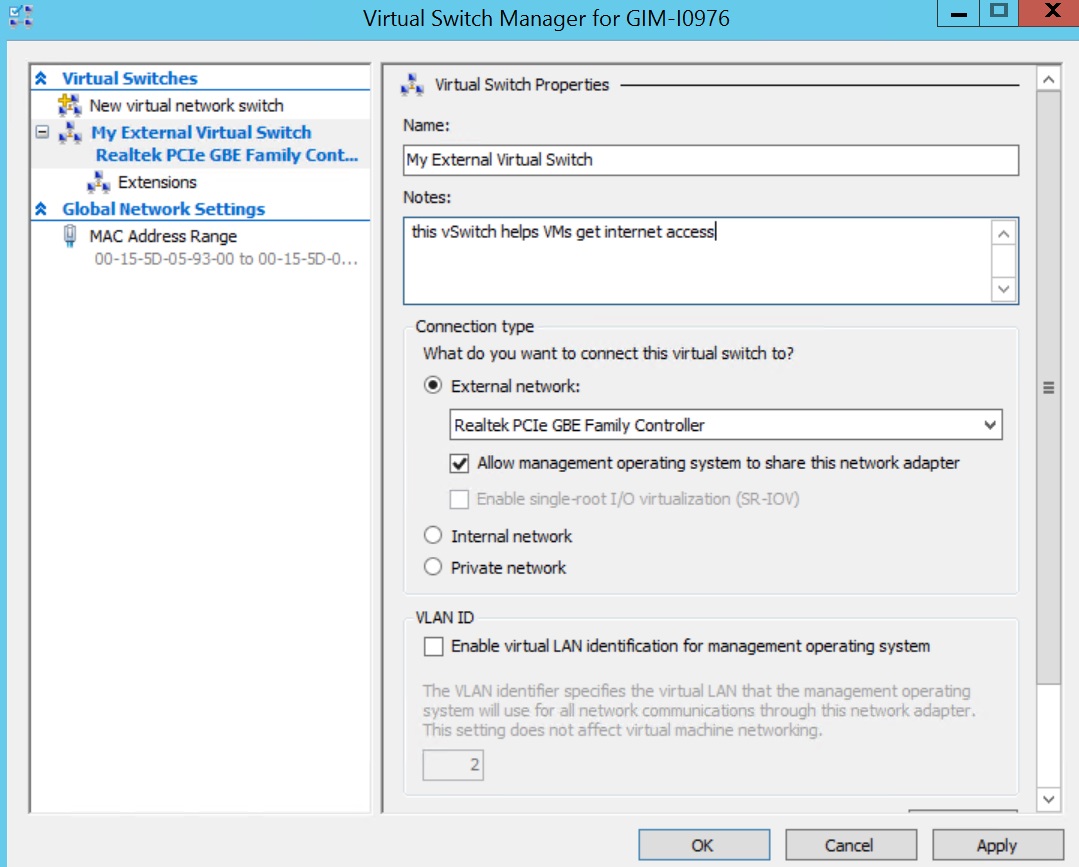
Creating an external vSwitch with Hyper-V Virtual Switch Manager
To create an external vSwitch, a creation wizard allows you to tune a few settings.
- You can select an appropriate physical NIC if you have a few of them for an external vSwitch.
- The Allow management OS to share this network adapter setting is enabled by default. Disabling this setting will leave your hypervisor OS without network connectivity. Be careful when creating vSwitch remotely, because it will completely drop a connection to a remote host.
- SR-IOV (Single Root I/O Virtualization) allows you to prepare such configuration that you can increase network throughput by bypassing a vSwitch and redirecting traffic directly to the VM. An overview of enabling SR-IOV can be found here. There are a few requirements to keep in mind such as BIOS compatibility, SLAT support by your CP and a SR-IOV PCIe network card in your system. Make sure you know what you’re doing in advance here.
NOTE: You won’t be able to enable SR-IOV to an existing vSwitch. - VLAN ID: This setting enables Virtual LAN (VLAN) for the management OS. The same is true for the physical environment; it allows you to segregate hypervisor traffic by providing separate broadcast domains within the same network.
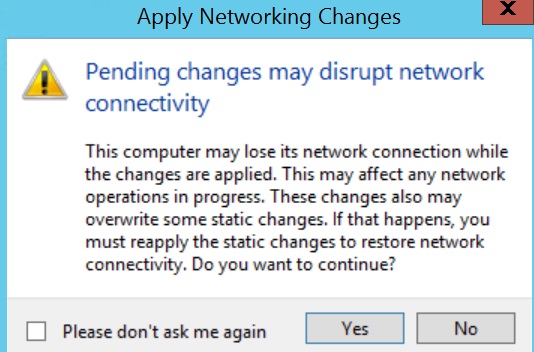
Once you click the Apply button, be prepared to lose physical connectivity for a moment while Hyper-V needs to turn the physical NIC off, configure the vSwitch and turn both on:
Creation of internal and private vSwitches will look the same, although some settings, such as network sharing and SR-IOV, will be greyed out due to the nature of these vSwitches.
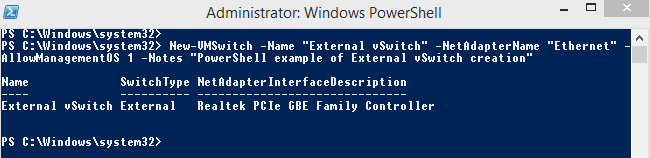
NOTE: Just like any other administrative operation in Windows 2012 R2, this can be automated by a PowerShell script. While the full syntax needs to be checked on TechNet, a few examples of PS scripts are below.
HINT: Don’t forget to run the PowerShell console with elevated permissions.
Following command to create an external vSwitch for “Ethernet” NIC:
New-VMSwitch -Name "External vSwitch" -NetAdapterName "Ethernet" -AllowManagementOS 1 -Notes "PowerShell example of External vSwitch creation"
Next command to create an internal vSwitch:
New-VMSwitch -Name "Internal vSwitch" -SwitchType "Internal" -Notes "PowerShell example of Internal vSwitch creation"
The type of vSwitch is defined by using “-SwitchType “Internal/Private” parameter or any of following for an external vSwitch “-NetAdapterName “name of the physical NIC” / -NetAdapterInterfaceDescription “description of a physical NIC””.
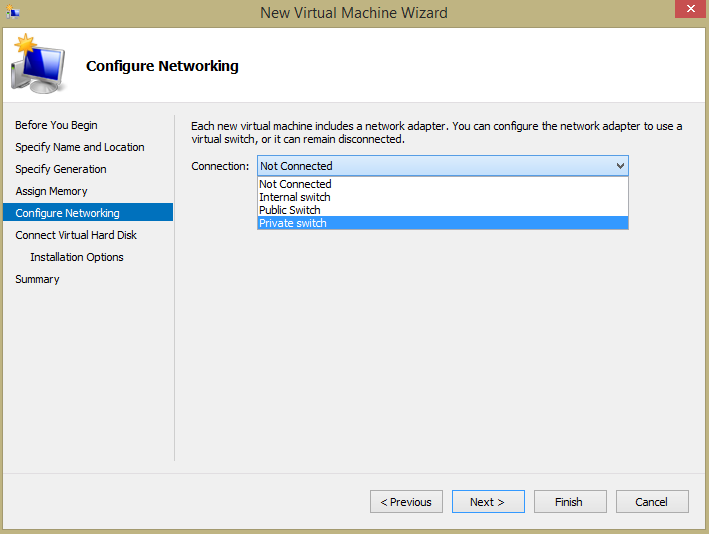
Once the vSwitches are created, you can use them while configuring your VM’s network connectivity.
HINT: Check which vSwitch of all your VM are connected to by using:
Get-VMNetworkAdapter -VMName *
VM network connectivity
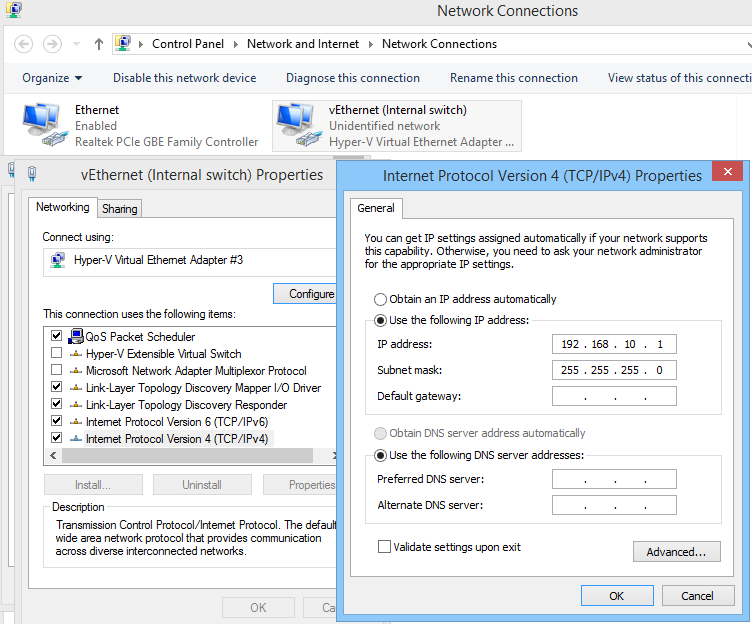
Be informed, that VM connected to an internal vSwitch or private vSwitch will get IP address automatically if only DHCP server is present at the same virtual network. If there is no DHCP server, perform some post-configuration for VMs connected to a private vSwitch:
- Go to hypervisor OS Network Connections and find the connection related to your internal vSwitch. Configure the static IP address and subnet mask manually:

Figure 7. Post-configuration of an internal switch - Turn on the VM and provide the VM NIC with an appropriate static IP from the same subnet to setup a network connection. Once you apply the right settings, you’ll be able to ping the hypervisor to check and see if everything has been set up correctly.

Figure 8. Checking network connectivity within an internal switch

To configure a private vSwitch, use static IPs for all VMs and place them on the same subnet.
That’s it, folks. I’ll be sharing some more useful Hyper-V-related material soon. Until then, tell me what your experience with Hyper-V Virtual Switching is? Any difficulties, tips or comments you’d like to share?