- Veeam Support Knowledge Base
- Enterprise Manager works with http, but not with https
Enterprise Manager works with HTTP, but not with HTTPS
| KB ID: | 1168 |
| Product: | Veeam Backup & Replication |
| Version: | All |
| Published: | 2011-08-22 |
| Last Modified: | 2024-12-03 |

Get weekly article updates
Cheers for trusting us with the spot in your mailbox!
Now you’re less likely to miss what’s been brewing in our knowledge base with this weekly digest

Oops! Something went wrong.
Please, try again later.
Challenge
This article covers two scenarios:
- The Veeam Backup Enterprise Manager webpage is not able to be reached when using both HTTP and HTTPS.
or - The Veeam Backup Enterprise Manager webpage is accessible when using HTTP, but fails to load when using HTTPS.
Solution
Enterprise Manager Webpage Is Inaccessible Using Both HTTP and HTTPS
Check the following on the Machine where the browser is running:
- Clear the browser's cache and cookies, or try accessing the Enterprise Manager page using the browser's Private/Incognito mode.
- Test if the machine can reach the Enterprise Manager web ports. The default ports are 9080 and 9443.
Check the following on the Enterprise Manager server itself
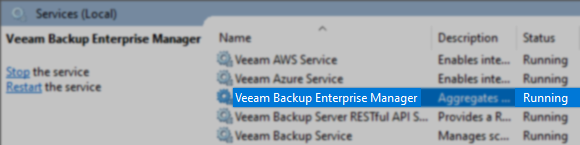
- Make sure that the Veeam Backup Enterprise Manager service is running.
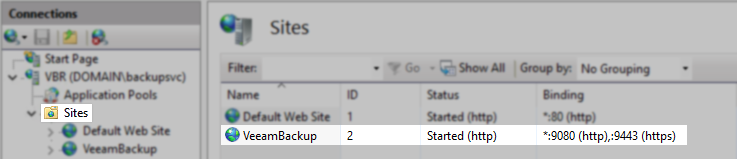
- Open Internet Information Services (IIS) Manager and make sure that the "VeeamBackup" site is in a started state.
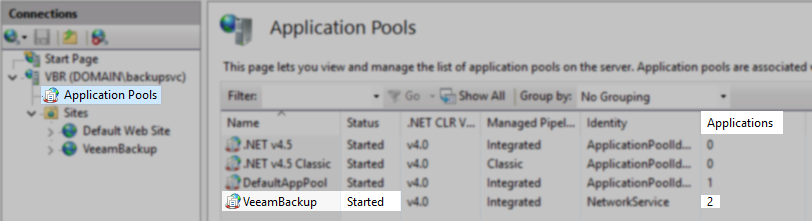
- In the Internet Information Services (IIS) Manager console under Application Pools, check that the VeeamBackup application pool exists and has at least one linked application.
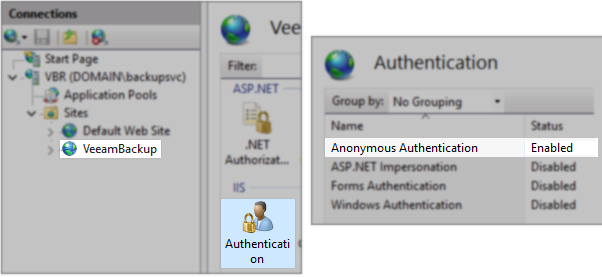
- Within Internet Information Services (IIS) Manager, make sure that Anonymous Authentication is enabled for the VeeamBackup site.
Enterprise Manager webpage is Accessible via HTTP, but not HTTPS
Part 1: Generate a New "Veeam Self-Signed Certificate" for Enterprise Manager
On the machine where Veeam Backup Enterprise Manager is installed, open an Administrative PowerShell Console and run the following PowerShell script:
#Generate Self-Signed Certificate
$params = @{
    DnsName = [System.Net.Dns]::GetHostByName("").HostName
    CertStoreLocation = "Cert:\LocalMachine\My"
    FriendlyName = "$(Get-Date -Format 'yyMMdd') Veeam Self-Signed Certificate"
    Subject = 'CN=' + [System.Net.Dns]::GetHostByName("").HostName
    KeyUsage = @("None")
    NotAfter = (Get-Date).AddYears(10)
}
$cert = New-SelfSignedCertificate @params

#Add the certificate to the Trusted Root Certification Authorities
$rootStore = New-Object System.Security.Cryptography.X509Certificates.X509Store('Root', 'LocalMachine')
$rootStore.Open('ReadWrite')
$rootStore.Add($cert)
$rootStore.Close()Part 2: Assigning the New Certificate to the Site
With a new certificate imported or generated using the steps above, perform the following steps to assign that certificate to the site within IIS Manager.
- Open Internet Information Service (IIS) Manager (InetMgr.exe).
- Expand the node for the server's name.
- Expand the Sites node.
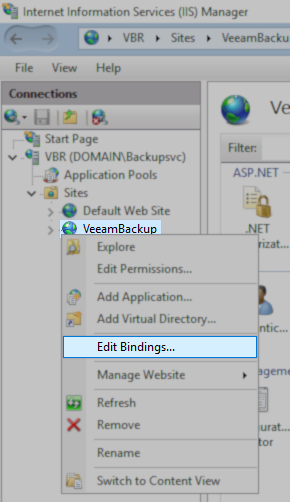
- Right-click on the entry 'VeeamBackup'.
- From the context menu, select Edit Bindings...
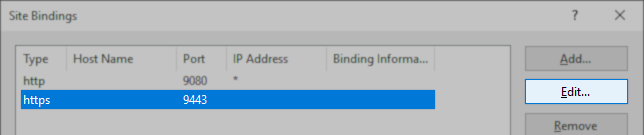
- In the Site Bindings window, double-click the https entry.
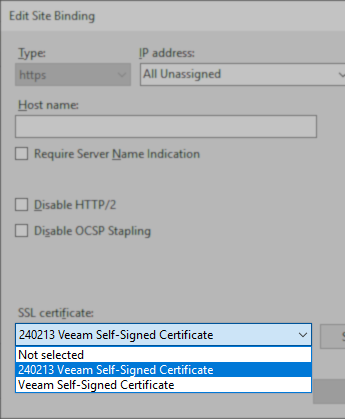
- Using the SSL certificate drop-down box, select the new certificate.
Note: The self-signed certificate generation scripts on this KB add a datestamp prefix to the new certificate's name for easy identification.
- After selecting the new SSL certificate, click OK to close the https site binding settings, then close the Site Bindings window with the close button.
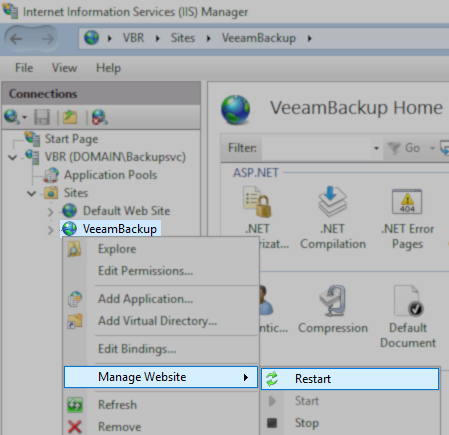
- Right-click the site, and from the Manage Website sub-menu, select Restart.
If this KB article did not resolve your issue or you need further assistance with Veeam software, please create a Veeam Support Case.
To submit feedback regarding this article, please click this link: Send Article Feedback
To report a typo on this page, highlight the typo with your mouse and press CTRL + Enter.
