- Veeam Support Knowledge Base
- Unable to Connect Veeam Service Provider Console to Veeam Cloud Connect Server Using a Local Account
Unable to Connect Veeam Service Provider Console to Veeam Cloud Connect Server Using a Local Account
| KB ID: | 2665 |
| Product: | Veeam Service Provider Console | 6.0 | 7.0 | 8.0 | 8.1 | 9 | 9.1 | 9.2 | 9.3 |
| Published: | 2018-06-12 |
| Last Modified: | 2025-02-13 |

Cheers for trusting us with the spot in your mailbox!
Now you’re less likely to miss what’s been brewing in our knowledge base with this weekly digest

Oops! Something went wrong.
Please, try again later.
Challenge
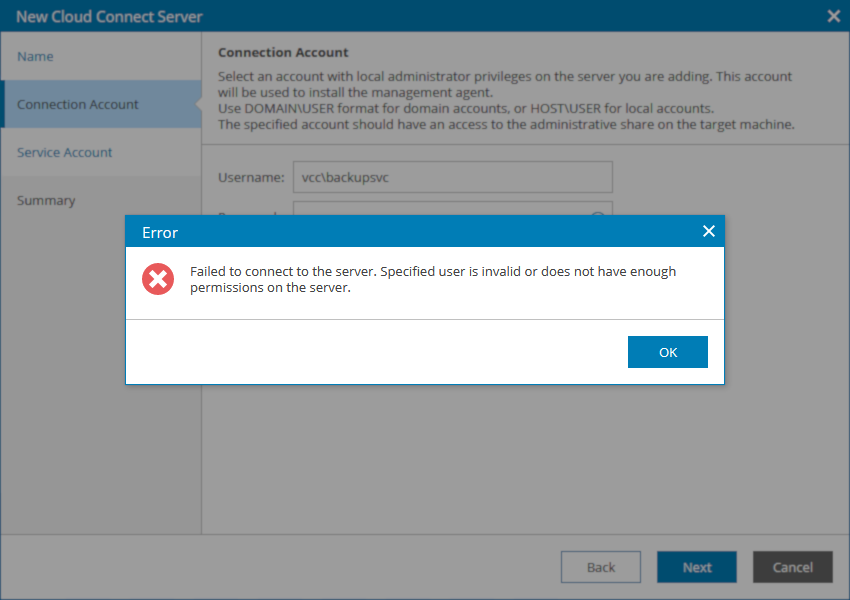
Failed to connect to the server. Specified user is invalid or does not have enough permissions on the server.
Cause
Solution
Use Valid Account
When Veeam Service Provider Console Web UI is provided credentials to connect to a Cloud Connect Server to deploy the Management Agent, the user account provided must comply with the UAC remote restrictions. The account must be either:
- A domain account that is a member of the Local Administrators group.
or
- The built-in local Administrator account.
Note: The built-in Administrator account may fail if the "User Account Control: Admin Approval Mode for the Built-in Administrator account" policy is enabled on the remote machine.
Local Account Workaround
If the Veeam Cloud Connect server you are trying to add is not joined to a domain, and you cannot use the Administrator account. The following method can be used to deploy the Management Agent manually and have it run as Local System.
For Veeam Service Provider Console 8.1 and higher
- Deploy Management Agents Manually on the Veeam Cloud Connect server you were attempting to add.
- The Veeam Cloud Connect server should now appear under Clients > Discovery.
- Navigate to the Agent Configuration folder:
C:\ProgramData\Veeam\Veeam Availability Console\Configuration\Agent\
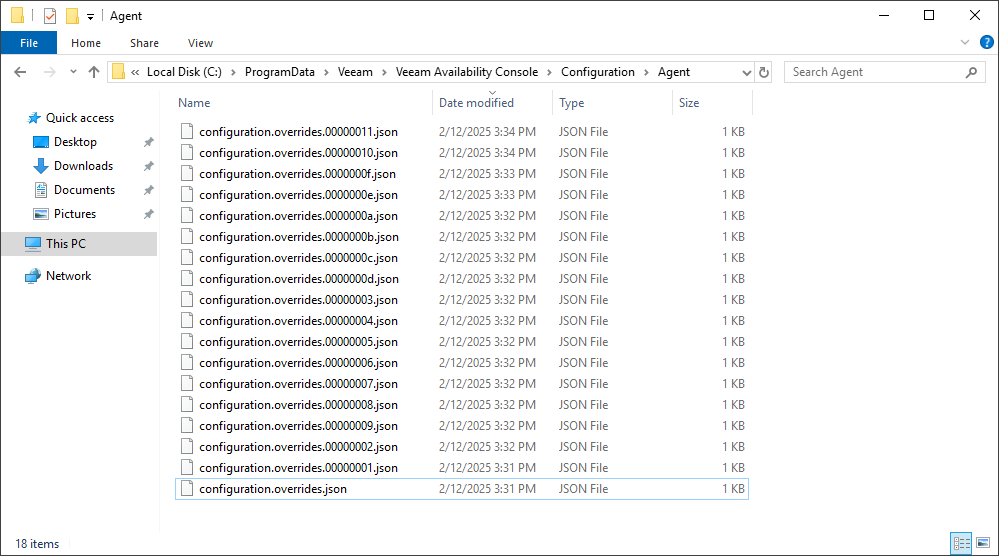
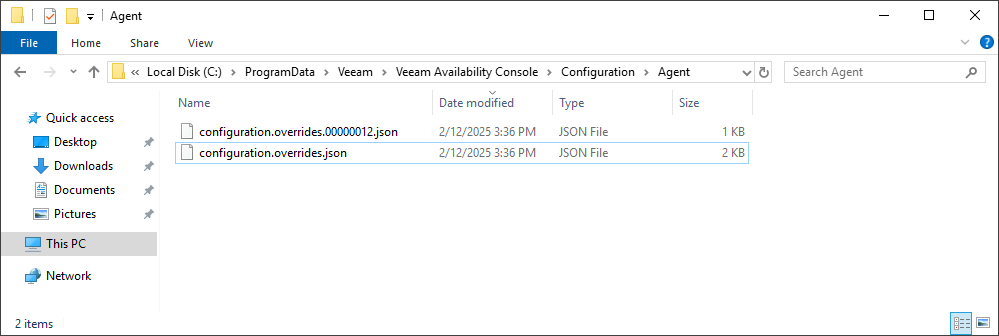
- Initially, there will be many (10+) .json files in the folder. Wait about 5 minutes* for all the
configuration.overrides.00000.jsonfiles to be automatically merged.
*The automatic merging of the configuration overrides json files occurs every 5 minutes. The waiting after manually deploying the management agent is to allow the configuration to stabilize and ensure that the value that needs to be adjusted will have been merged into the primaryconfiguration.overrides.jsonfile.
- Stop the Veeam Management Agent Service service.
- Open the
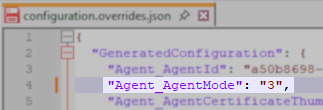
configuration.overrides.jsonfile. - Identify the line for
"Agent_AgentMode"and change the value from4to3.
- Start the Veeam Management Agent Service service.
- The Veeam Cloud Connect server will now appear under Configuration > Cloud Connect Server.
For Veeam Service Provider Console 8.0 and lower
- Deploy Management Agents Manually on the Veeam Cloud Connect server you were attempting to add.
- The Veeam Cloud Connect server should now appear under Clients > Discovery.
- Change the Management Agent mode as documented below so that it appears under Configuration > Cloud Connect Servers:
- Connect to the Veeam Cloud Connect server.
- Stop the Veeam Management Agent Service service.
- Set the Agent Mode to 3:
- Open Registry Editor, and navigate to: HKLM\SOFTWARE\Veeam\VAC\Agent
- Change AgentMode registry value to
3.
- Start the Veeam Management Agent Service service.
Get-Service VeeamManagementAgentSvc | Stop-Service
New-ItemProperty -Path 'HKLM:\SOFTWARE\Veeam\VAC\Agent\' -Name 'AgentMode' -Value 3 -PropertyType DWORD -Force
Get-Service VeeamManagementAgentSvc | Start-Service- The Veeam Cloud Connect server will now appear under Configuration > Cloud Connect Server.
More Information
If this KB article did not resolve your issue or you need further assistance with Veeam software, please create a Veeam Support Case.
To submit feedback regarding this article, please click this link: Send Article Feedback
To report a typo on this page, highlight the typo with your mouse and press CTRL + Enter.
