- Veeam Support Knowledge Base
- How to Migrate Tenant Replicas From a Standard Switch (vSS) to a Distributed Switch (vDS)
How to Migrate Tenant Replicas From a Standard Switch (vSS) to a Distributed Switch (vDS)
Purpose
This article documents how a Veeam Cloud Service Provider (VCSP or simply SP) would migrate their tenant(s)'s replica(s) from a virtual Standard Switch (vSS) to a virtual Distributed Switch (vDS).
Solution
Part 1: Update the Hardware Plan Configuration
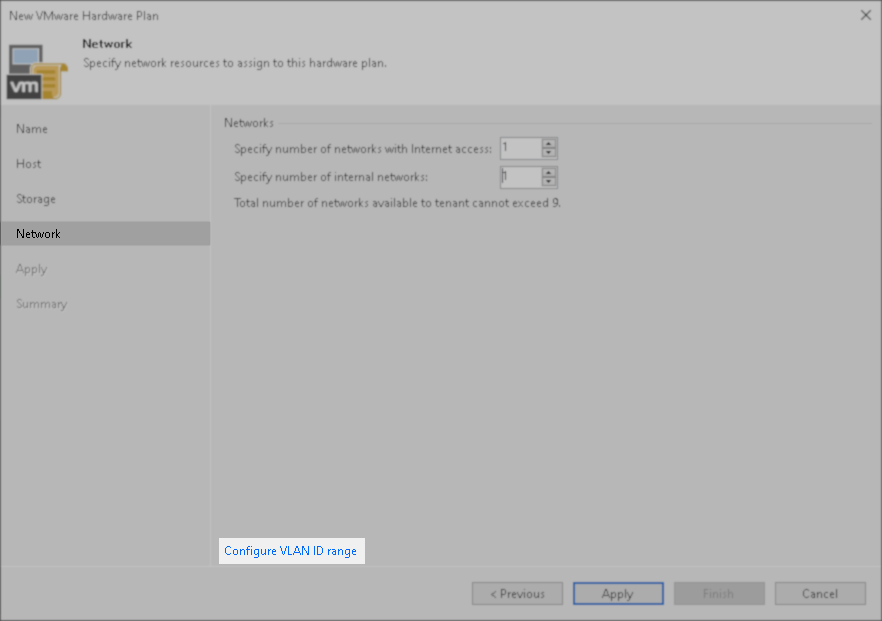
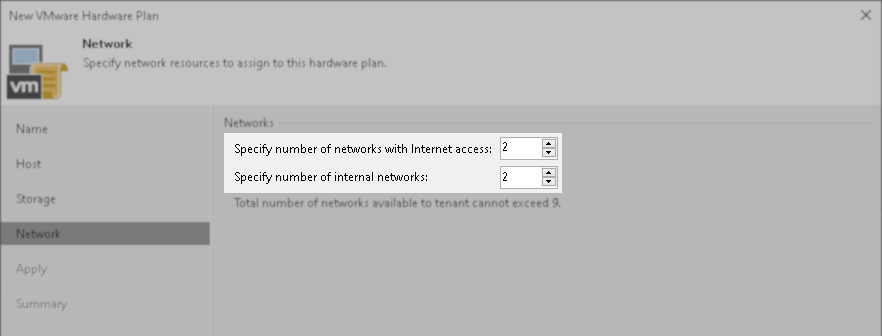
- Edit the Hardware Plan used by tenants that are being migrated to a vDS.
- On the Network step of the wizard, click the Configure VLAN ID range link.
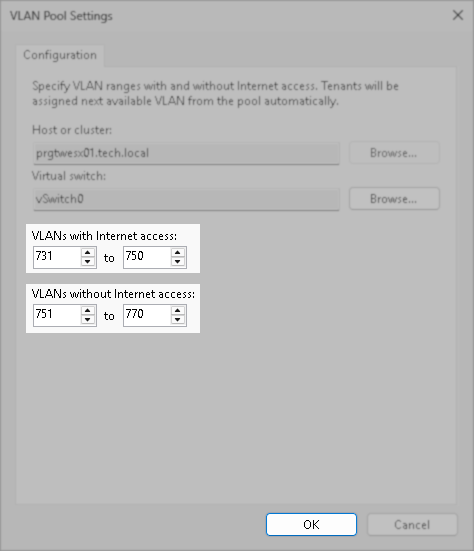
- In the VLANs Configuration window, select the current VLAN configuration and click Edit.
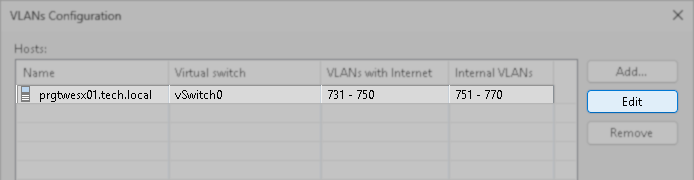
- Configure the ranges for "VLANs with Internet access" and "VLANs without Internet access" so that only pre-allocated networks remain, then click OK.
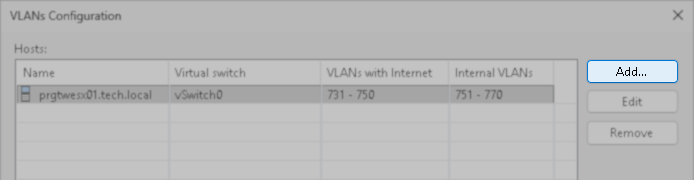
- In the VLANs Configuration window, click Add and configure a new VLAN entry for the virtual Distributed Switch (vDS).
- After the VLAN Configuration section is updated, go back ot the Network step of the wizard, and increase the number of networks on the Network configuration tab. The values should be increased to match the total number of networks.
- Apply the configuration settings.
For each tenant using this hardware plan, the new vDS networks will appear on the host.
Part 2: Reconfigure Tenant Replicas on SP-Side
- Update each tenant replica that will be migrated to change the network adapter manually to the vDS VLAN.
There are two ways to accomplish this:- In vSphere Web Client, right-click on the old VLAN and select the option: Migrate VMs to Another Net…
or - In vSphere Web Client, edit the Network adapter settings for each VM.
- In vSphere Web Client, right-click on the old VLAN and select the option: Migrate VMs to Another Net…
Part 3: Update Tenant(s) Replication Jobs
- Coordinate with Tenants to have them remap networks for their replication jobs.
There are two ways they can accomplish this:- Change replication jobs settings:
- Edit replication job.
- On the Name step, enable the select option: Network remapping
- On the Network step, Add a network mapping to switch jobs to the new network.
or - In the tenant's Veeam Backup & Replication Console, under the Backup Infrastructure > Service Providers section, right-click on the service provider entry and select the option "Manage default gateways" to remap Windows VMs.
- Change replication jobs settings:
If this KB article did not resolve your issue or you need further assistance with Veeam software, please create a Veeam Support Case.
To submit feedback regarding this article, please click this link: Send Article Feedback
To report a typo on this page, highlight the typo with your mouse and press CTRL + Enter.
Spelling error in text
Thank you!
Your feedback has been received and will be reviewed.
Oops! Something went wrong.
Please, try again later.
You have selected too large block!
Please try select less.
KB Feedback/Suggestion
This form is only for KB Feedback/Suggestions, if you need help with the software open a support case
Verify your email to continue your product download
We've sent a verification code to:
An email with a verification code was just sent to
Didn't receive the code? Click to resend in sec
Didn't receive the code? Click to resend
Start using Veeam:
Download the product
&
Activate the license key
Thank you!
Your feedback has been received and will be reviewed.
![]()
Oops! Something went wrong.
Please, try again later.