After Adding the Veeam ONE Server to a Domain, the Reports List Is Empty
| KB ID: | 4310 |
| Product: | Veeam ONE |
| Published: | 2022-05-03 |
| Last Modified: | 2025-03-28 |
Get weekly article updates
Challenge
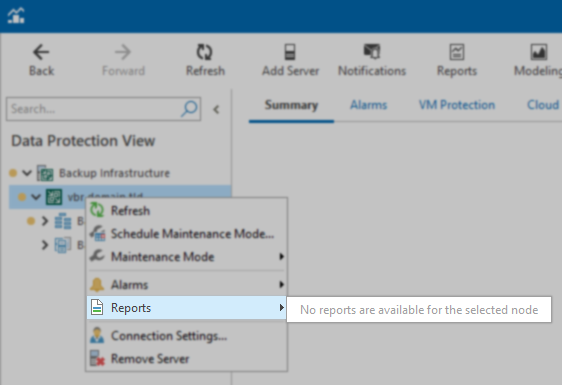
This article documents a scenario where the Veeam ONE software was initially installed on a Windows machine that was not joined to a Domain. Then after Veeam ONE is installed, that Windows machine is joined to a Domain. When this specific scenario occurs, the Reports menu will display a message stating that:

Cause
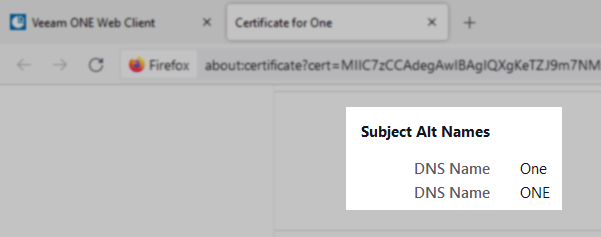
This issue occurs because the initial self-signed certificate was generated for what the DNS name was before joining the domain and does not now match the new FQDN.
Solution
Repair Reports list in the Veeam ONE Client
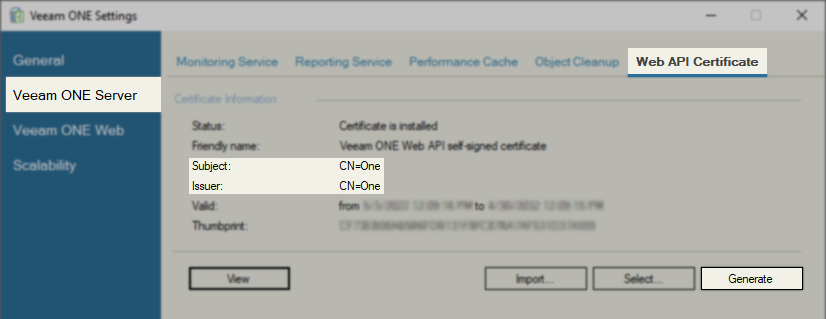
- Launch the Veeam ONE Settings Utility
- Within the Veeam ONE Setting Utility, click the Veeam ONE Server tab on the left. Then, click the Web API Certificate tab along the top.
- On the Web API Certificate tab, click Generate and follow the steps to generate a new certificate.
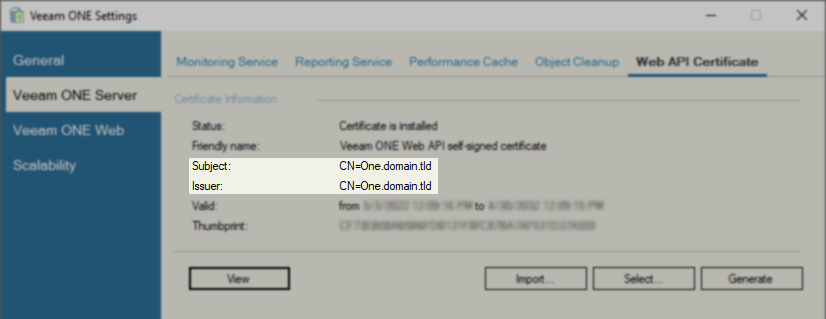
- After a new Certificate has been generated, note that the Subject and Issuer lines now list the FQDN.
Repair Veeam ONE Web Client Certificate:
- Connect to the machine where the Veeam ONE Web Service component is installed.
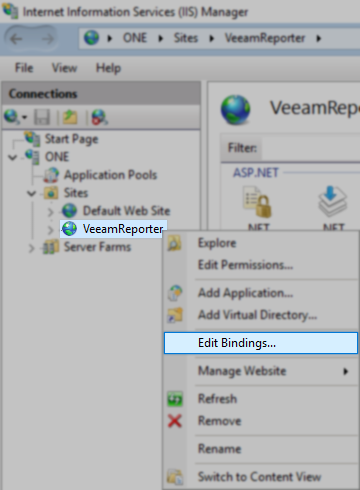
- Open the Internet Information Services (IIS) Manager, expand the localhost node, then expand Sites.
- Right-click on VeeamReporter site entry and select Edit Bindings...
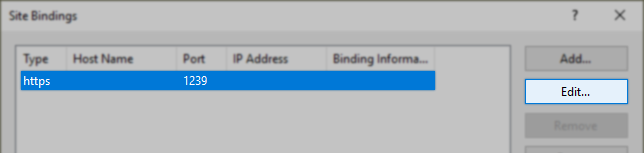
- In the Site Bindings window, select the existing binding and click Edit.
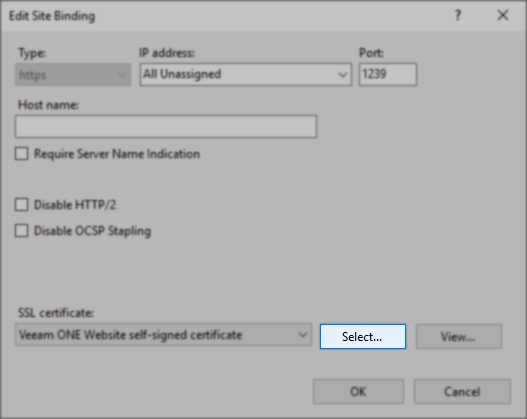
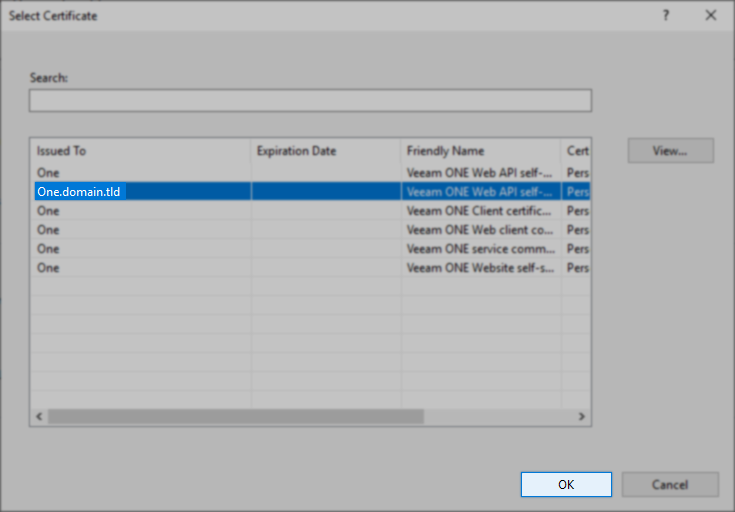
- On the Edit Site Binding screen, click Select and select the recently generated SSL Certificate with the FQDN, and click OK.
- In the Site Bindings window, click Close.
- Restart the Veeam ONE services.
More information
If you face any difficulties related to this issue, create a Veeam Support case.
If this KB article did not resolve your issue or you need further assistance with Veeam software, please create a Veeam Support Case.
To submit feedback regarding this article, please click this link: Send Article Feedback
To report a typo on this page, highlight the typo with your mouse and press CTRL + Enter.
Spelling error in text
KB Feedback/Suggestion
This form is only for KB Feedback/Suggestions, if you need help with the software open a support case