How to Configure HTTP Proxy for Linux-based Veeam Components
| KB ID: | 4807 |
| Product: | Veeam Backup & Replication | 13 |
| Published: | 2025-12-15 |
| Last Modified: | 2026-07-14 |
Purpose
This article documents how to configure HTTP and HTTPS Proxy settings for Linux-based components, including the Veeam Software Appliance and JeOS-deployed Veeam Infrastructure Appliances, in environments that require a proxy to access the internet.
Note: For proxy configuration settings for Windows-based components, please review KB4875.
Solution
For Veeam Software Appliance and Veeam Infrastructure Appliances built with JeOS
This procedure is documented in the user guide:
User Guide > Configuring Veeam Appliances > Configuring Network Settings > Configuring HTTP/HTTPS Proxies
Note: The HTTP proxy settings on the Veeam Software Appliance are not propagated to the Veeam Infrastructure Appliances. Each appliance must be configured individually.
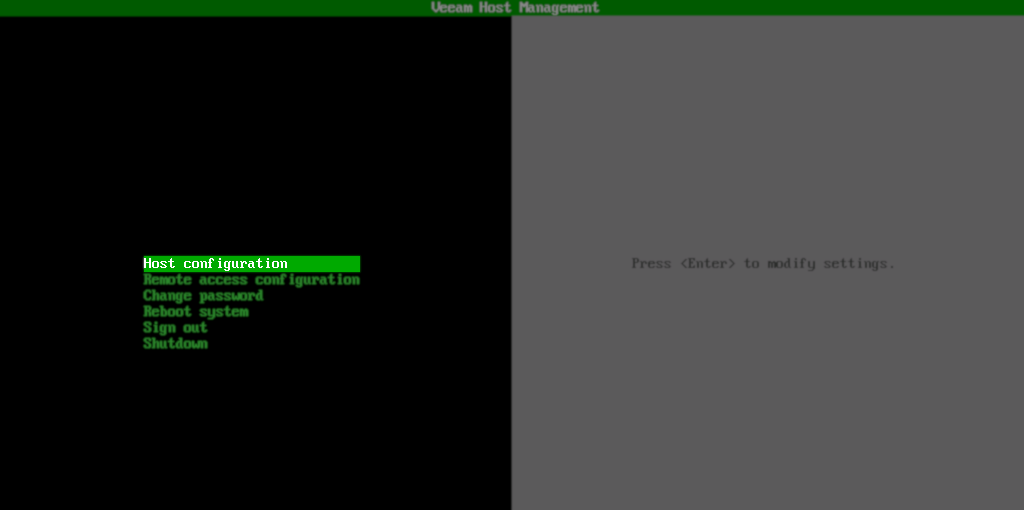
- Log in to the TUI (Terminal UI).
- In the main menu, select Host Configuration.
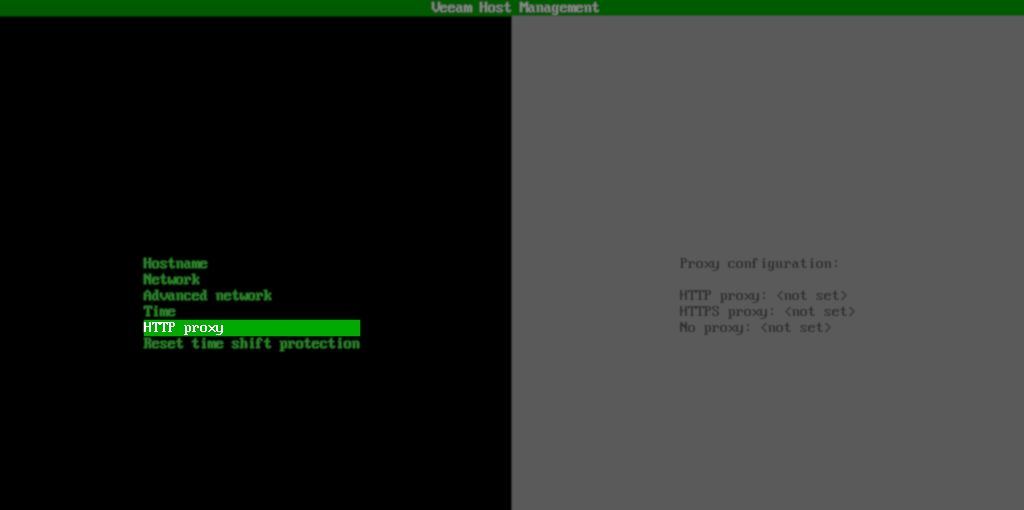
- In the next menu, select HTTP proxy.
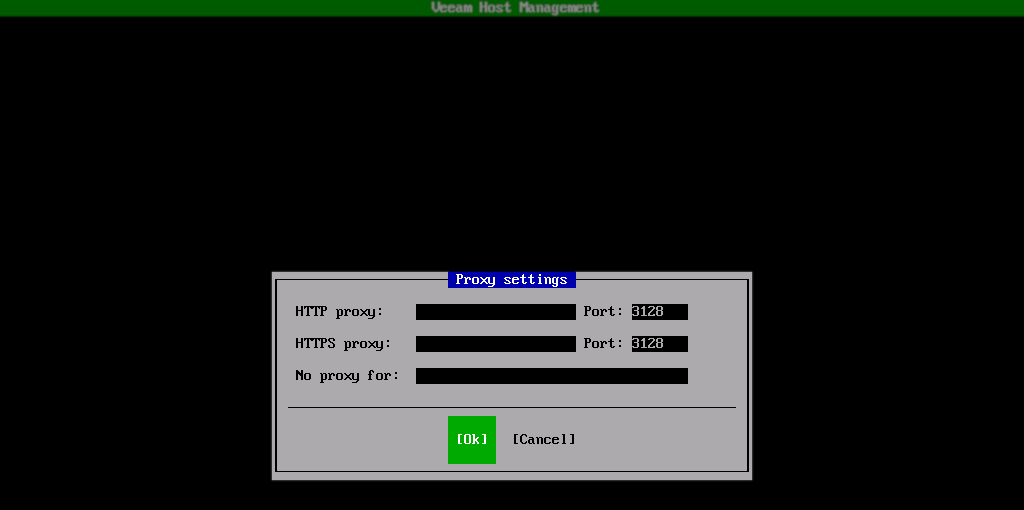
- In the Proxy settings dialog box that appears, specify the proxy settings, then click OK and press Enter.
For User-Built Linux-based Veeam Component Machines
- The Veeam packages deployed on Linux utilize the file
/etc/veeam-environmentfor their HTTP and HTTPS proxy settings, instead of the OS-default file,/etc/environment. When using a JeOS-deployed Veeam Infrastructure Appliance, the TUI manages the configuration file, as shown here:

- For Linux machines not deployed using the JeOS appliance ISO, the
/etc/veeam-environmentfile must be manually created and configured. - Optionally, if the
/etc/environmentfile has already been set, and you want Veeam to use the same proxy settings as the OS, you can choose to create a symlink instead (sudo ln -s /etc/environment /etc/veeam-environment).
If this KB article did not resolve your issue or you need further assistance with Veeam software, please create a Veeam Support Case.
To submit feedback regarding this article, please click this link: Send Article Feedback
To report a typo on this page, highlight the typo with your mouse and press CTRL + Enter.
Spelling error in text
KB Feedback/Suggestion
This form is only for KB Feedback/Suggestions, if you need help with the software open a support case