- Veeam Support Knowledge Base
- How to Attach Files to a Veeam Support Case
How to Attach Files to a Veeam Support Case
| KB ID: | 4162 |
| Published: | 2021-05-12 |
| Last Modified: | 2026-02-17 |
| Languages: | JP |
Cheers for trusting us with the spot in your mailbox!
Now you’re less likely to miss what’s been brewing in our knowledge base with this weekly digest
![]()
Oops! Something went wrong.
Please, try again later.
Purpose
Methods
Below are the two methods (portal or SFTP) used to attach files to a support case.
Expand a section to learn more.
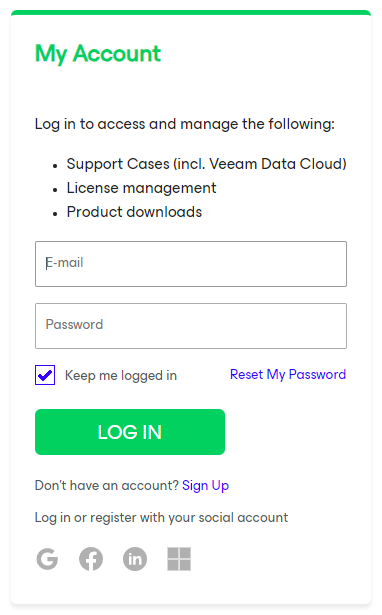
Attach files to the Support case via the My Account portal.
- Sign In to the My Account portal.
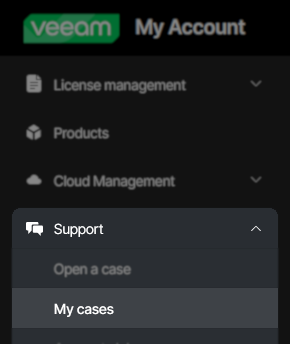
- Expand the Support section
- Click My Cases
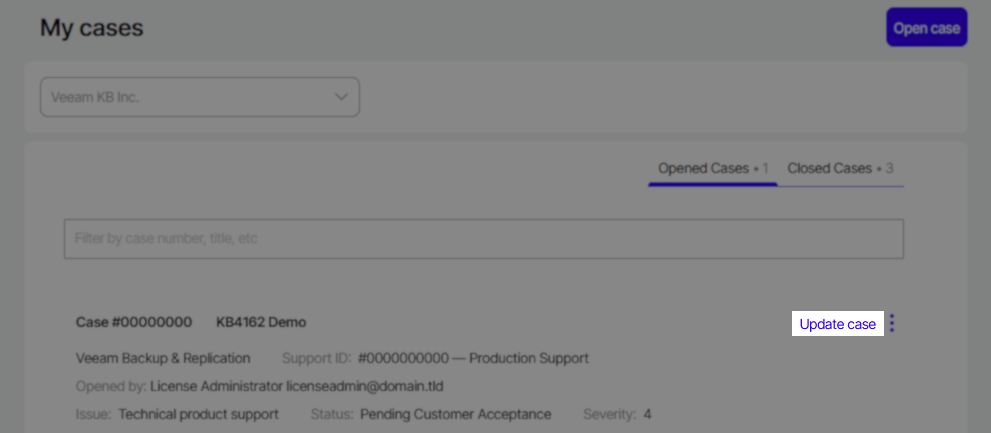
- Locate the Support Case you are adding logs to and click Update case
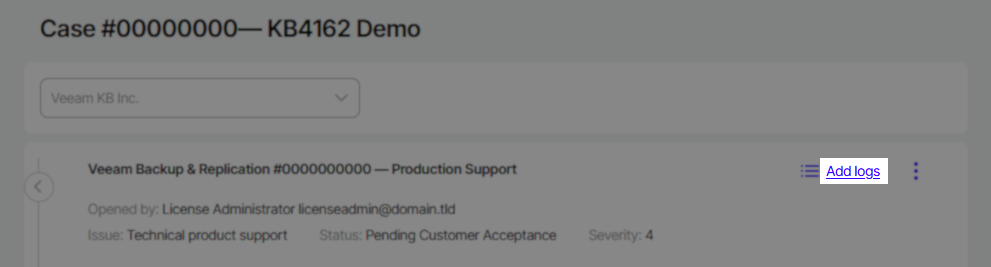
- On the Case Summary page click Add logs
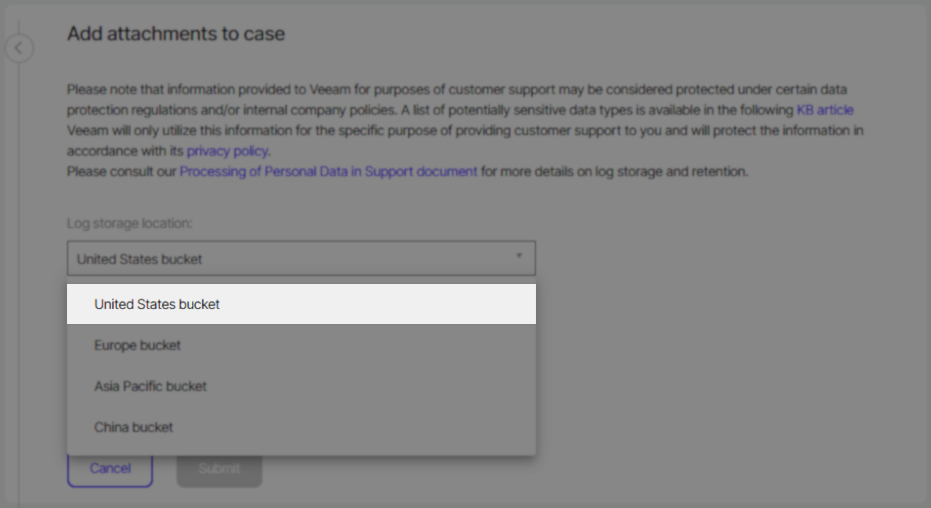
- On the "Add attachments to case" page, ensure the correct Log storage location is selected using the drop-down box. Select the bucket location nearest to you.
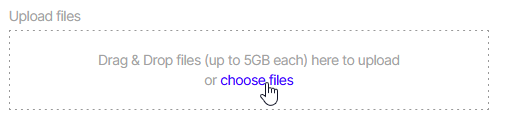
- Drag & Drop files into the "Upload files" box or click the choose files link to open a file selector.
Note: There is a maximum individual file size limit of 5GB. If you need to upload a file larger than 5GB either (a) use SFTP method described in the other attachment option section of this page or (b) split the single file as described here.
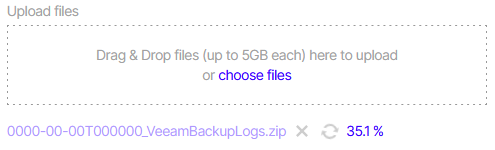
- After you have selected a file to be uploaded a completion percentage will be shown as the file uploads.
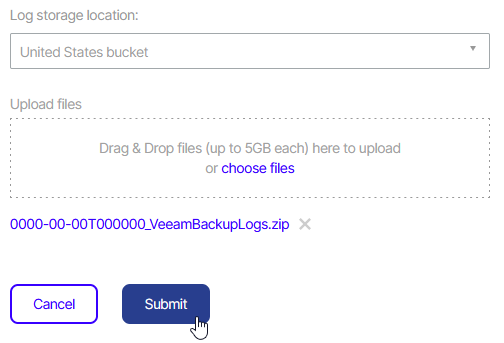
- Once the upload has been completed, the Submit button will change from grey to green, indicating that you are ready to proceed. Click Submit to attach the file to the case.
Attach files to the Support case via SFTP using WinSCP
The instructions below assume you have already generated an SFTP account for your case. If you have not done so or need to find the SFTP login details, please review KB1661.
Note: U.S. federal customers are restricted from using the SFTP option due to data-handling policies.
If you upload logs via SFTP, remember to send an email on the case to notify the Support staff that you have uploaded a file.
More information regarding WinSCP usage can be found here: https://winscp.net/eng/docs/guide_connect.
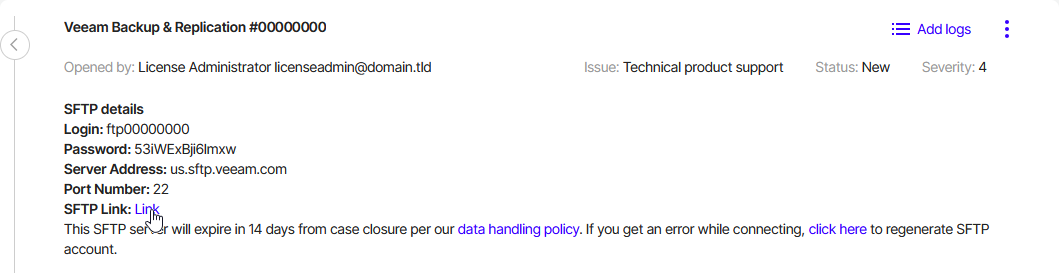
- Locate the SFTP link for your case by clicking Update Case in the My Cases view.

- If you have WinSCP installed and it is set as the default application for handling SFTP protocol, simply click on the link, and your browser will open WinSCP and connect. (If this works, skip to step 5, if not, go to the next step.)

- If WinSCP is not associated with the SFTP protcol you will need to right-click on the SFTP Link and copy it to the clipboard.
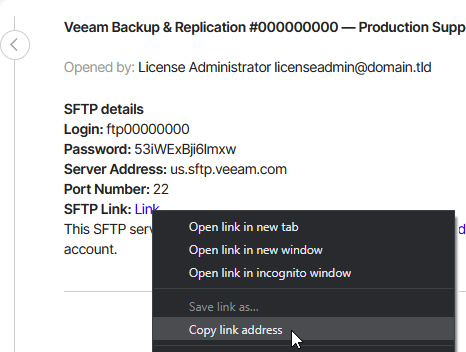
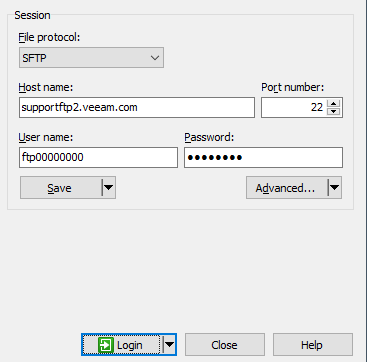
- Open WinSCP and paste the SFTP information into the "Host name:" field in the WinSCP Login screen. It will auto-populate the necessary fields.
- Click Login
- Once connected, upload files you would like to attach to the case.
Note: If there is a folder named "Upload", place files inside that folder.
Veeam's SFTP servers block the SETSTAT command, which WinSCP sends after a file has been successfully uploaded. WinSCP will display a warning message stating:
The server does not support the operation.
Error code: 8
Error message from server (US-ASCII): SETSTAT unsupported
It is safe to skip the warning about failing to set the timestamp. WinSCP will only attempt to set the timestamp of a file after it has been successfully uploaded. Preserve timestamp for uploaded files is a default setting within WinSCP.
Attach files to the Support case via SFTP using CLI
The instructions below assume you have already generated an SFTP account for your case. If you have not done so or need to find the SFTP login details, please review KB1661.
Note: U.S. federal customers are restricted from using the SFTP option due to data-handling policies.
If you upload logs via SFTP, remember to send an email on the case to notify the Support staff that you have uploaded a file.
- Locate the SFTP link for your case by clicking Update Case in the My Cases view.
- Right-click on the SFTP Link and copy it to the clipboard.

- Paste the SFTP link with username and password embedded into the text editor of your preference.
The SFTP link will be formatted as:sftp://ftp00000000:p455w0rd@us.sftp.veeam.com - Reformat the text to remove the
:passwordso that it is onlyusername@sftpserver - Open an Administrative Command Prompt and enter the command:
sftp username@sftpserver
- If prompted to trust the RSA key fingerprint of the sftpserver, enter yes, and hit enter.
Note: The letters you type will not appear in the CLI. - When prompted, paste the password and hit enter.
- Once connected, the prompt will change to show
sftp>
- Use the
putcommand and the full path to the file that needs to be uploaded.

More Information
Log Upload Location Option
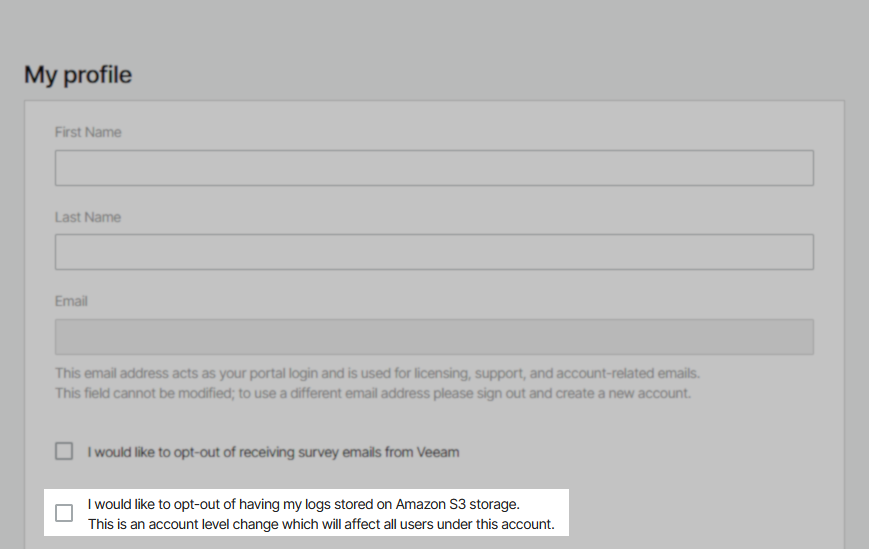
All files uploaded via SFTP are stored in secure AWS S3 storage by default. You may opt-out of storing files on AWS S3, by doing so you opt-out your entire company. Opting out will cause all users in your company to be restricted to only using SFTP to upload logs to SFTP servers hosted by Veeam Software.
The opt-out option can be found in your My Portal profile details page.
To opt back in to using AWS S3 for storing uploaded files, simply uncheck the box.
Related Articles
- Veeam Account Sign In FAQ
- How to Create a Veeam Account
- Veeam My Account Portal - MFA Guide
- My Account Portal "Recovery email for case contact" Guide
- My Account Portal - Role Management FAQ
- How to Create a Veeam Support Case
- My Account Portal: "No licenses can be found for your account"
- How to Attach Files to a Veeam Support Case
- How to Attach a File Larger Than 5GB to a Support Case
- How to Generate an SFTP Account for a Support Case
- How to Contact Veeam Support Management
- Support Partners Case Management
If this KB article did not resolve your issue or you need further assistance with Veeam software, please create a Veeam Support Case.
To submit feedback regarding this article, please click this link: Send Article Feedback
To report a typo on this page, highlight the typo with your mouse and press CTRL + Enter.
Spelling error in text
Thank you!
Your feedback has been received and will be reviewed.
Oops! Something went wrong.
Please, try again later.
You have selected too large block!
Please try select less.
KB Feedback/Suggestion
This form is only for KB Feedback/Suggestions, if you need help with the software open a support case
Thank you!
Your feedback has been received and will be reviewed.
![]()
Oops! Something went wrong.
Please, try again later.